First Time Log-In
How you sign in for the first time depends on how your organization set up GovEagle. If you are not sure which applies to you, go to https://app.goveagle.com, enter your work email, and click Next: if you are sent to your company's own sign-in page, your organization uses Single Sign-On.
If your organization uses Single Sign-On (SSO)
You do not need to create a GovEagle password. You will receive an email titled Your GovEagle account is ready with a Login with SSO button, but you can also sign in directly:
Navigate to https://app.goveagle.com
Enter your work email and click Next
You will be sent to your company's sign-in page. Sign in the way you normally do, including any MFA prompt.
You should then see the GovEagle Dashboard!
Note
If you are returned to GovEagle with an Access Denied message after signing in at your company's page, your IT team has not yet assigned you to the GovEagle application in your identity provider. Ask your GovEagle admin or IT team to add you.
If your organization does not use SSO
Open the activation email from GovEagle (sent via Okta, titled Welcome to Okta!) and click Activate Okta Account
Create your password. It must be at least 15 characters and include an uppercase letter, a lowercase letter, a number, and a symbol.
You should then see the GovEagle Dashboard!
Note
Activation links expire and can only be used once. If yours no longer works, ask your GovEagle admin to resend your activation email. From then on, sign in at https://app.goveagle.com with your work email and password.
If you see “You don’t have a GovEagle license yet”
Your account is set up, but your organization has not assigned you a license, so opportunities, the content library, AI chat, and the Office add-ins are not available to you yet. The page lists the people in your organization who can assign one; email any of them. Once a license is assigned, refresh the page and everything unlocks, including anything already shared with you. See Understanding Licenses.
Set up GovEagle Add-Ins for MS Word, Excel, and PowerPoint
Prerequisite
Make sure your IT department has completed the steps in Deploying Microsoft Office Add-Ins and added you as a User before trying to add the add-ons in your Microsoft Word, Excel, and Powerpoint environment. If you use a firewall, be sure to follow the instructions in Whitelisting Domains for GovEagle Applications.
To enable GovEagle's in-document authoring environment for AI-assisted content development, we have created an Add-In for MS Word, Excel, and PowerPoint. Our Add-In extends GovEagle's capabilities directly into these applications. The screenshots below use Word, but the process is identical for Excel and PowerPoint.
Open a blank document in Microsoft Word, Excel, or Powerpoint.
From the toolbar, click “Add-Ins”

You should see “GovEagle AI” as an Add-in option. If you do, click on it and log in.
.png)
If you do not see it, click “More Add-Ins”
.png)
In the pop-up window, click “Admin Managed”
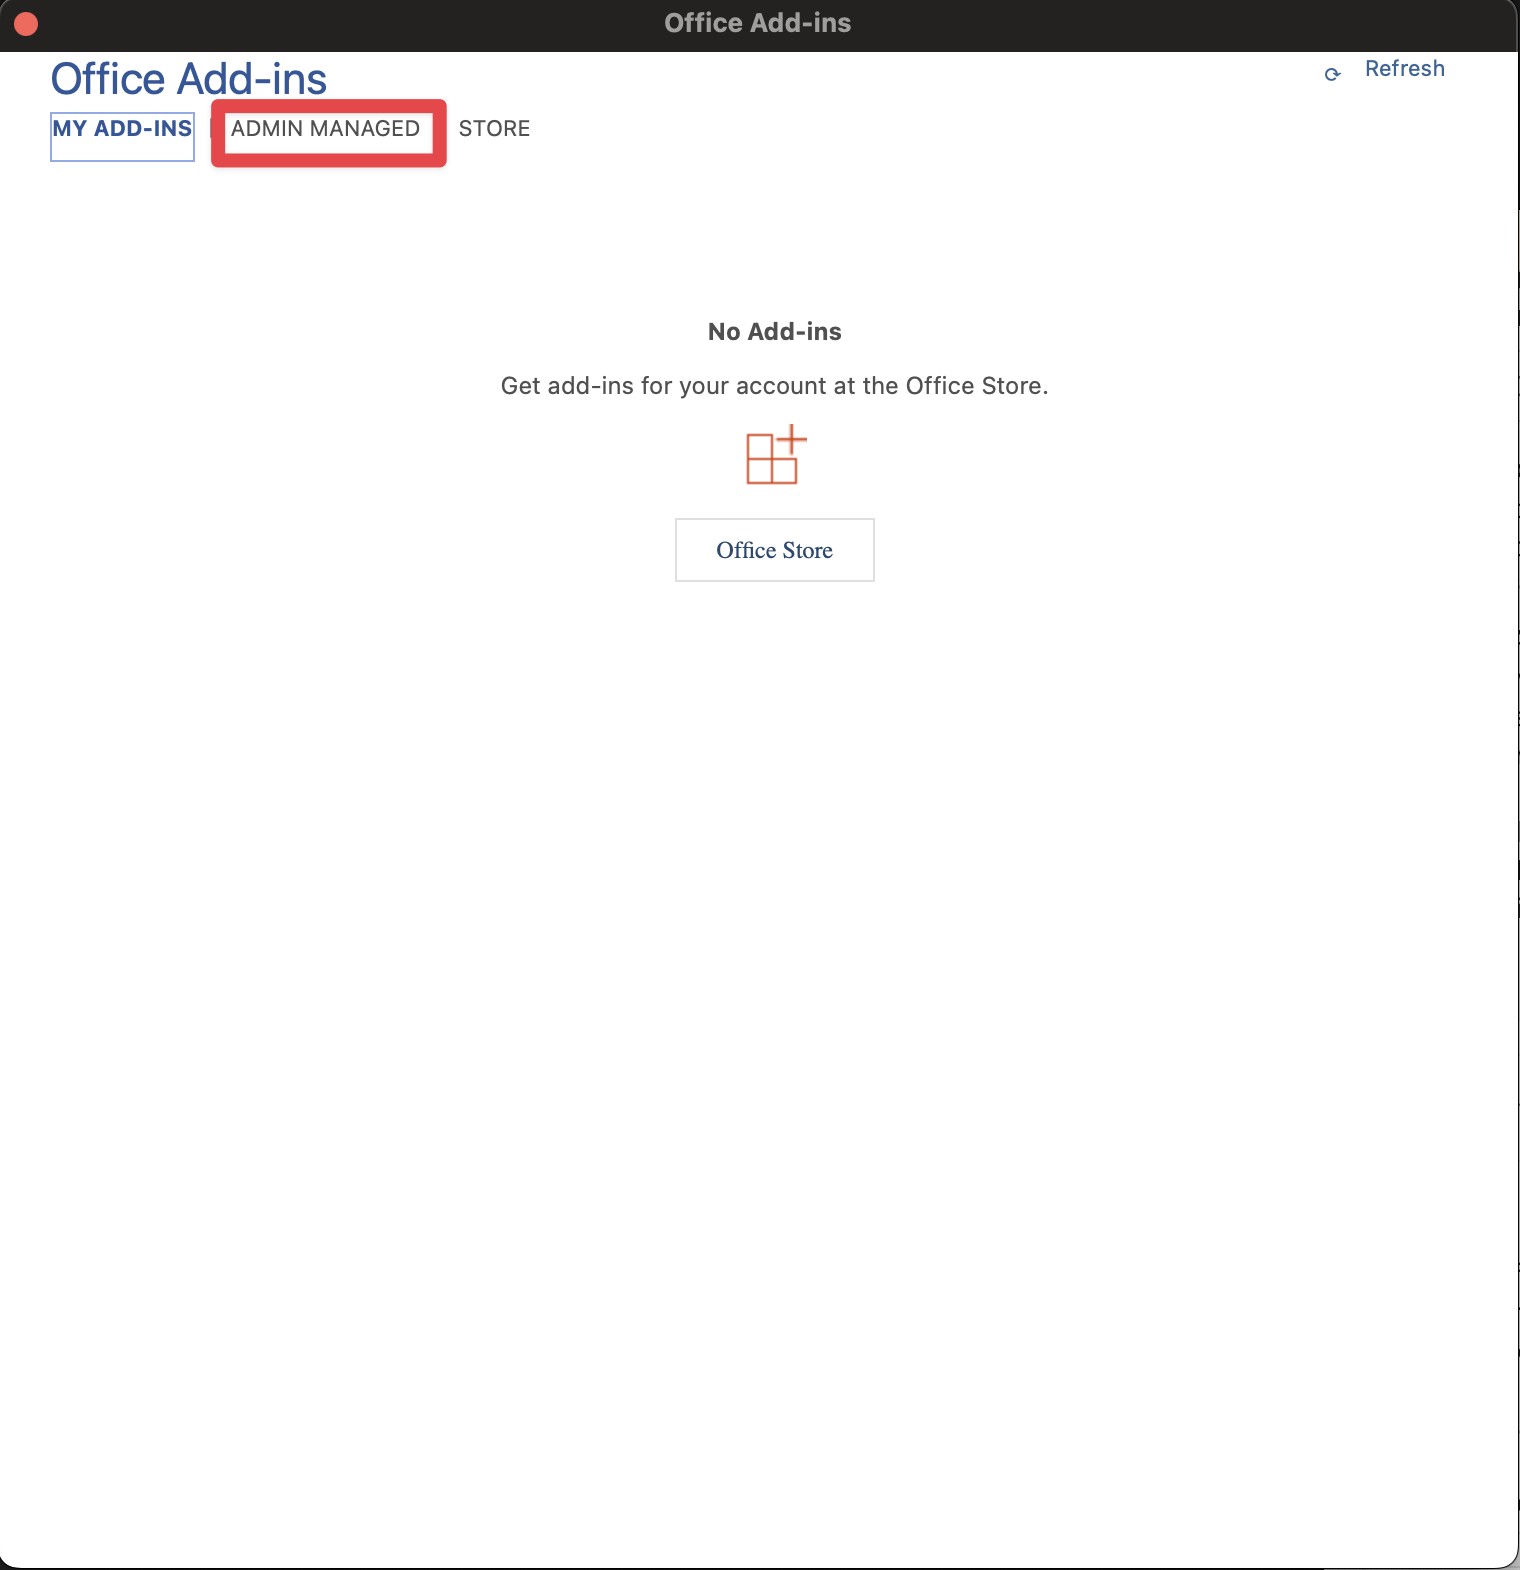
Click “Refresh” on the top-right
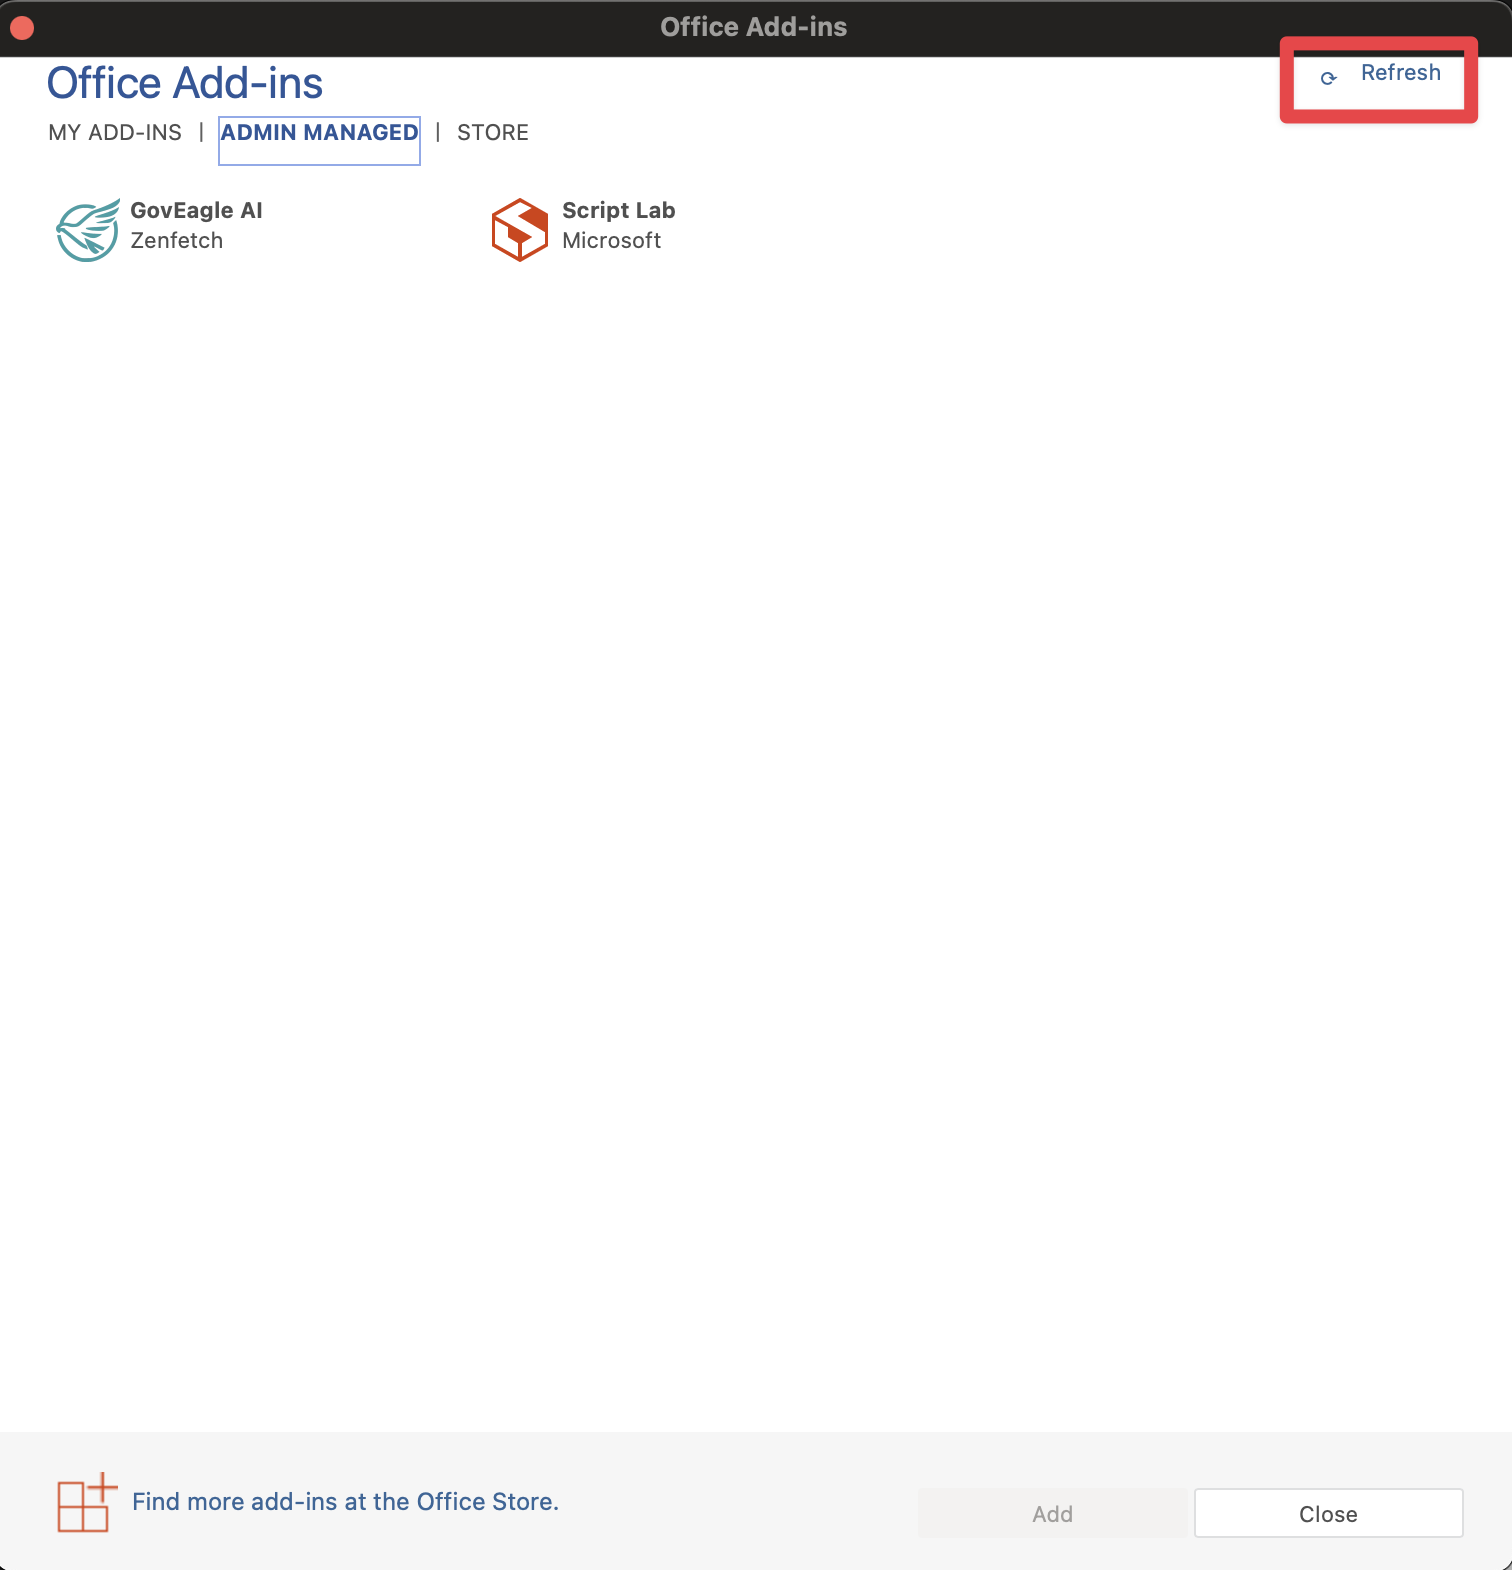
You should see GovEagle AI
Click “Add” at the bottom right
You should now see Open GovEagle AI in your toolbar
Troubleshooting
If you don't see GovEagle AI under "Admin Managed" after refreshing:
First, verify that you are logged into the correct Microsoft Office account in Word/Excel/PowerPoint. Check your account by clicking on your profile icon in the top corner of the application.

Sign out in Microsoft Word
If you need to switch accounts, sign out and sign back in with your work account.
Try searching for "GovEagle" in the Add-ins store under the "My Add-ins" tab.
Confirm with your IT department that they have followed the steps in Deploying Microsoft Office Add-Ins and added you as a user for the add-ins.
If none of these options work, please reach out to support@goveagle.com.