Single Sign-On (SSO) lets your organization sign in to GovEagle with your existing Microsoft Entra ID (formerly Azure Active Directory) accounts. Users use one set of credentials; no separate GovEagle password is required for SSO users.
Prerequisites
Microsoft Entra ID admin access
GovEagle admin access and the ability to access the Single Sign-On tab in settings
Setup
The steps below will guide you through creating a new Microsoft Entra ID app registration and adding the corresponding SSO provider details to GovEagle.
Register a new app registration in Microsoft Entra ID
Go to Azure Portal > App registrations > New registration to create a new app and give it a name (eg. “GovEagle SSO”)
Under Redirect URI, select Web and enter the value
https://goveagle.okta.com/oauth2/v1/authorize/callbackFrom Authentication > Implicit grant and hybrid flows, check both Access tokens and ID tokens
.png)
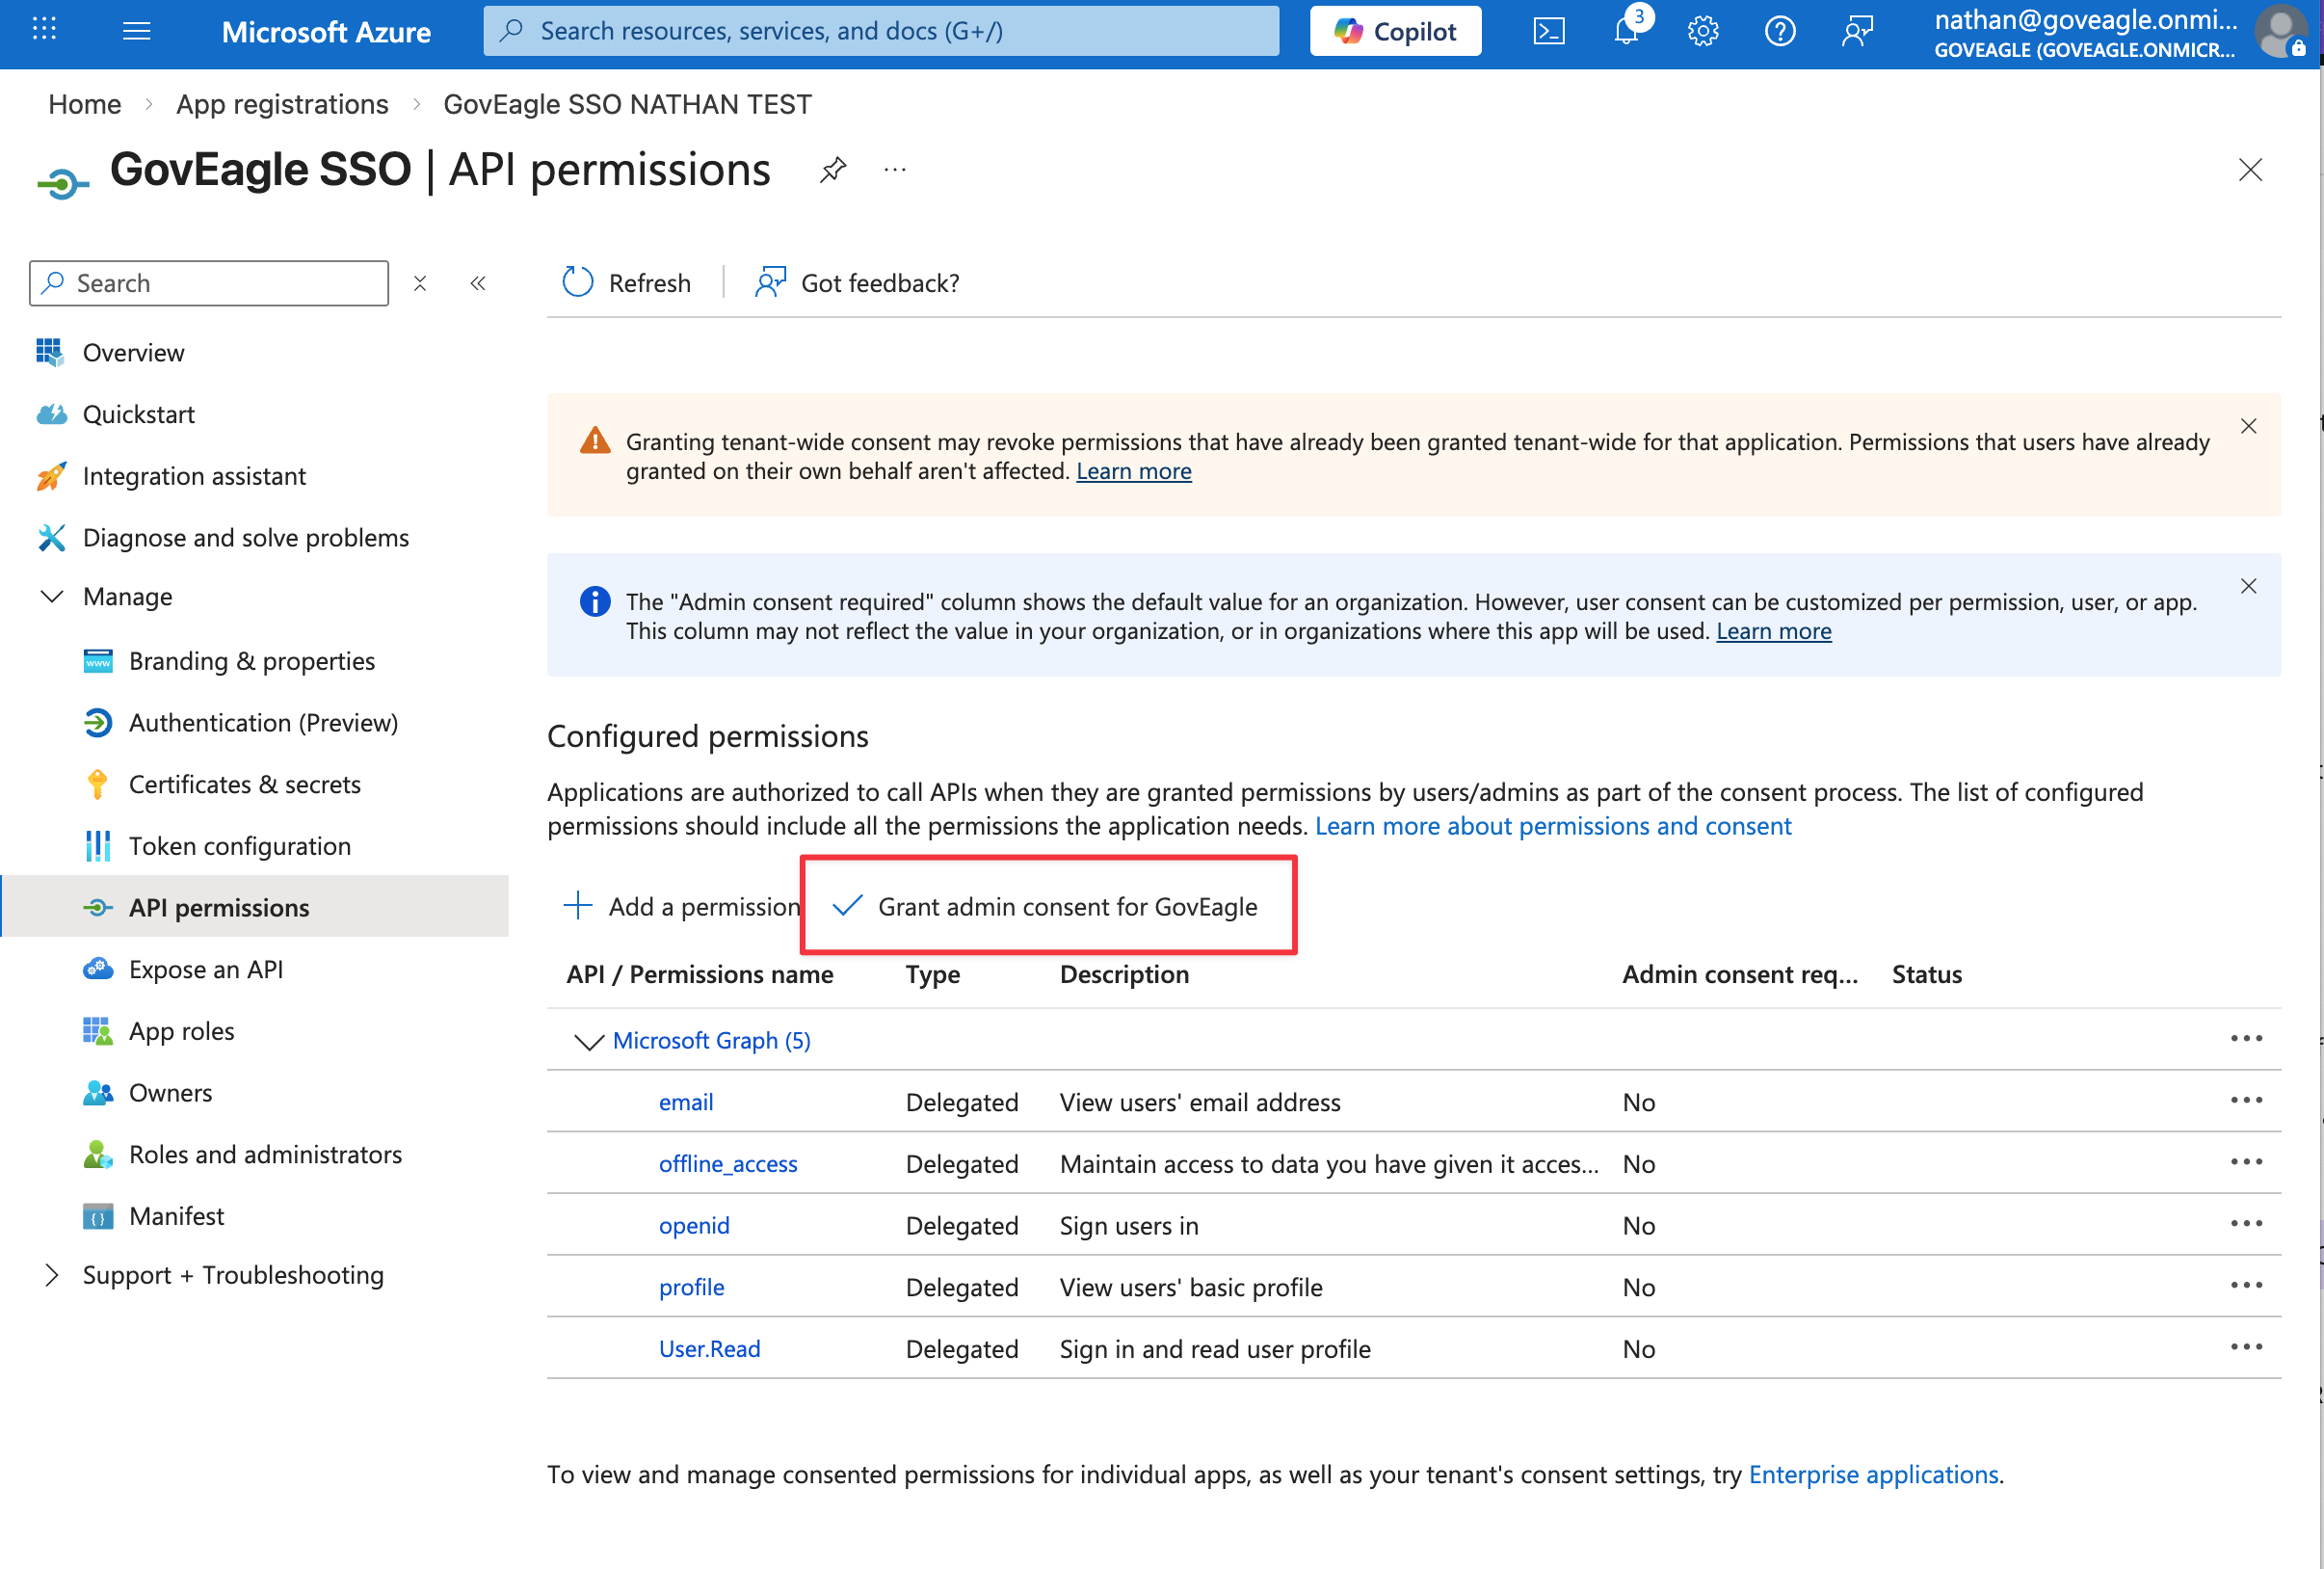
From API permissions > Add a permission > Microsoft Graph > Delegated permissions, add and save these permissions:
All OpenID permissions (email, offline_access, openid, profile)
User.Read
.png)
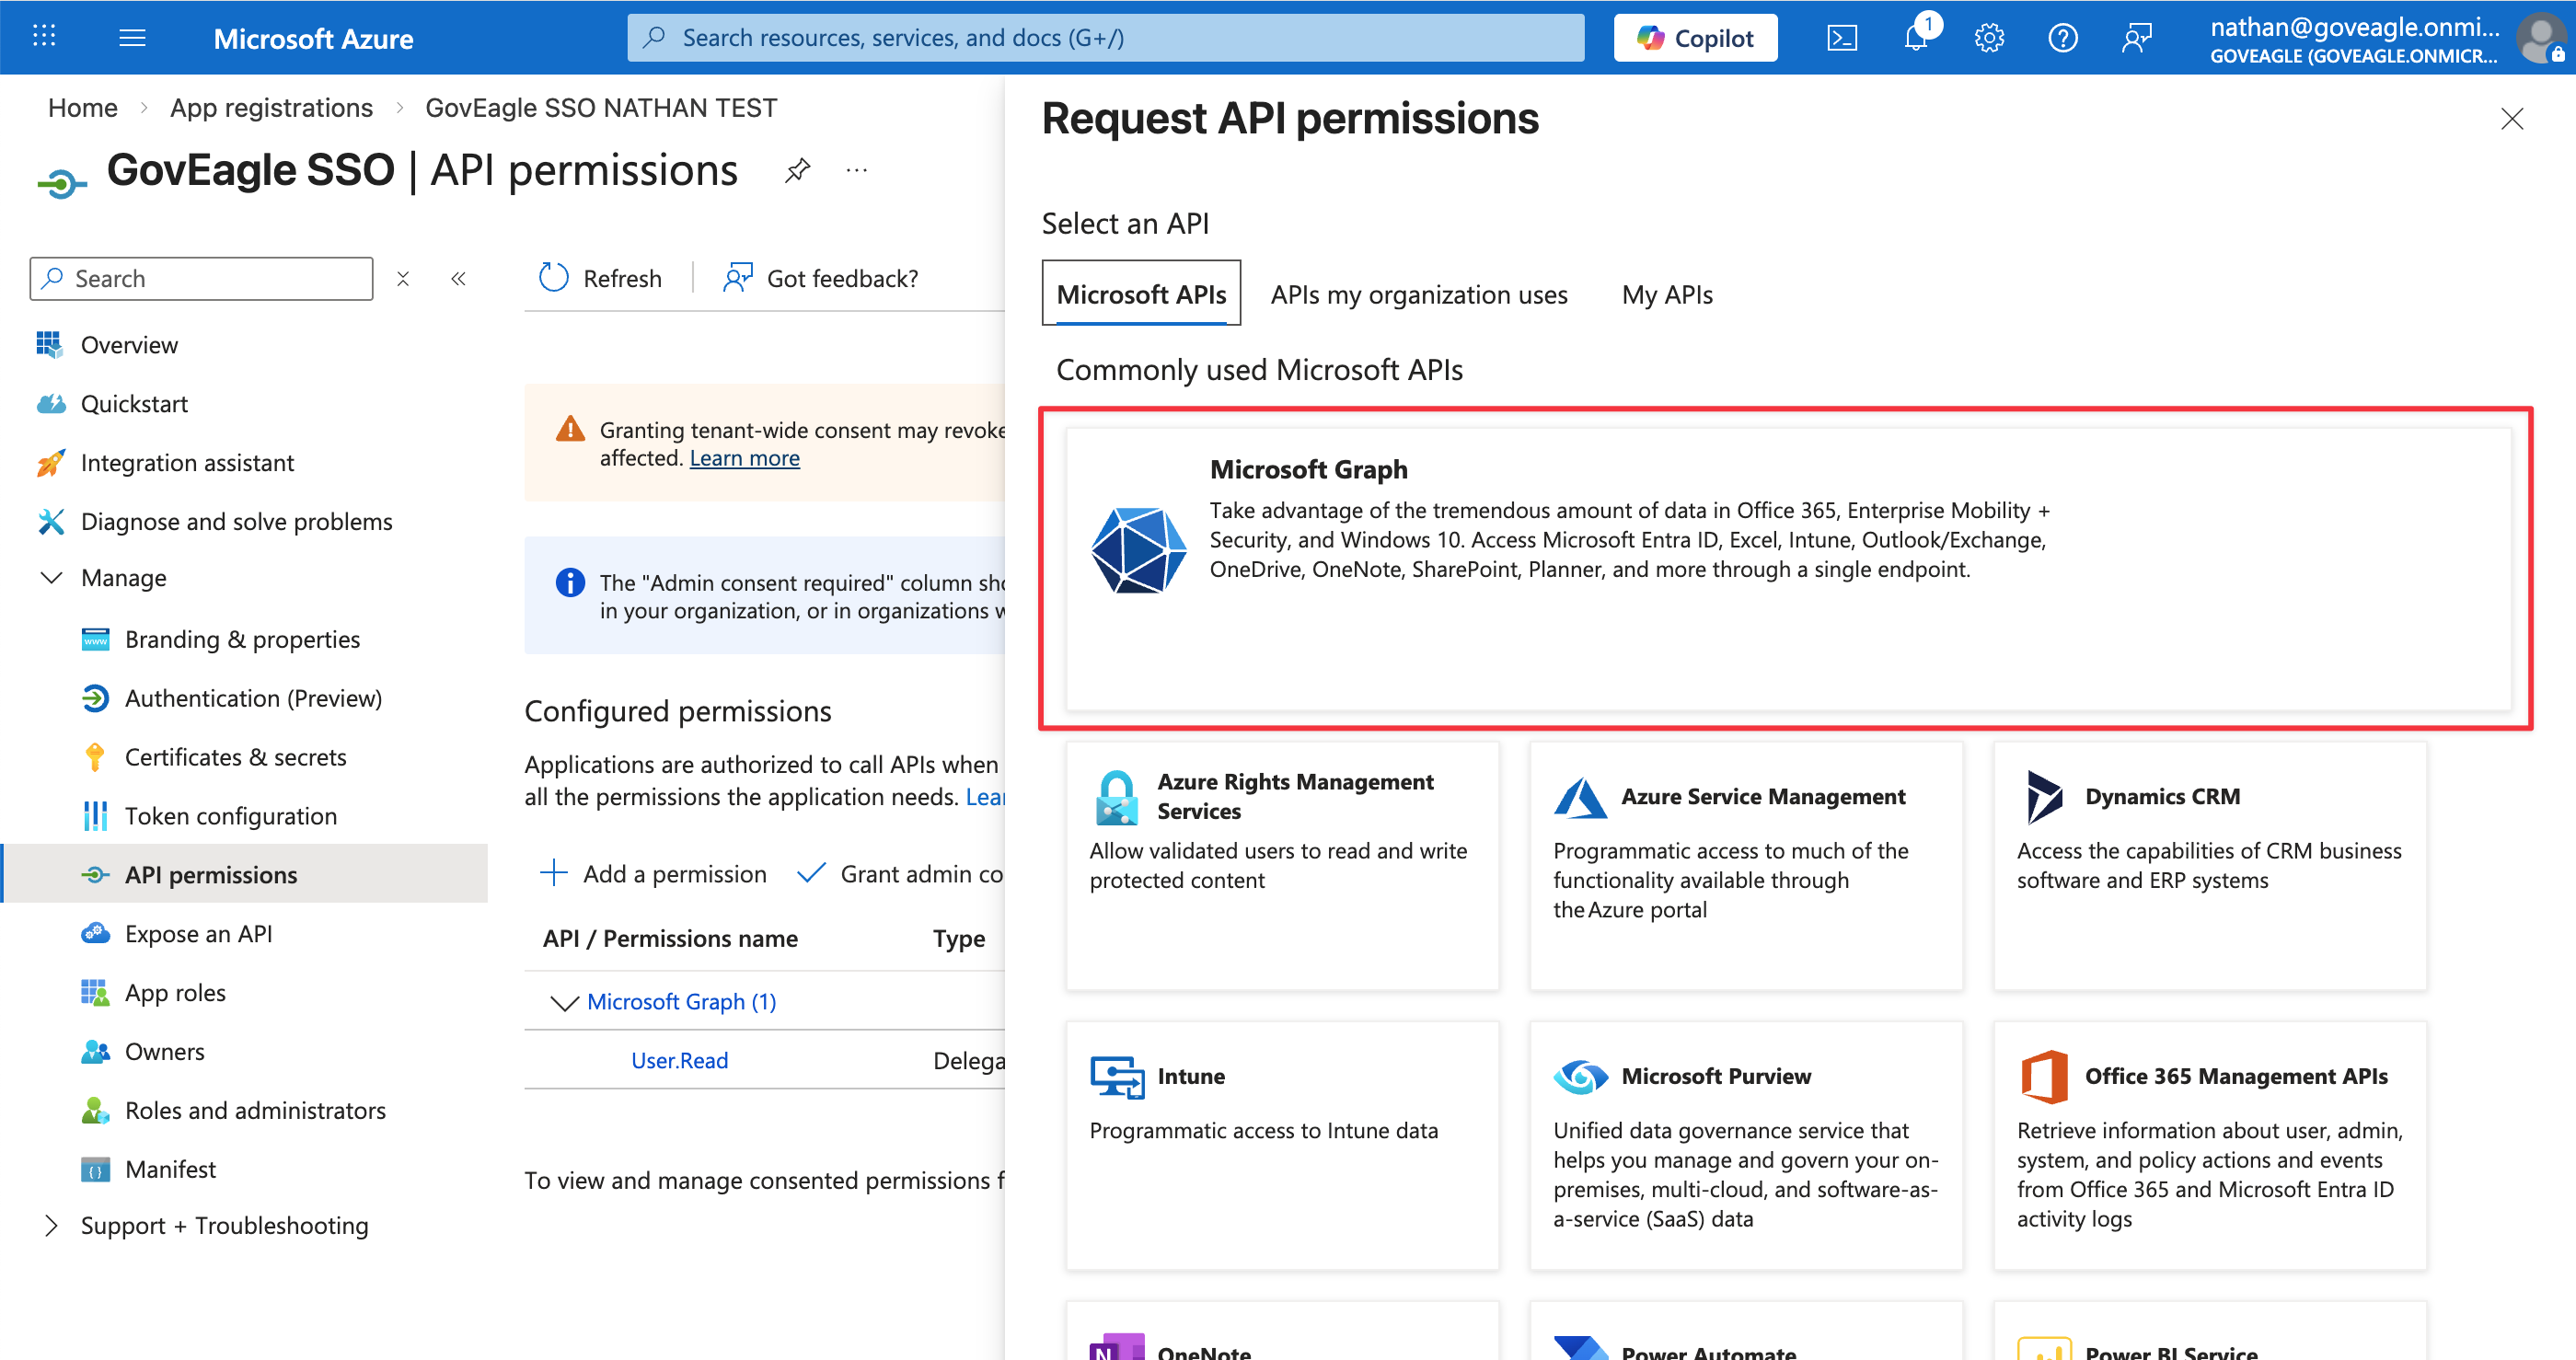
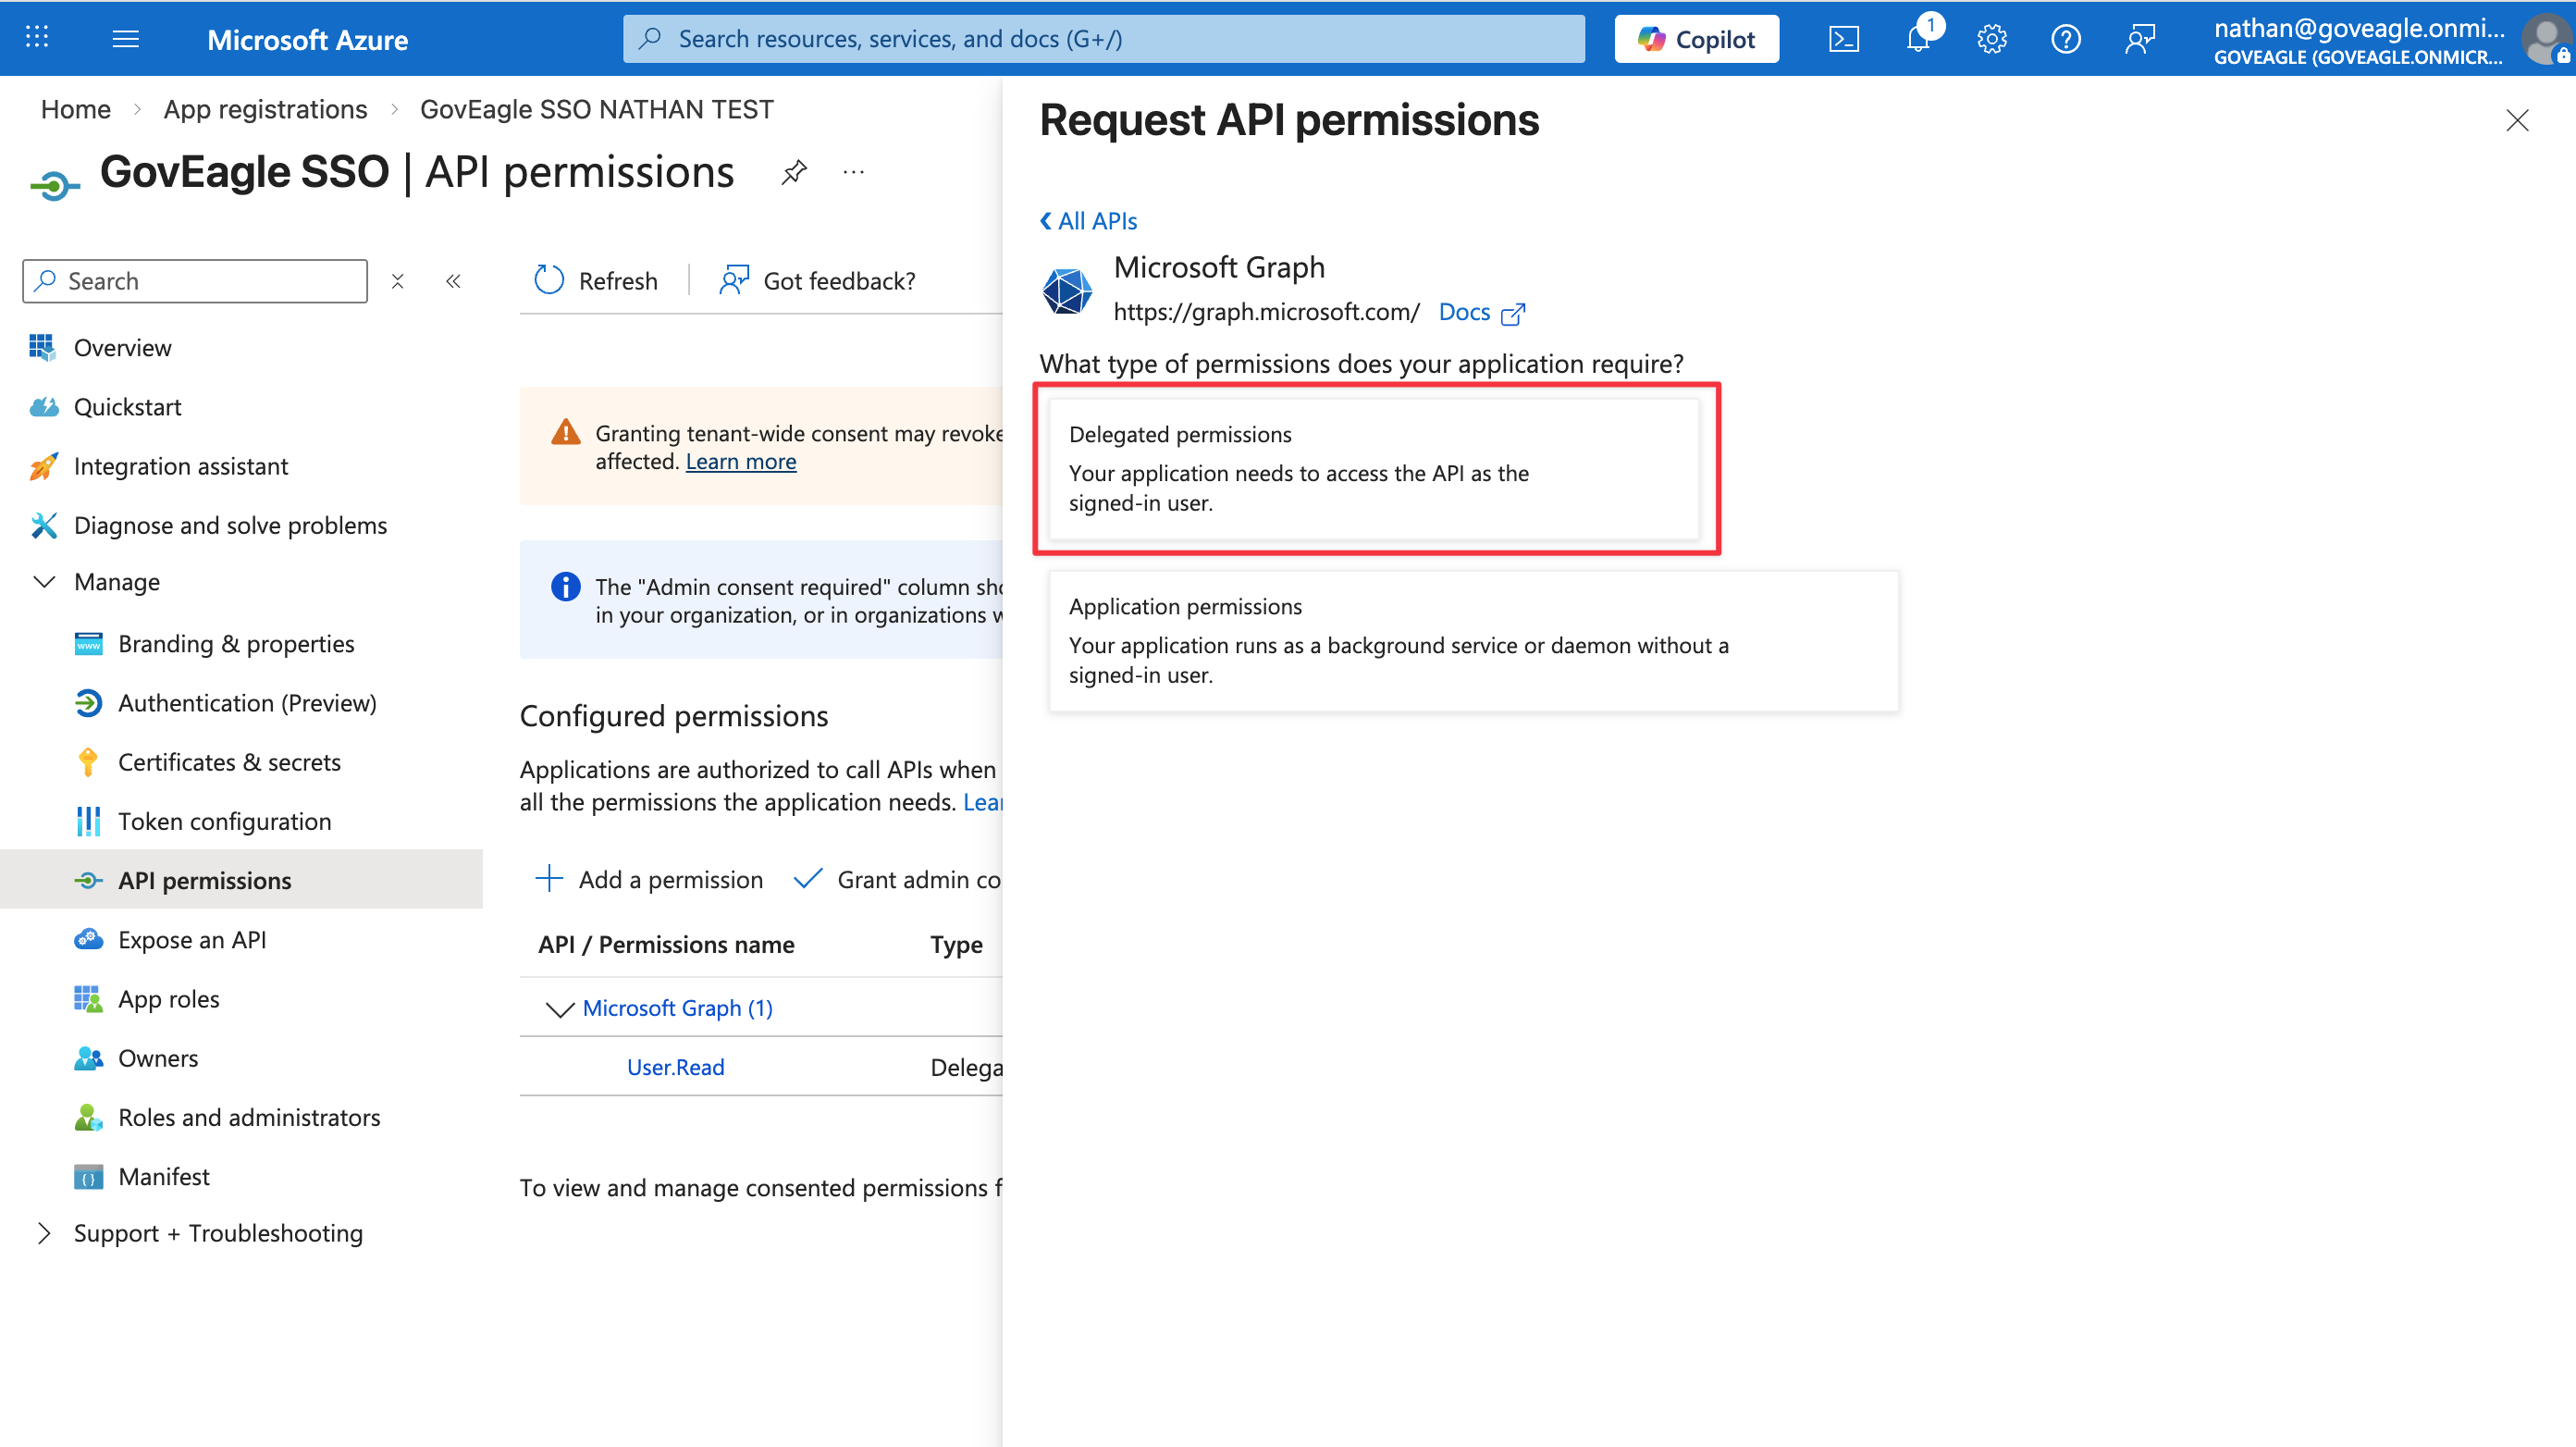
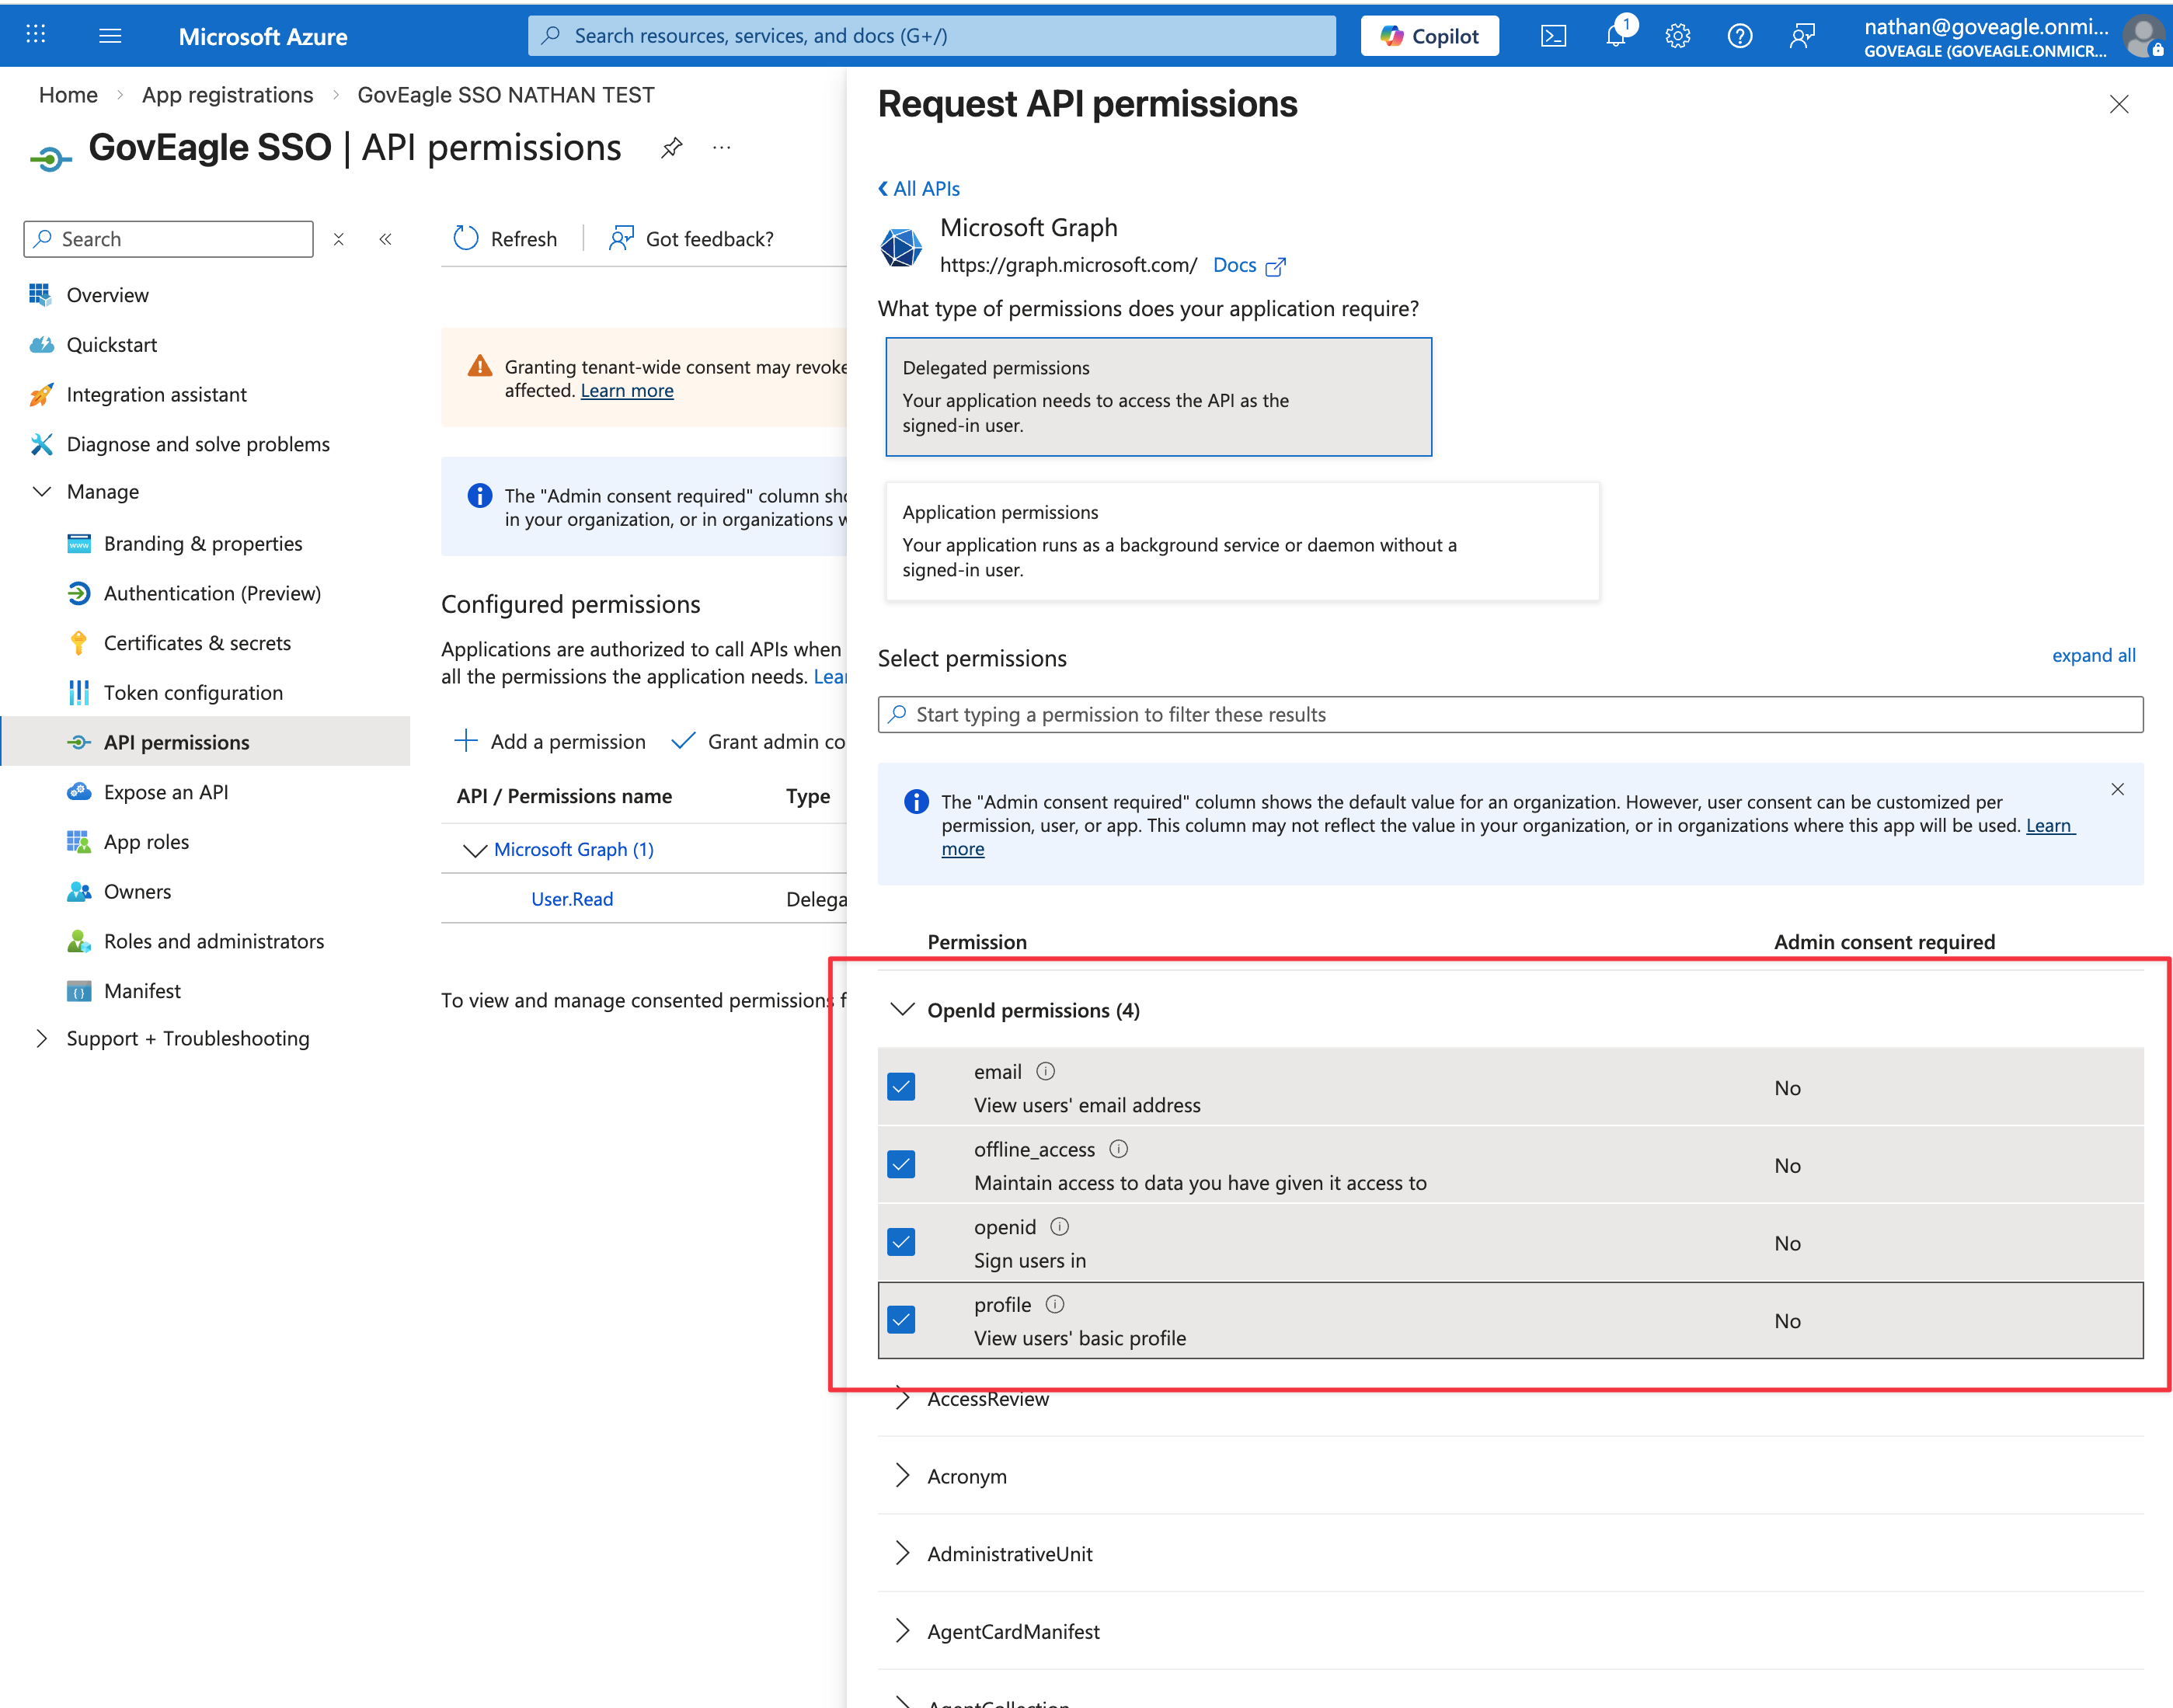
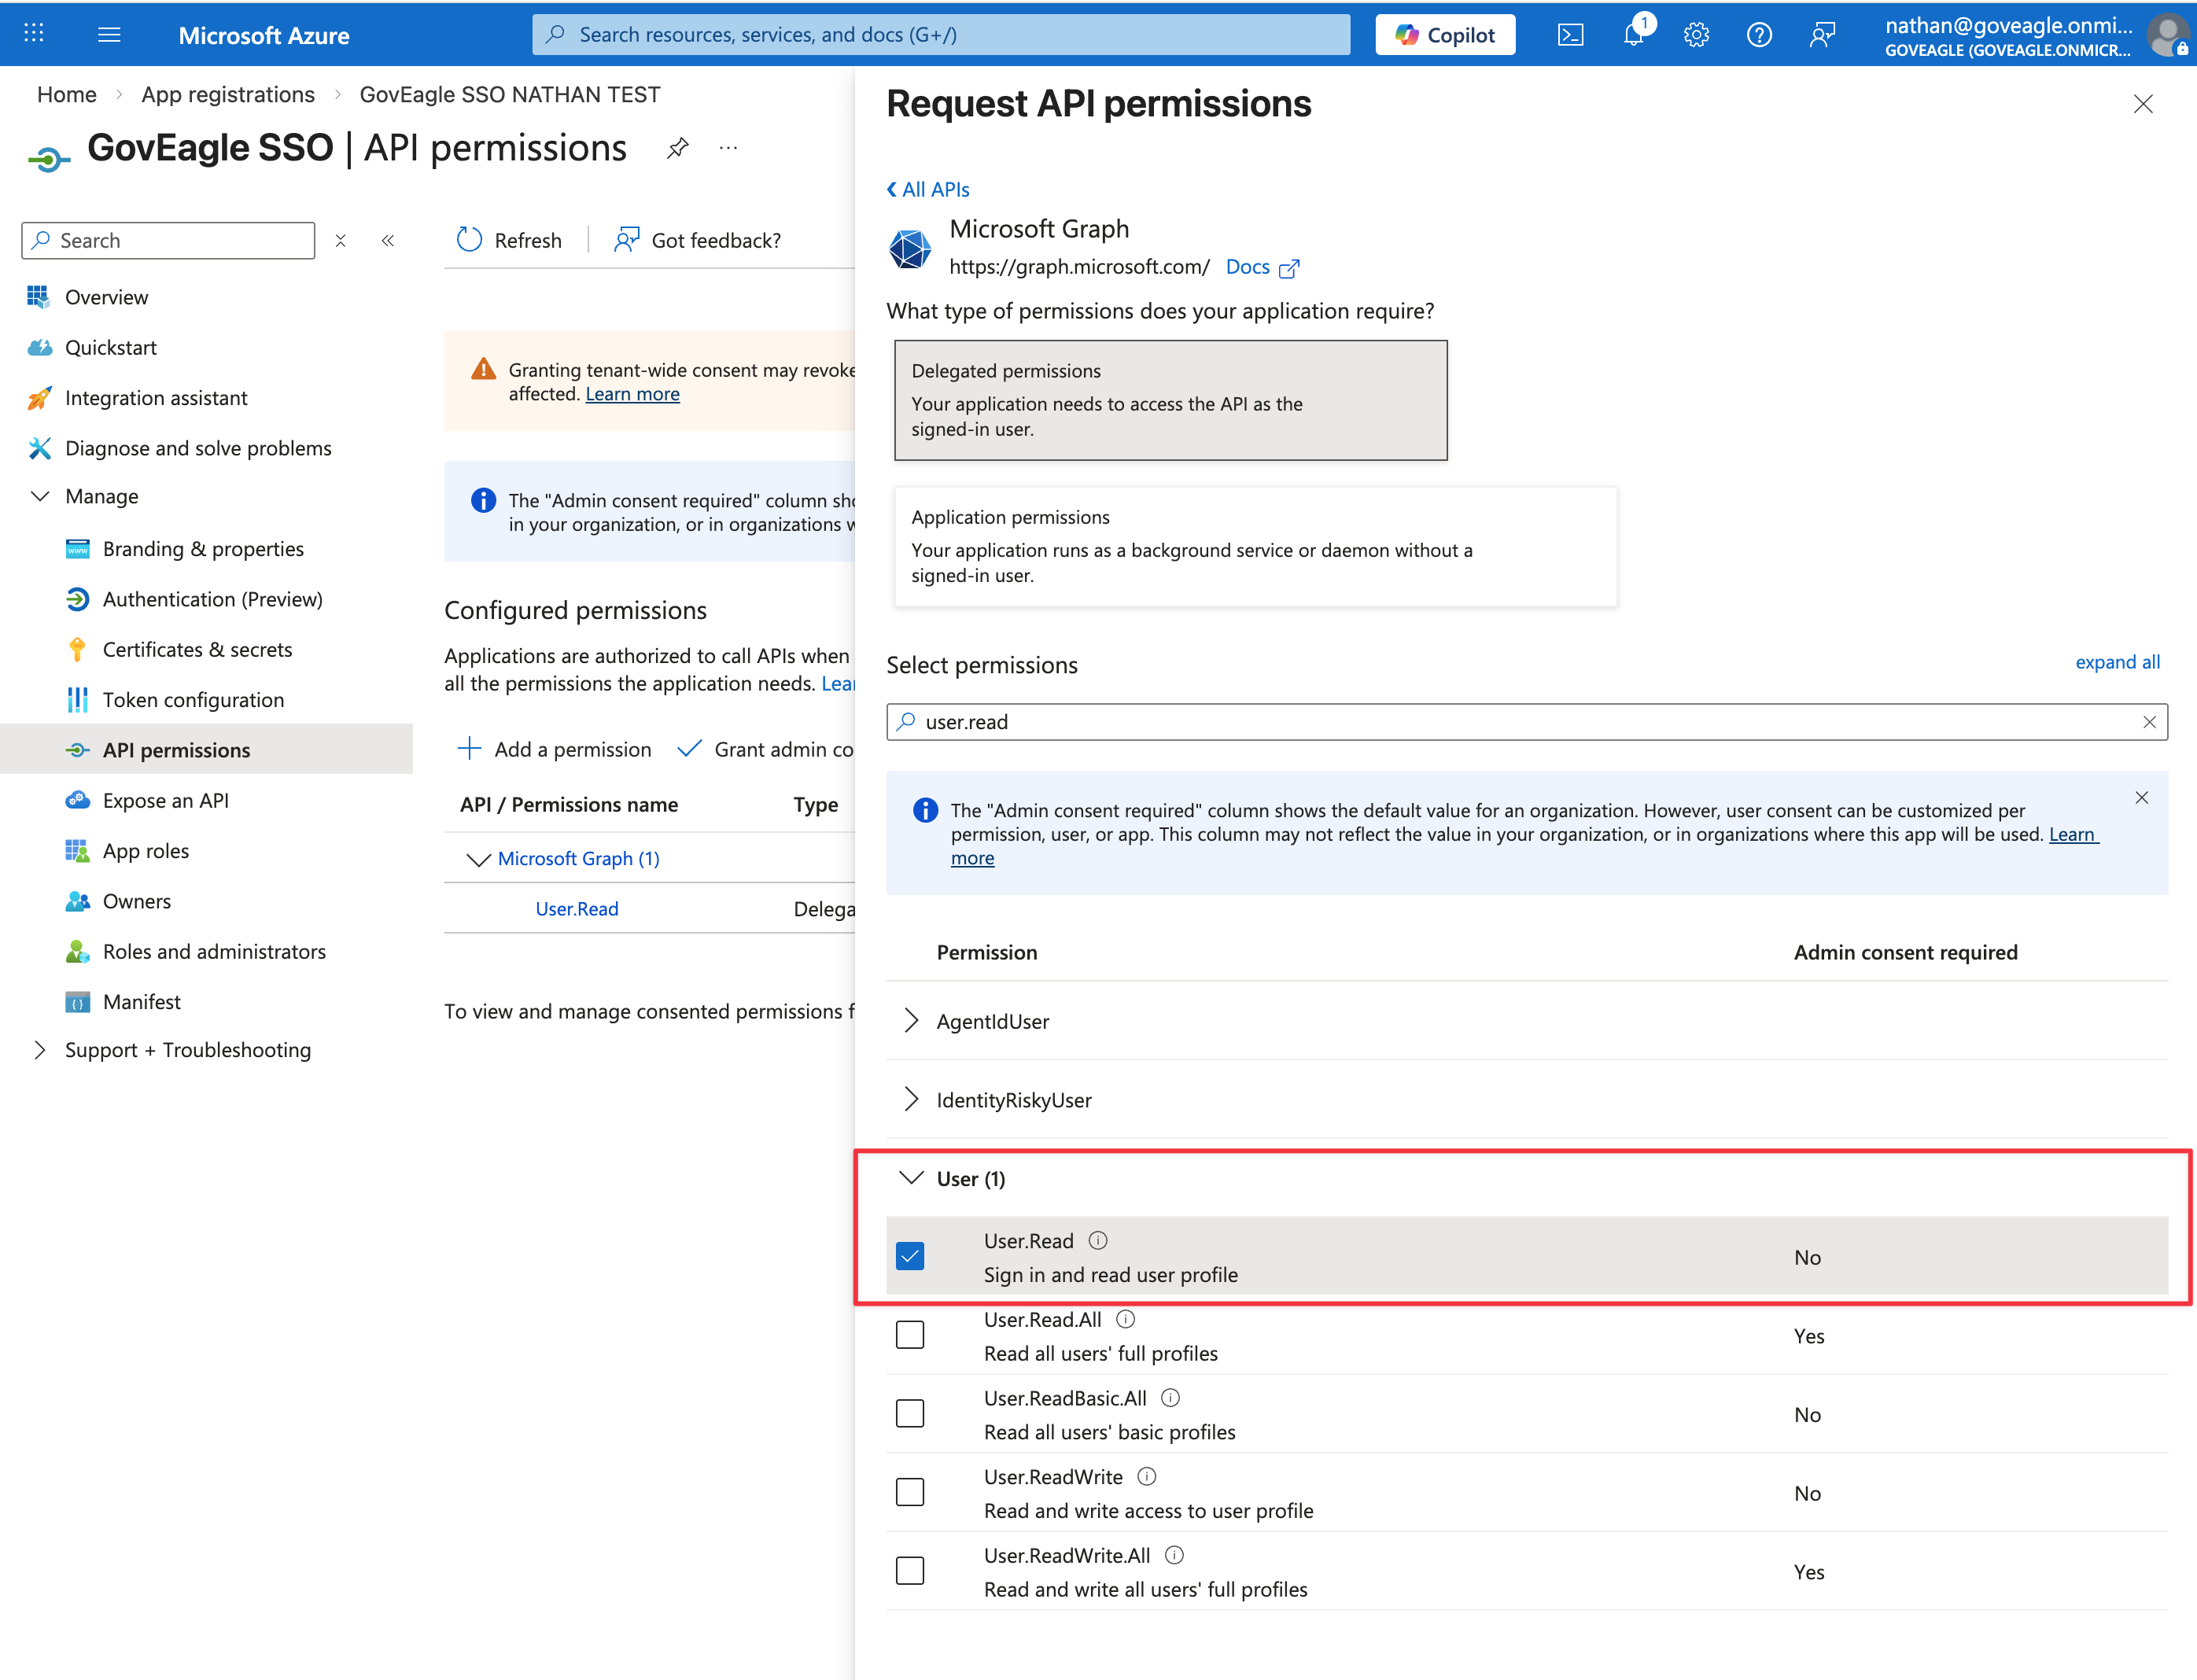
From API permissions page, select Grant admin consent
Create a new SSO Provider in GovEagle
Make sure to have browser windows open to both your Microsoft Entra ID app registration and GovEagle’s Add SSO Provider form (Settings > Single Sign-On > Add Provider) so that you can copy values from Microsoft Entra ID into GovEagle.
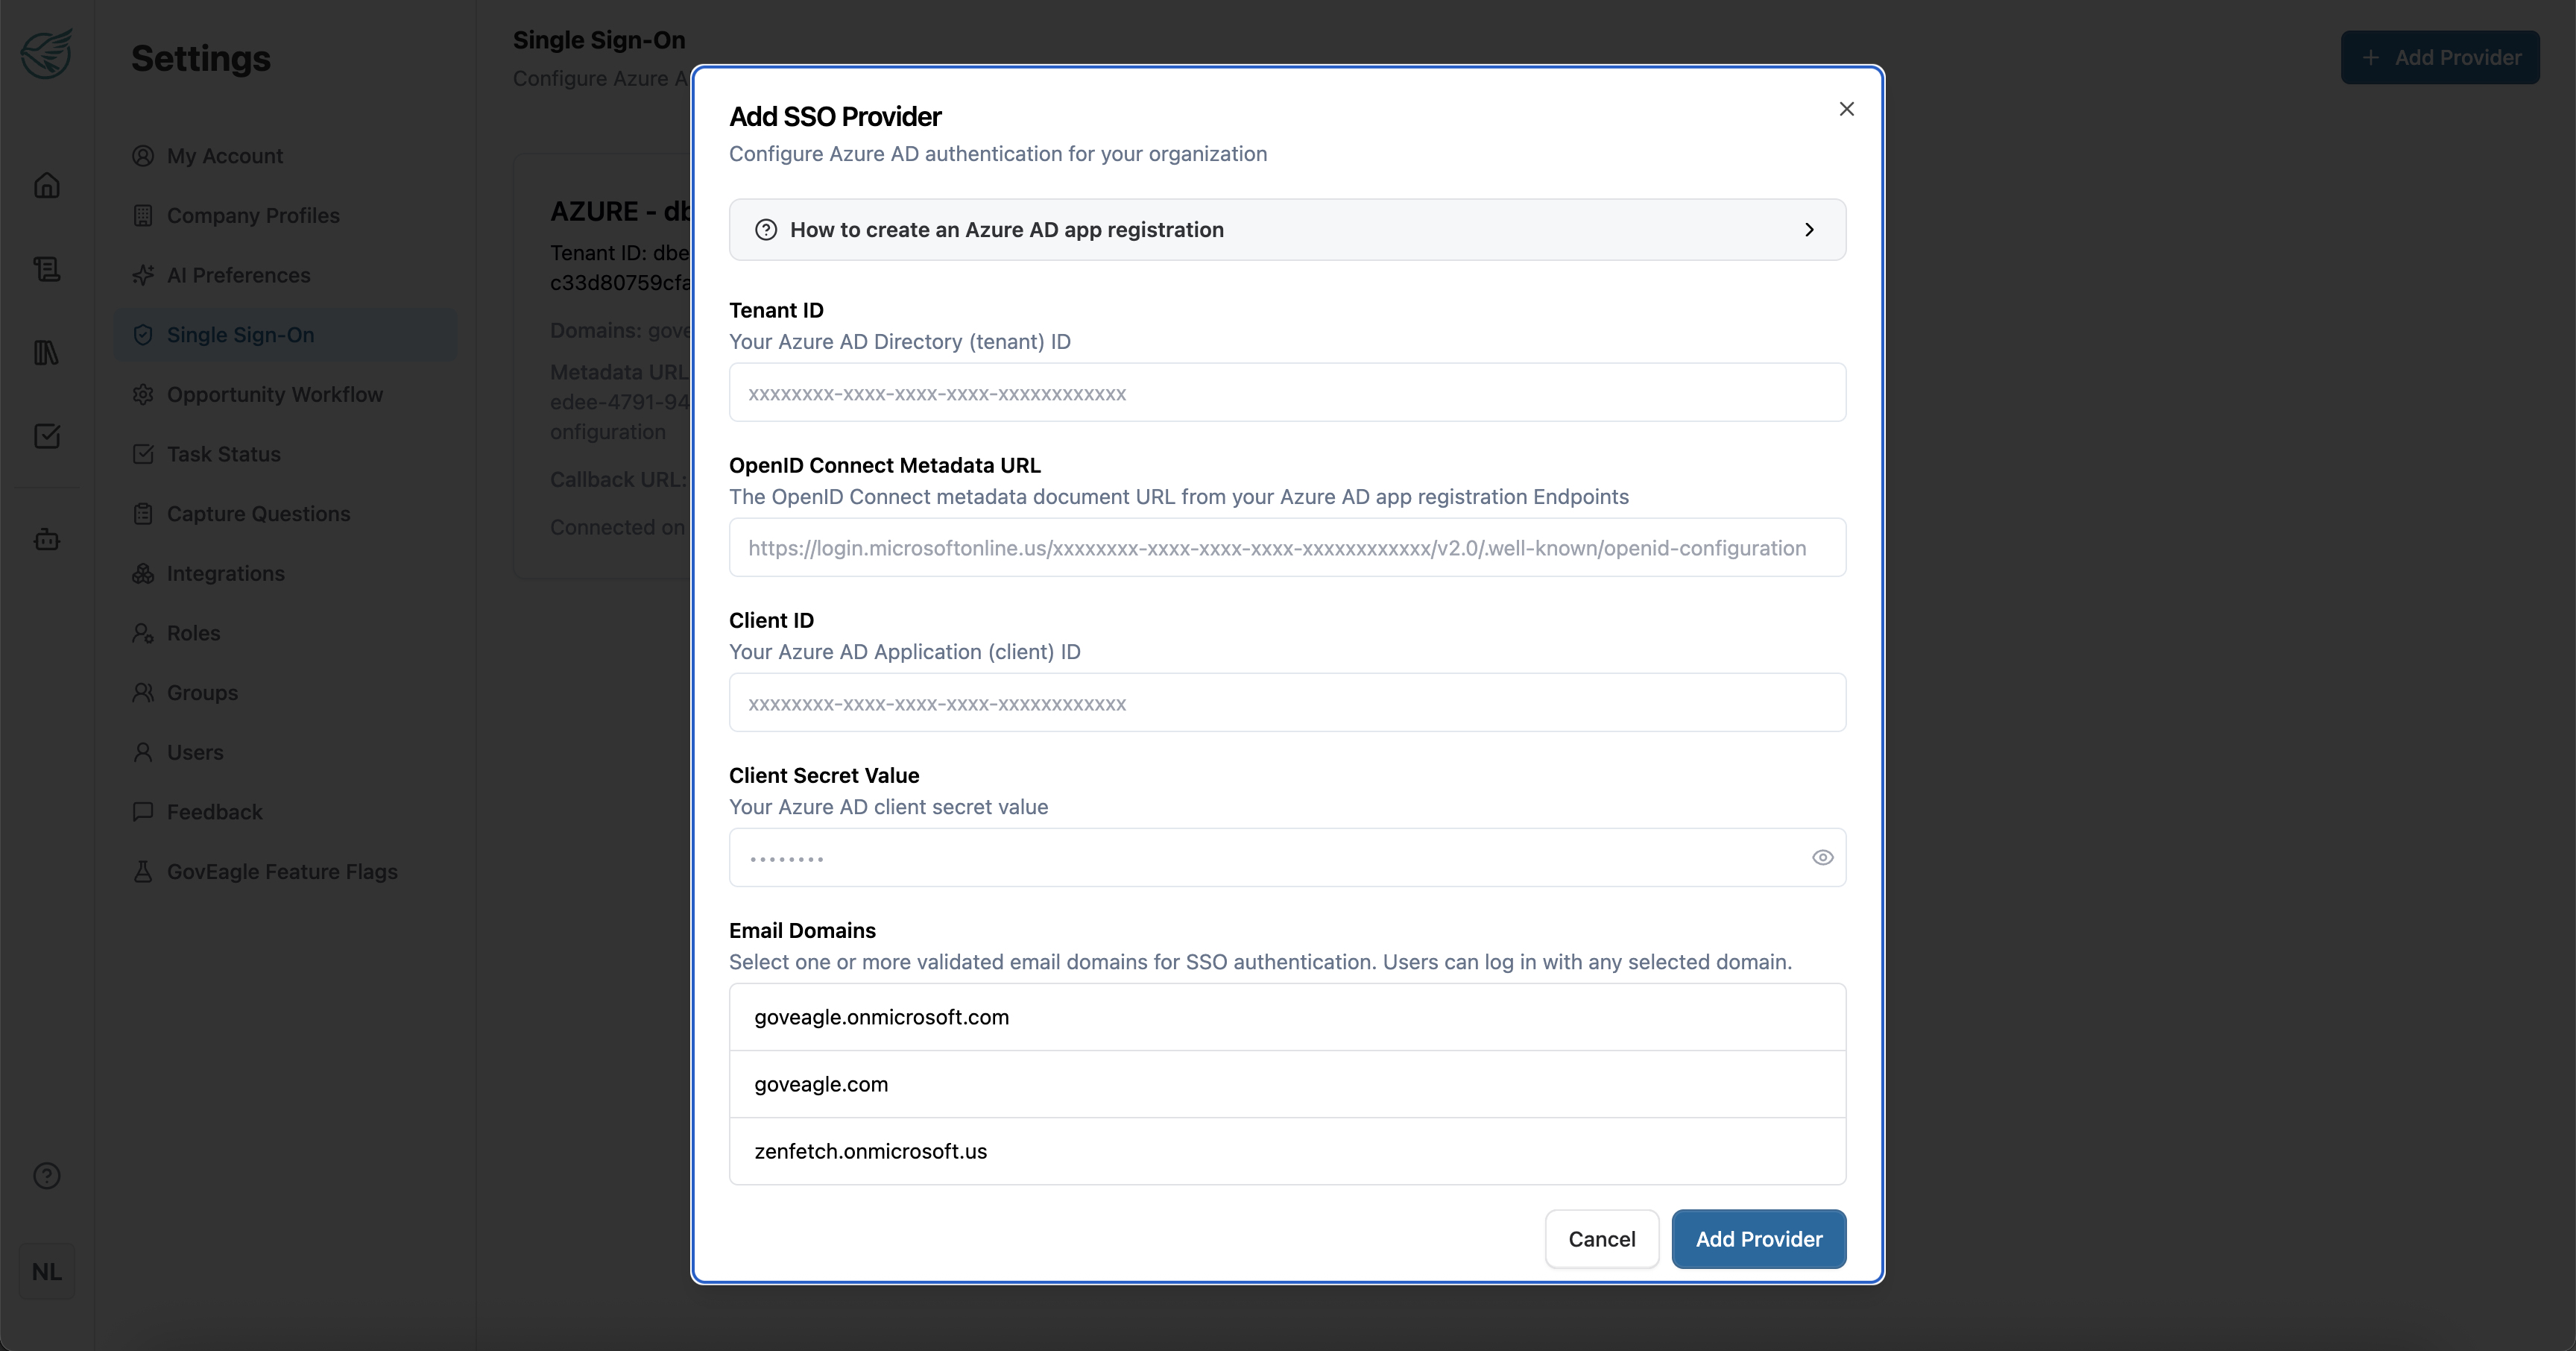
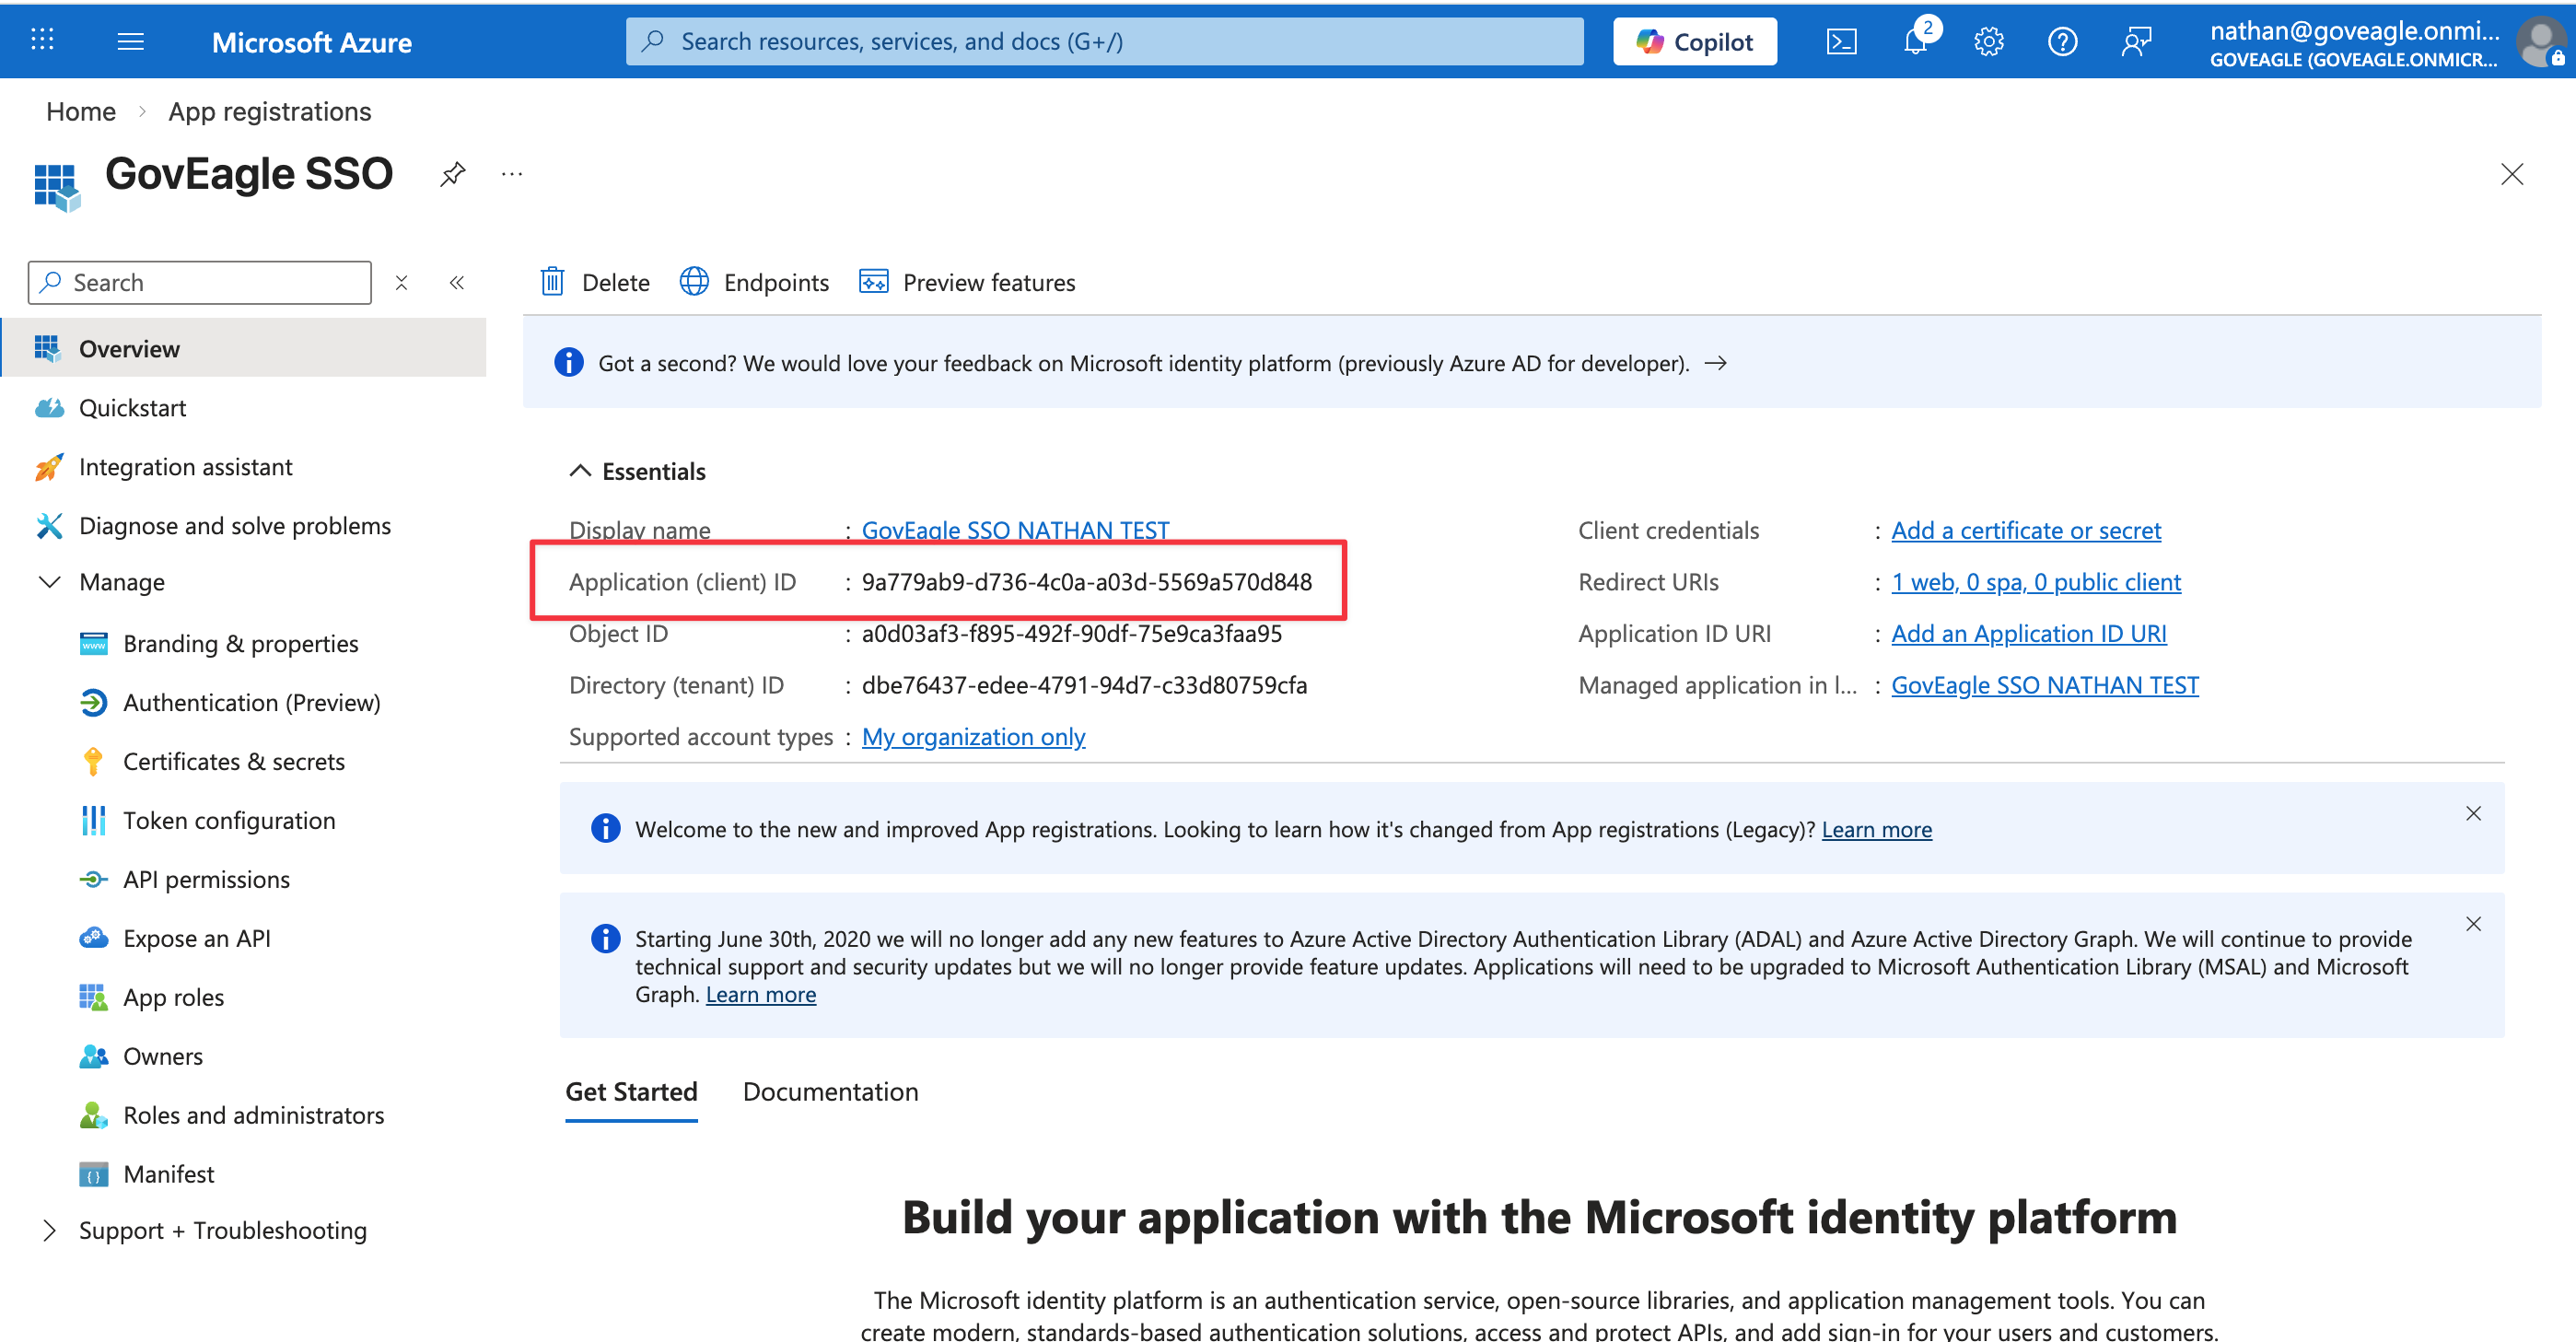
From Microsoft Entra ID app registration Overview page, copy the Application (client) ID value and enter it into GovEagle’s Client ID field.
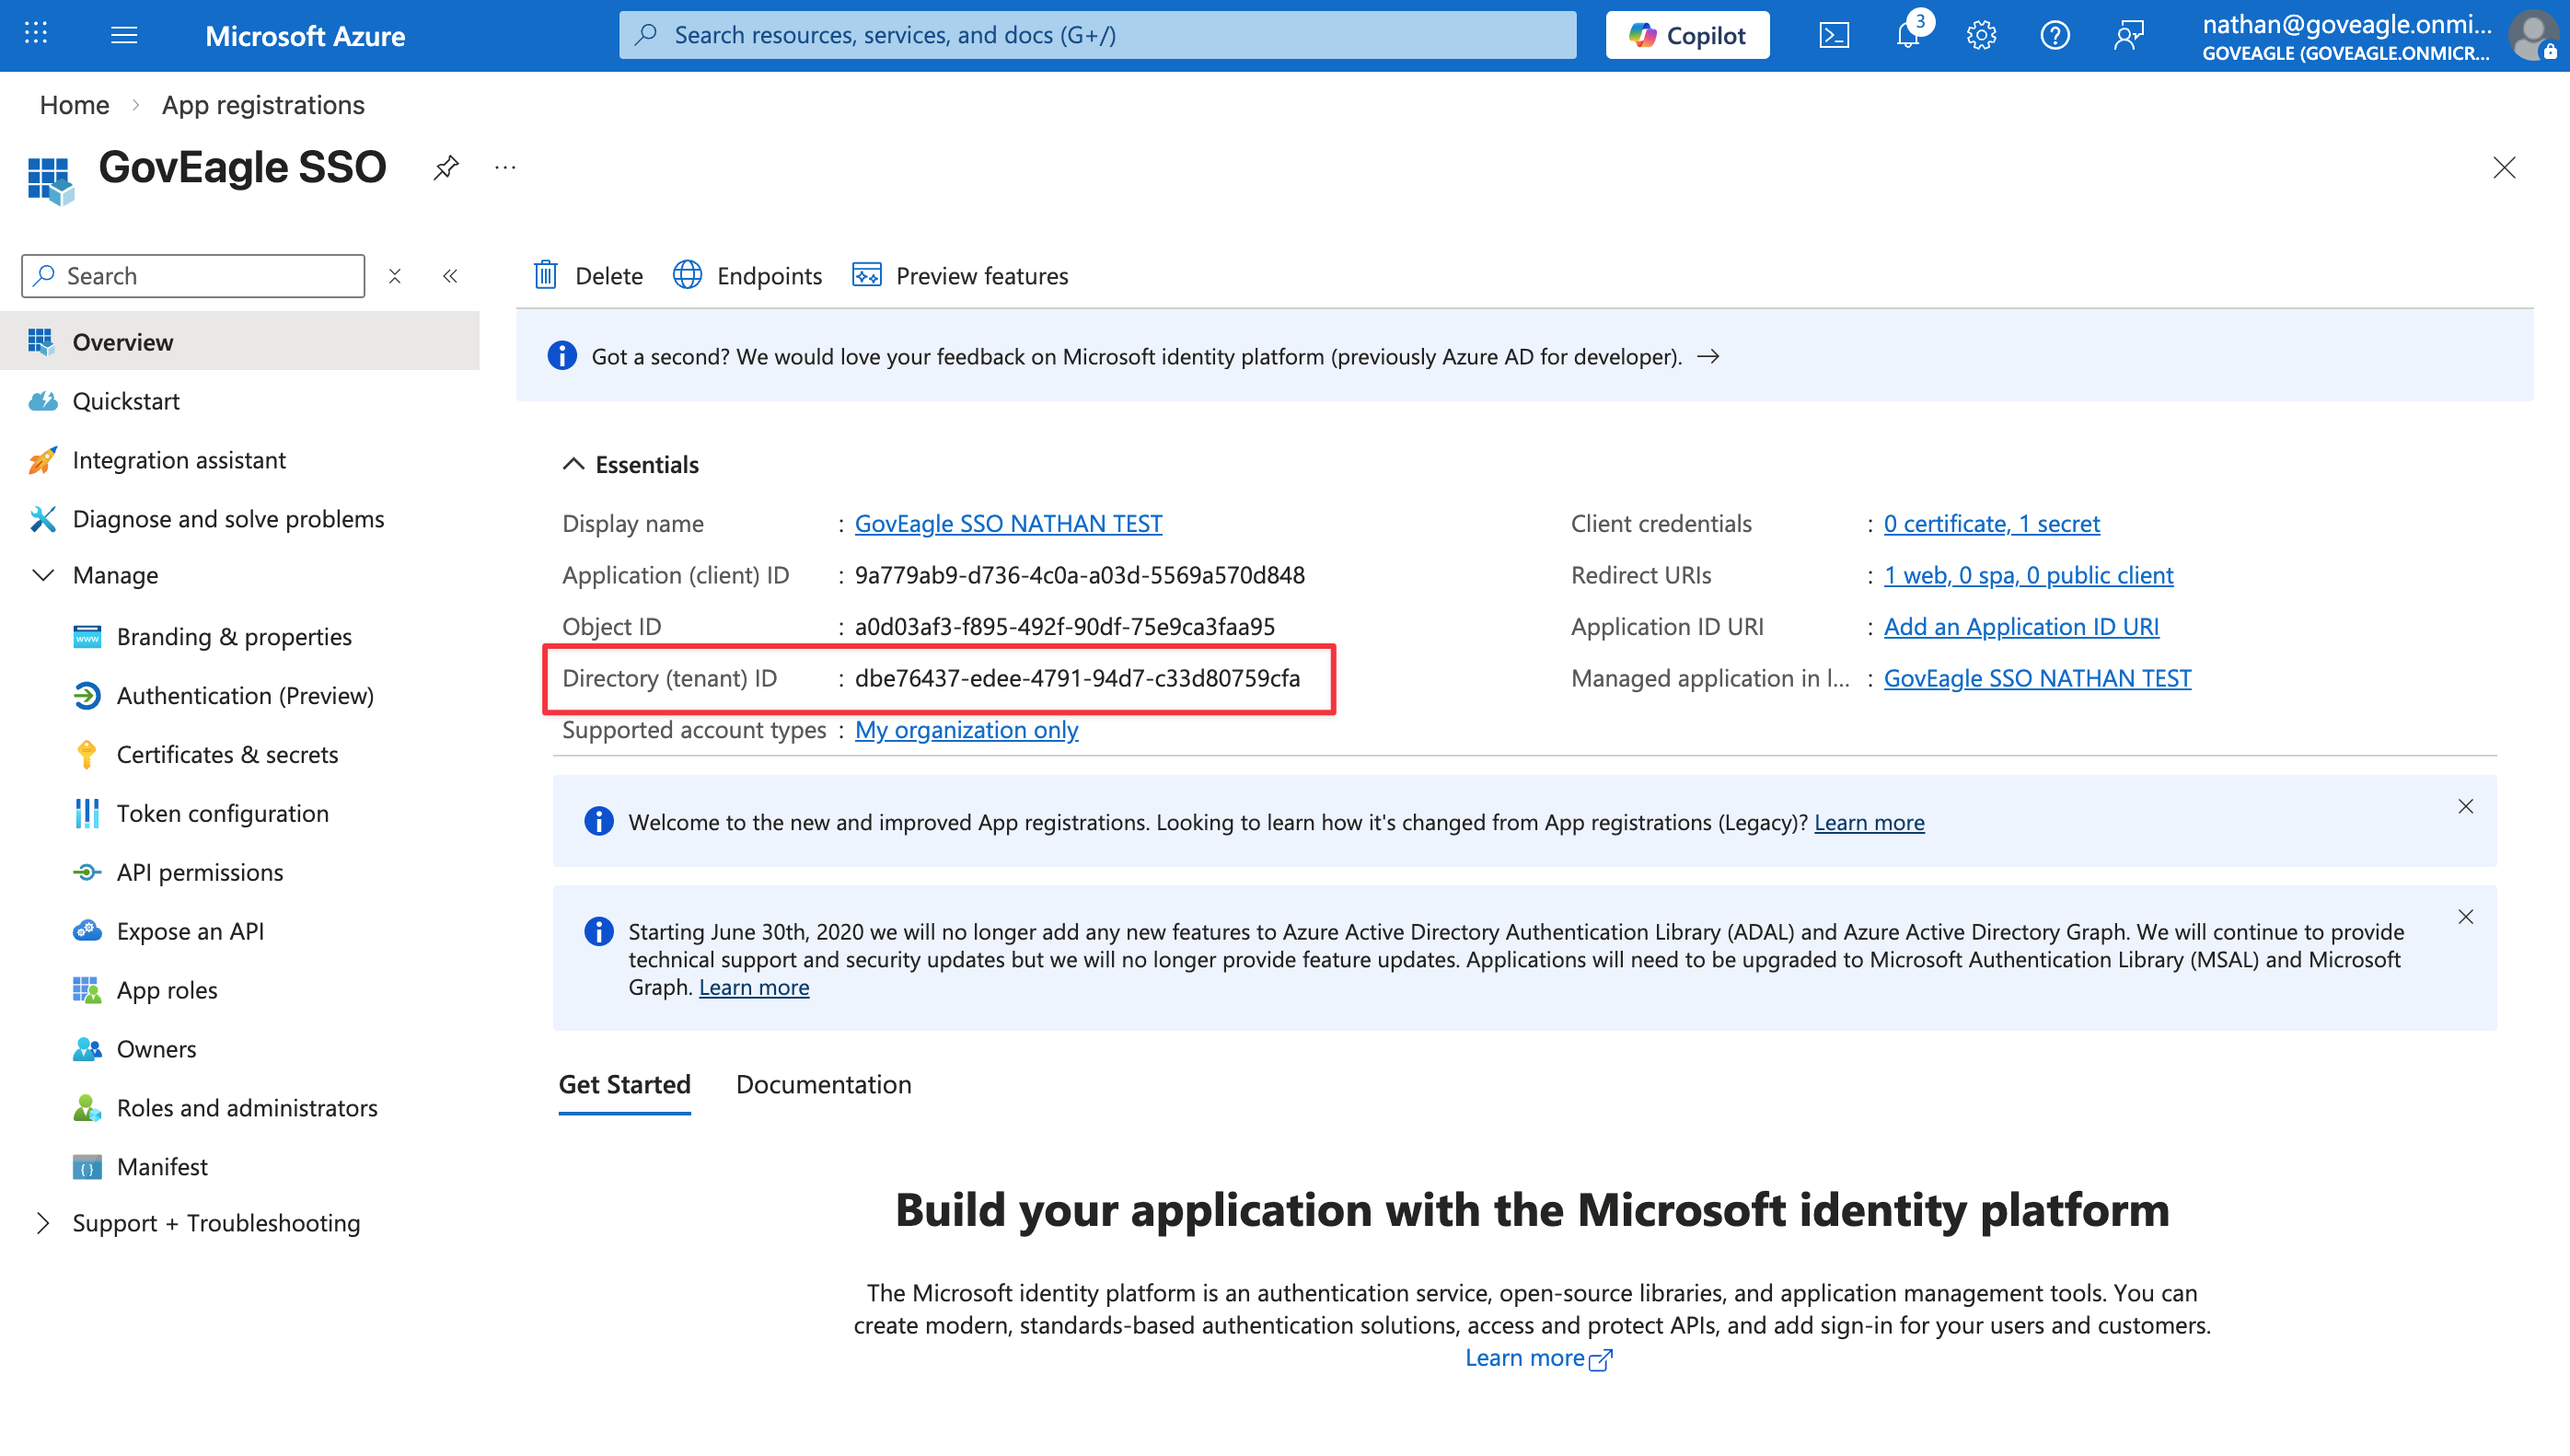
Also from the Microsoft Entra ID Overview page, copy Directory (tenant) ID value and enter it into GovEagle’s Tenant ID field.
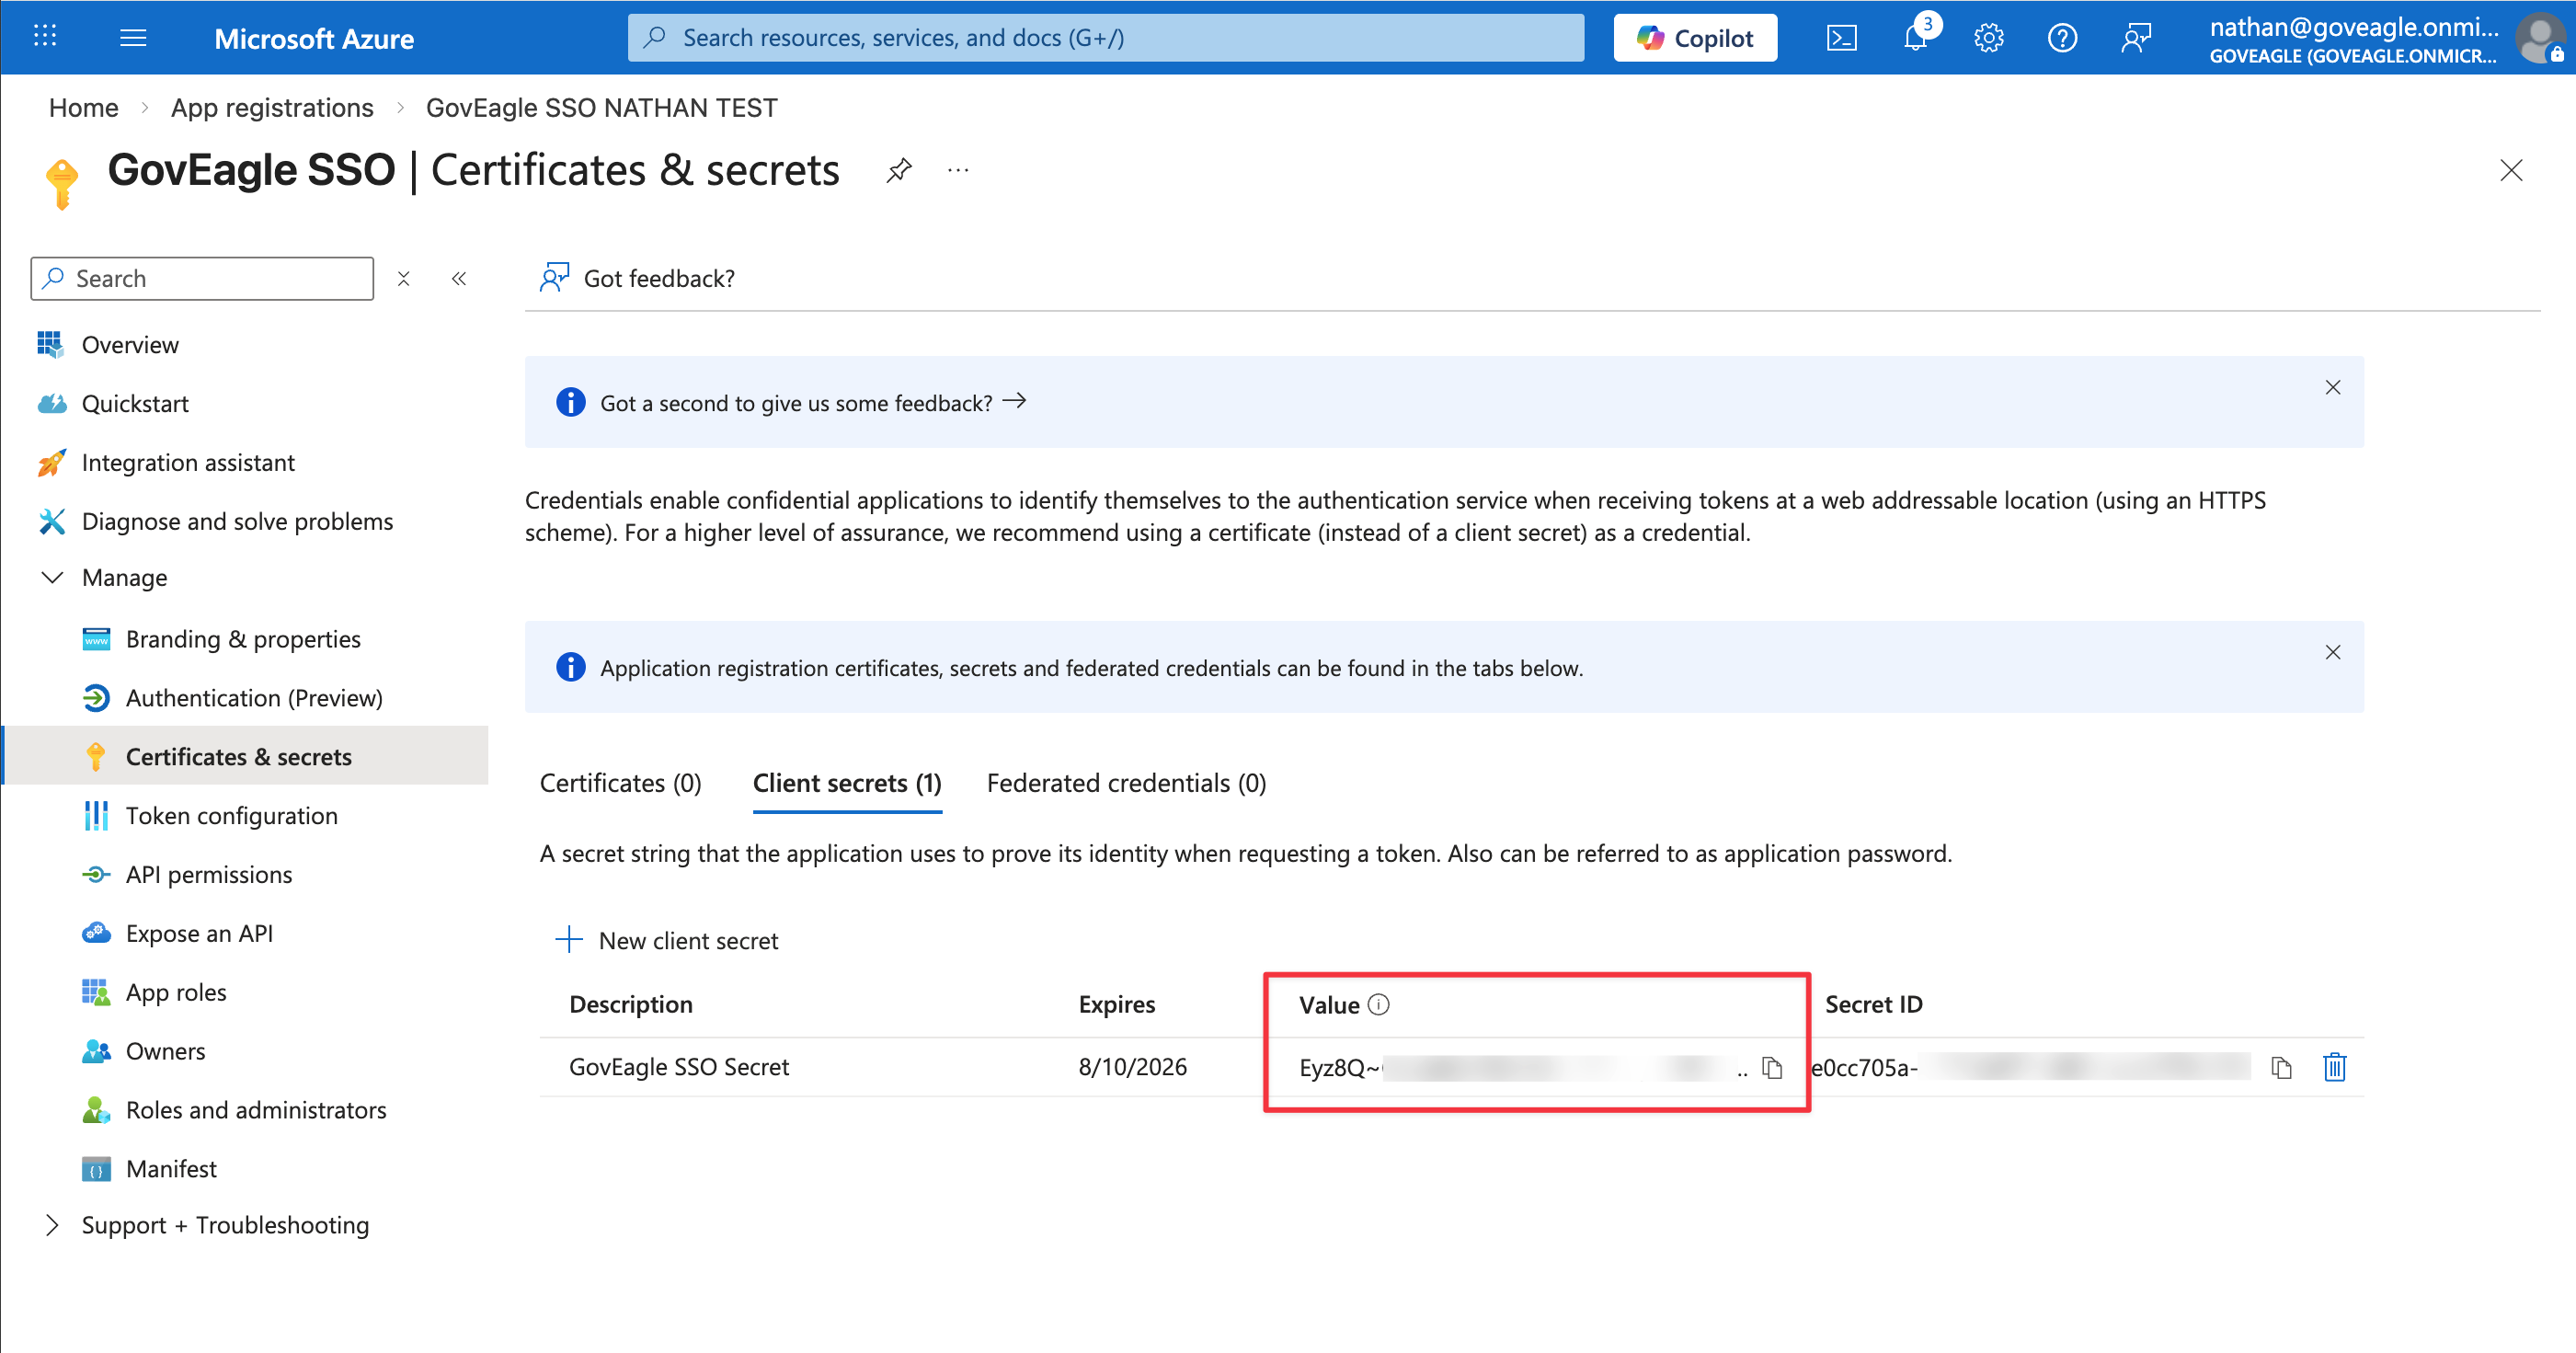
Create a new client secret in Microsoft Entra ID from Certificates & secrets > New client secret. Copy the secret value and enter it into GovEagle’s Client Secret Value field.
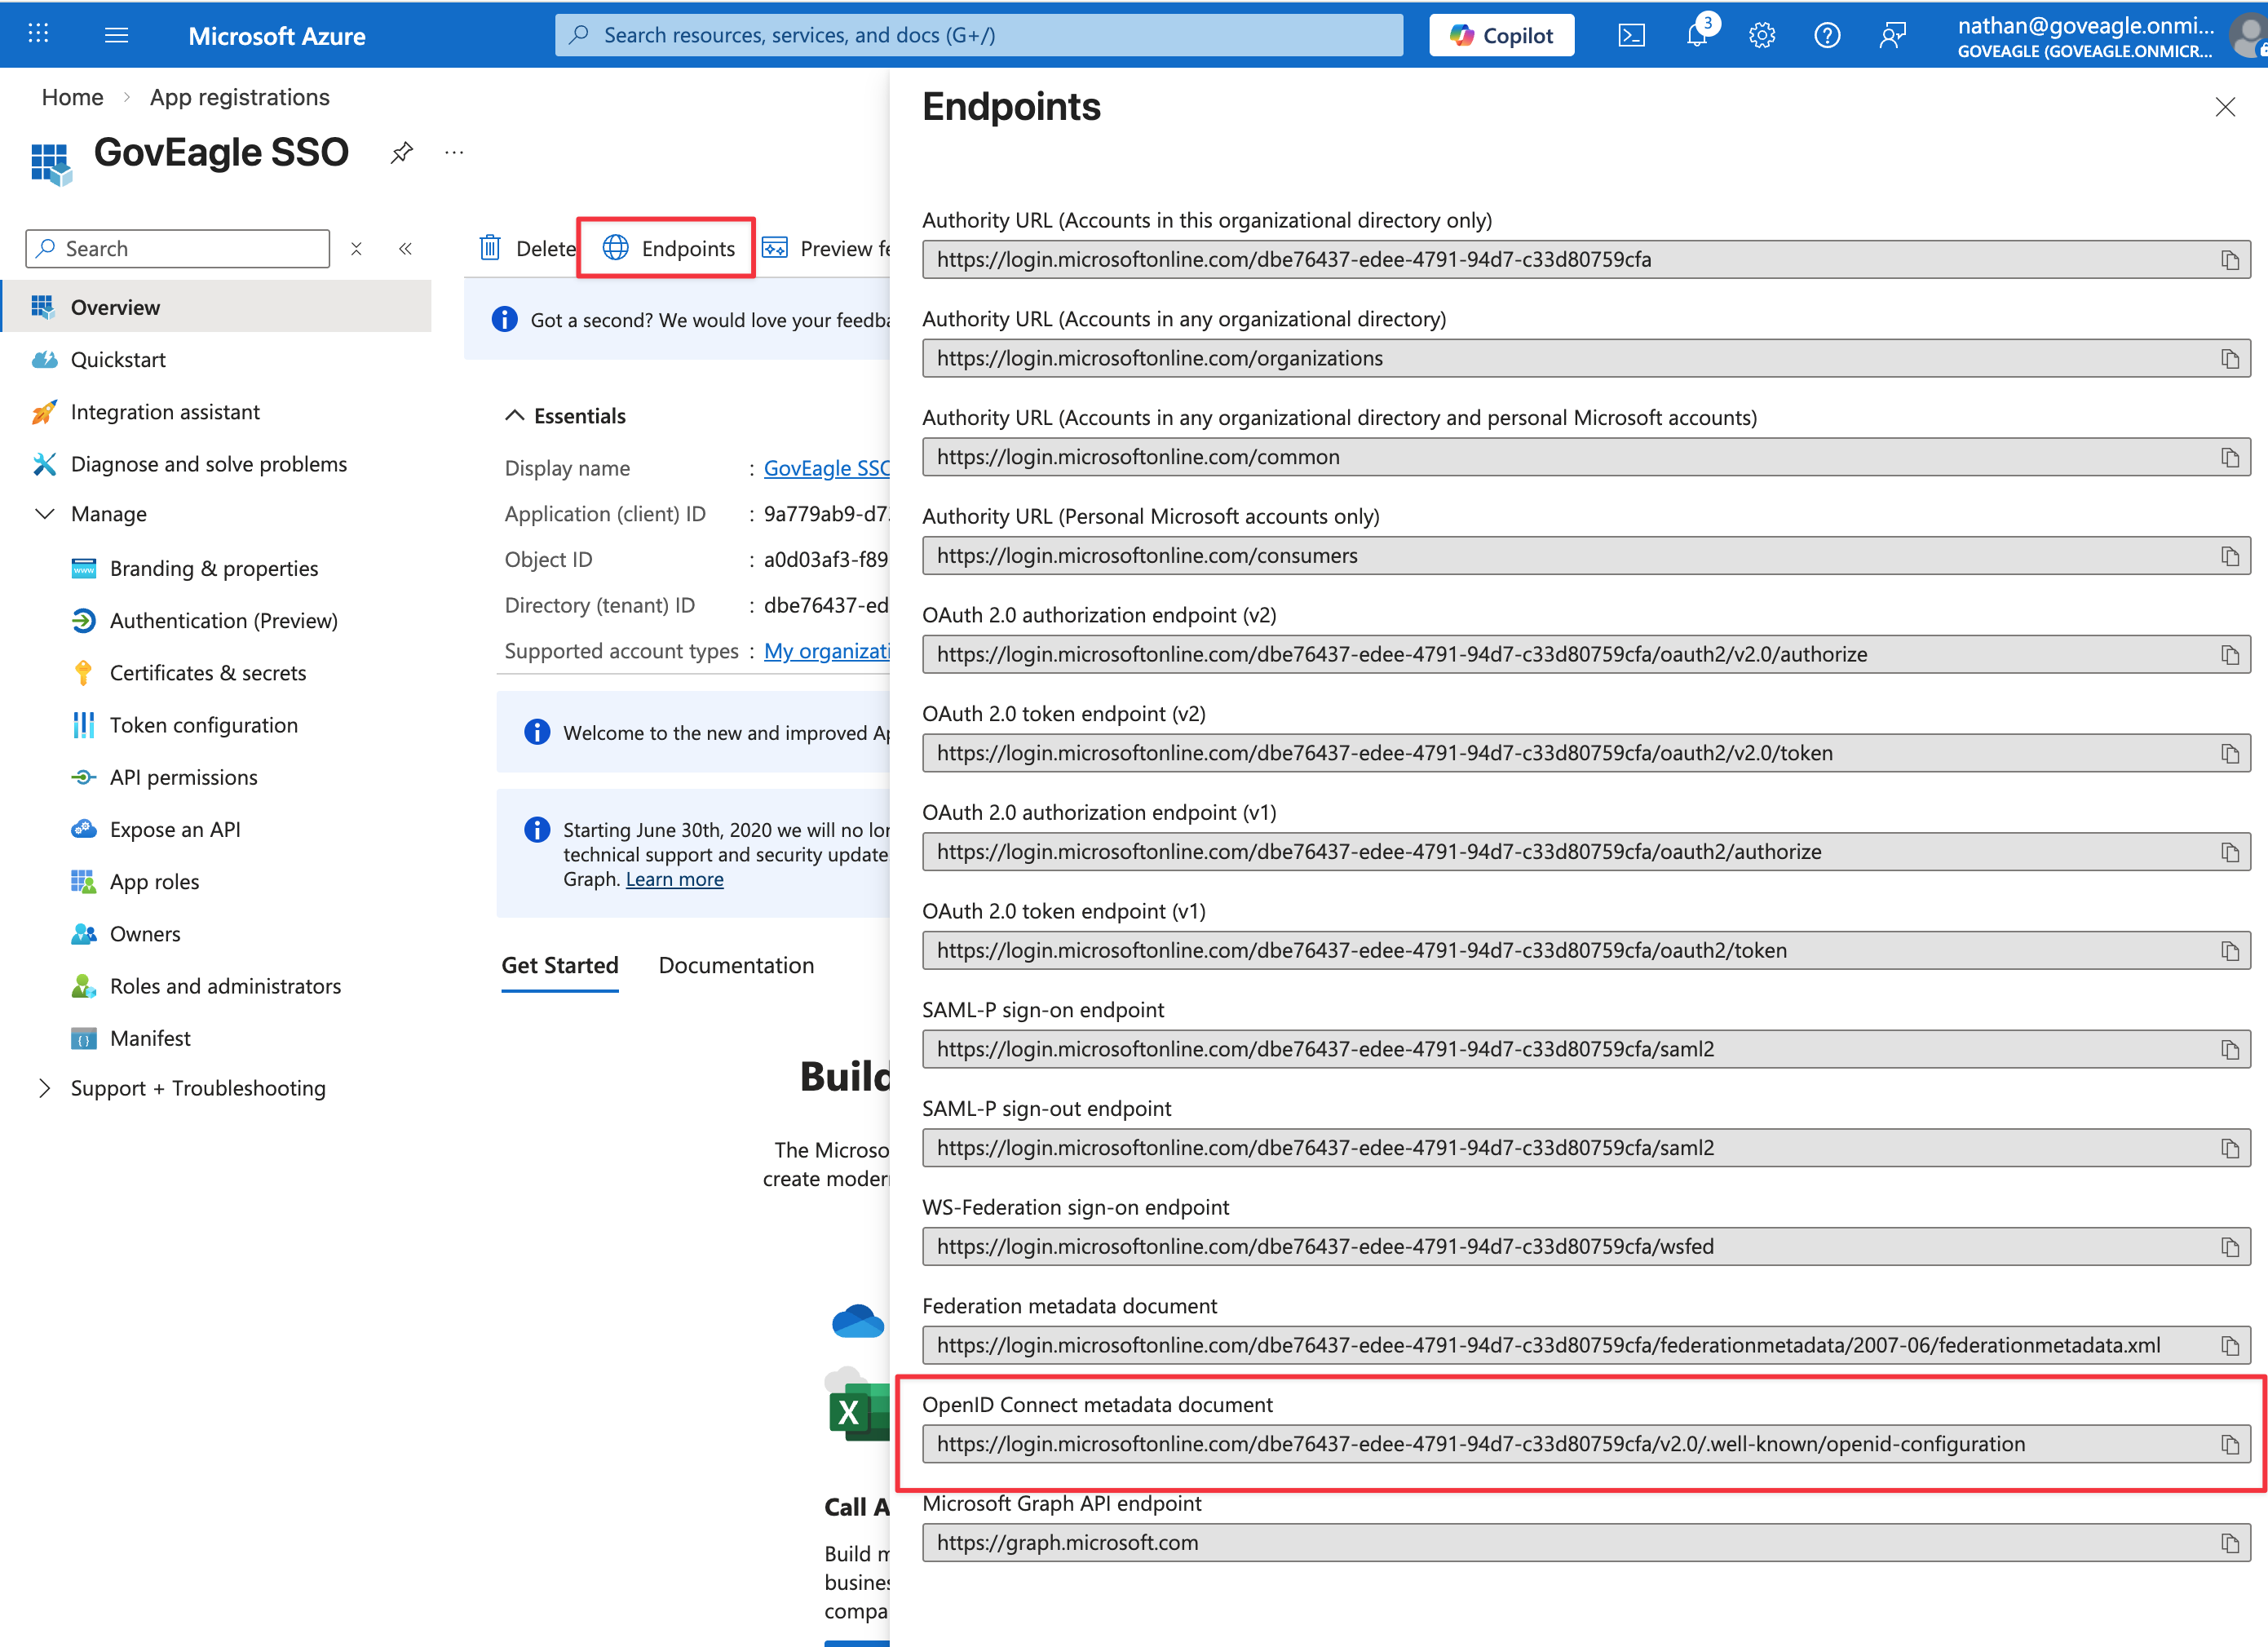
From Endpoints in the app overview, copy the OpenID Connect metadata document URL, and enter it into GovEagle’s OpenID Connect Metadata URL
In GovEagle’s Add SSO Provider form, select which email domains are associated with this SSO provider.
Select Add Provider to save.
After following the steps above, users in your Microsoft Entra ID tenant can sign in to GovEagle via SSO. Your Microsoft Entra ID configuration controls which users can use this app.
Troubleshooting
Sign-in fails right after your identity provider authenticates you
If you complete sign-in at your identity provider, including any MFA prompt or push notification, and are then returned to GovEagle with an Access Denied error, the most likely cause is that your IdP is not sending an email claim.
GovEagle matches every user by email address. If the token your IdP returns has no email claim, or the claim is empty, there is no way to identify the user and sign-in is rejected.
Quick check. Open your provider's discovery document in a browser. It is the same URL you pasted into the OpenID Connect Metadata field, and it usually ends in /.well-known/openid-configuration. Confirm that scopes_supported includes email. If it lists only openid, the application is not releasing email addresses and sign-in cannot work until that is changed in your IdP.
Where to enable it:
Microsoft Entra ID: go to Token configuration > Add optional claim > ID, then add the
emailclaim. Entra only emits anemailclaim when this is configured or the user has a mailbox.Okta: under Assignments, confirm the
emailscope is granted and that each assigned user has an email address in their Okta profile.Duo SSO: in the Duo Admin Panel, open your GovEagle OIDC application and enable the
emailandprofilescopes on the Scopes tab. Confirm theemailclaim maps to the attribute that holds the user's address, which ismailfor Active Directory sources. Duo publishes a separate discovery document per application, so check the one for the exact application you connected.Any other OIDC provider: enable the
openid,profile, andemailscopes, and make sure the userinfo endpoint returns at leastsub,email, andname.
Finally, confirm the individual user has an email address populated in your directory. A user whose email attribute is blank will fail to sign in even when the claim itself is configured correctly.
Only some users get Access Denied
If most of your users sign in fine but a new or specific user is sent back to GovEagle with Access Denied, the claim configuration is not the problem. Most identity providers only release a user to an application the user has been assigned to. In Microsoft Entra ID this is Enterprise applications > your GovEagle app > Users and groups; in Okta it is the application's Assignments tab; in PingFederate it is the application's access policy. Add the user (or their group) there, then have them sign in again. Nothing needs to change in GovEagle.
Test a new provider before you enable it
Every provider card has a Try logging into GovEagle with this provider option. This opens a sign-in link that goes directly to that one provider and skips domain routing entirely, so you can prove a new provider works while your existing provider stays live.
Do not disable a working provider in order to test a new one. If the new provider is misconfigured, everyone with an email address on those domains will be unable to sign in until you turn the old one back on. For the same reason, only use Enable without verifying if you are certain the provider works.
"No validated domains available"
Email domains must be validated by GovEagle before they can be attached to an SSO provider. If the Add Provider form shows no domains to select, contact support@goveagle.com and we will add them.
Can I configure more than one provider for the same email domain?
Yes. When two providers cover the same domain, users are asked which one to use at sign-in. Note that this is rarely what you want if your goal is simply to add MFA. Multi-factor authentication is handled by your identity provider, not by GovEagle, so it is usually better to either enable MFA within your existing provider or replace that provider with the one that enforces MFA.
Still stuck?
Contact support@goveagle.com with the approximate time of the failed sign-in and the email address used. We can look up the exact reason your identity provider returned and tell you which setting to change.