The Workflows tab on every opportunity lets your team run deep, multi-step AI analyses with a single click; the kind of work that would normally take a full afternoon, like checking a draft proposal against every solicitation requirement. Each workflow reads the documents on your opportunity, works through the analysis in the background, and delivers a structured report you can review, refine, edit, and export, or fills in a Word, PowerPoint, or Excel file of your own.
Available workflows
Workflow | What it does |
|---|---|
Gap Analysis | Scores your past performance and capability materials against every requirement in the solicitation, flags the gaps, and recommends actions to close them. |
Proposal Review | Reviews a draft proposal against the solicitation requirements, with compliance and compellingness scoring and specific suggestions. Supports Pink, Red, Gold, and White-Glove team review styles. |
Price-to-Win | Models what competitors are likely to bid and what the customer expects to pay, to find the price where you can win while still executing profitably. |
Black Hat Review | Assesses the competitive landscape and how the customer is likely to perceive your team compared to likely competitors. |
Need something else? Choose Create custom workflow at the bottom of the workflow list to teach GovEagle a new analysis from a description or an example deliverable. See Creating a custom workflow below.
Running a workflow
Open your opportunity and go to the Workflows tab.
Click Start workflow and pick a workflow from the list.
Answer the setup questions. Each workflow asks for what it needs (e.g., Gap Analysis asks whether to use your Compliance Matrix or the RFP/PWS documents as the requirements source, and lets you select past performance materials, teaming partner capability statements, and key personnel resumes).
Answer any follow-up questions. The AI reviews your setup answers and may ask a few more questions to make sure it gets the analysis right, then the run begins.
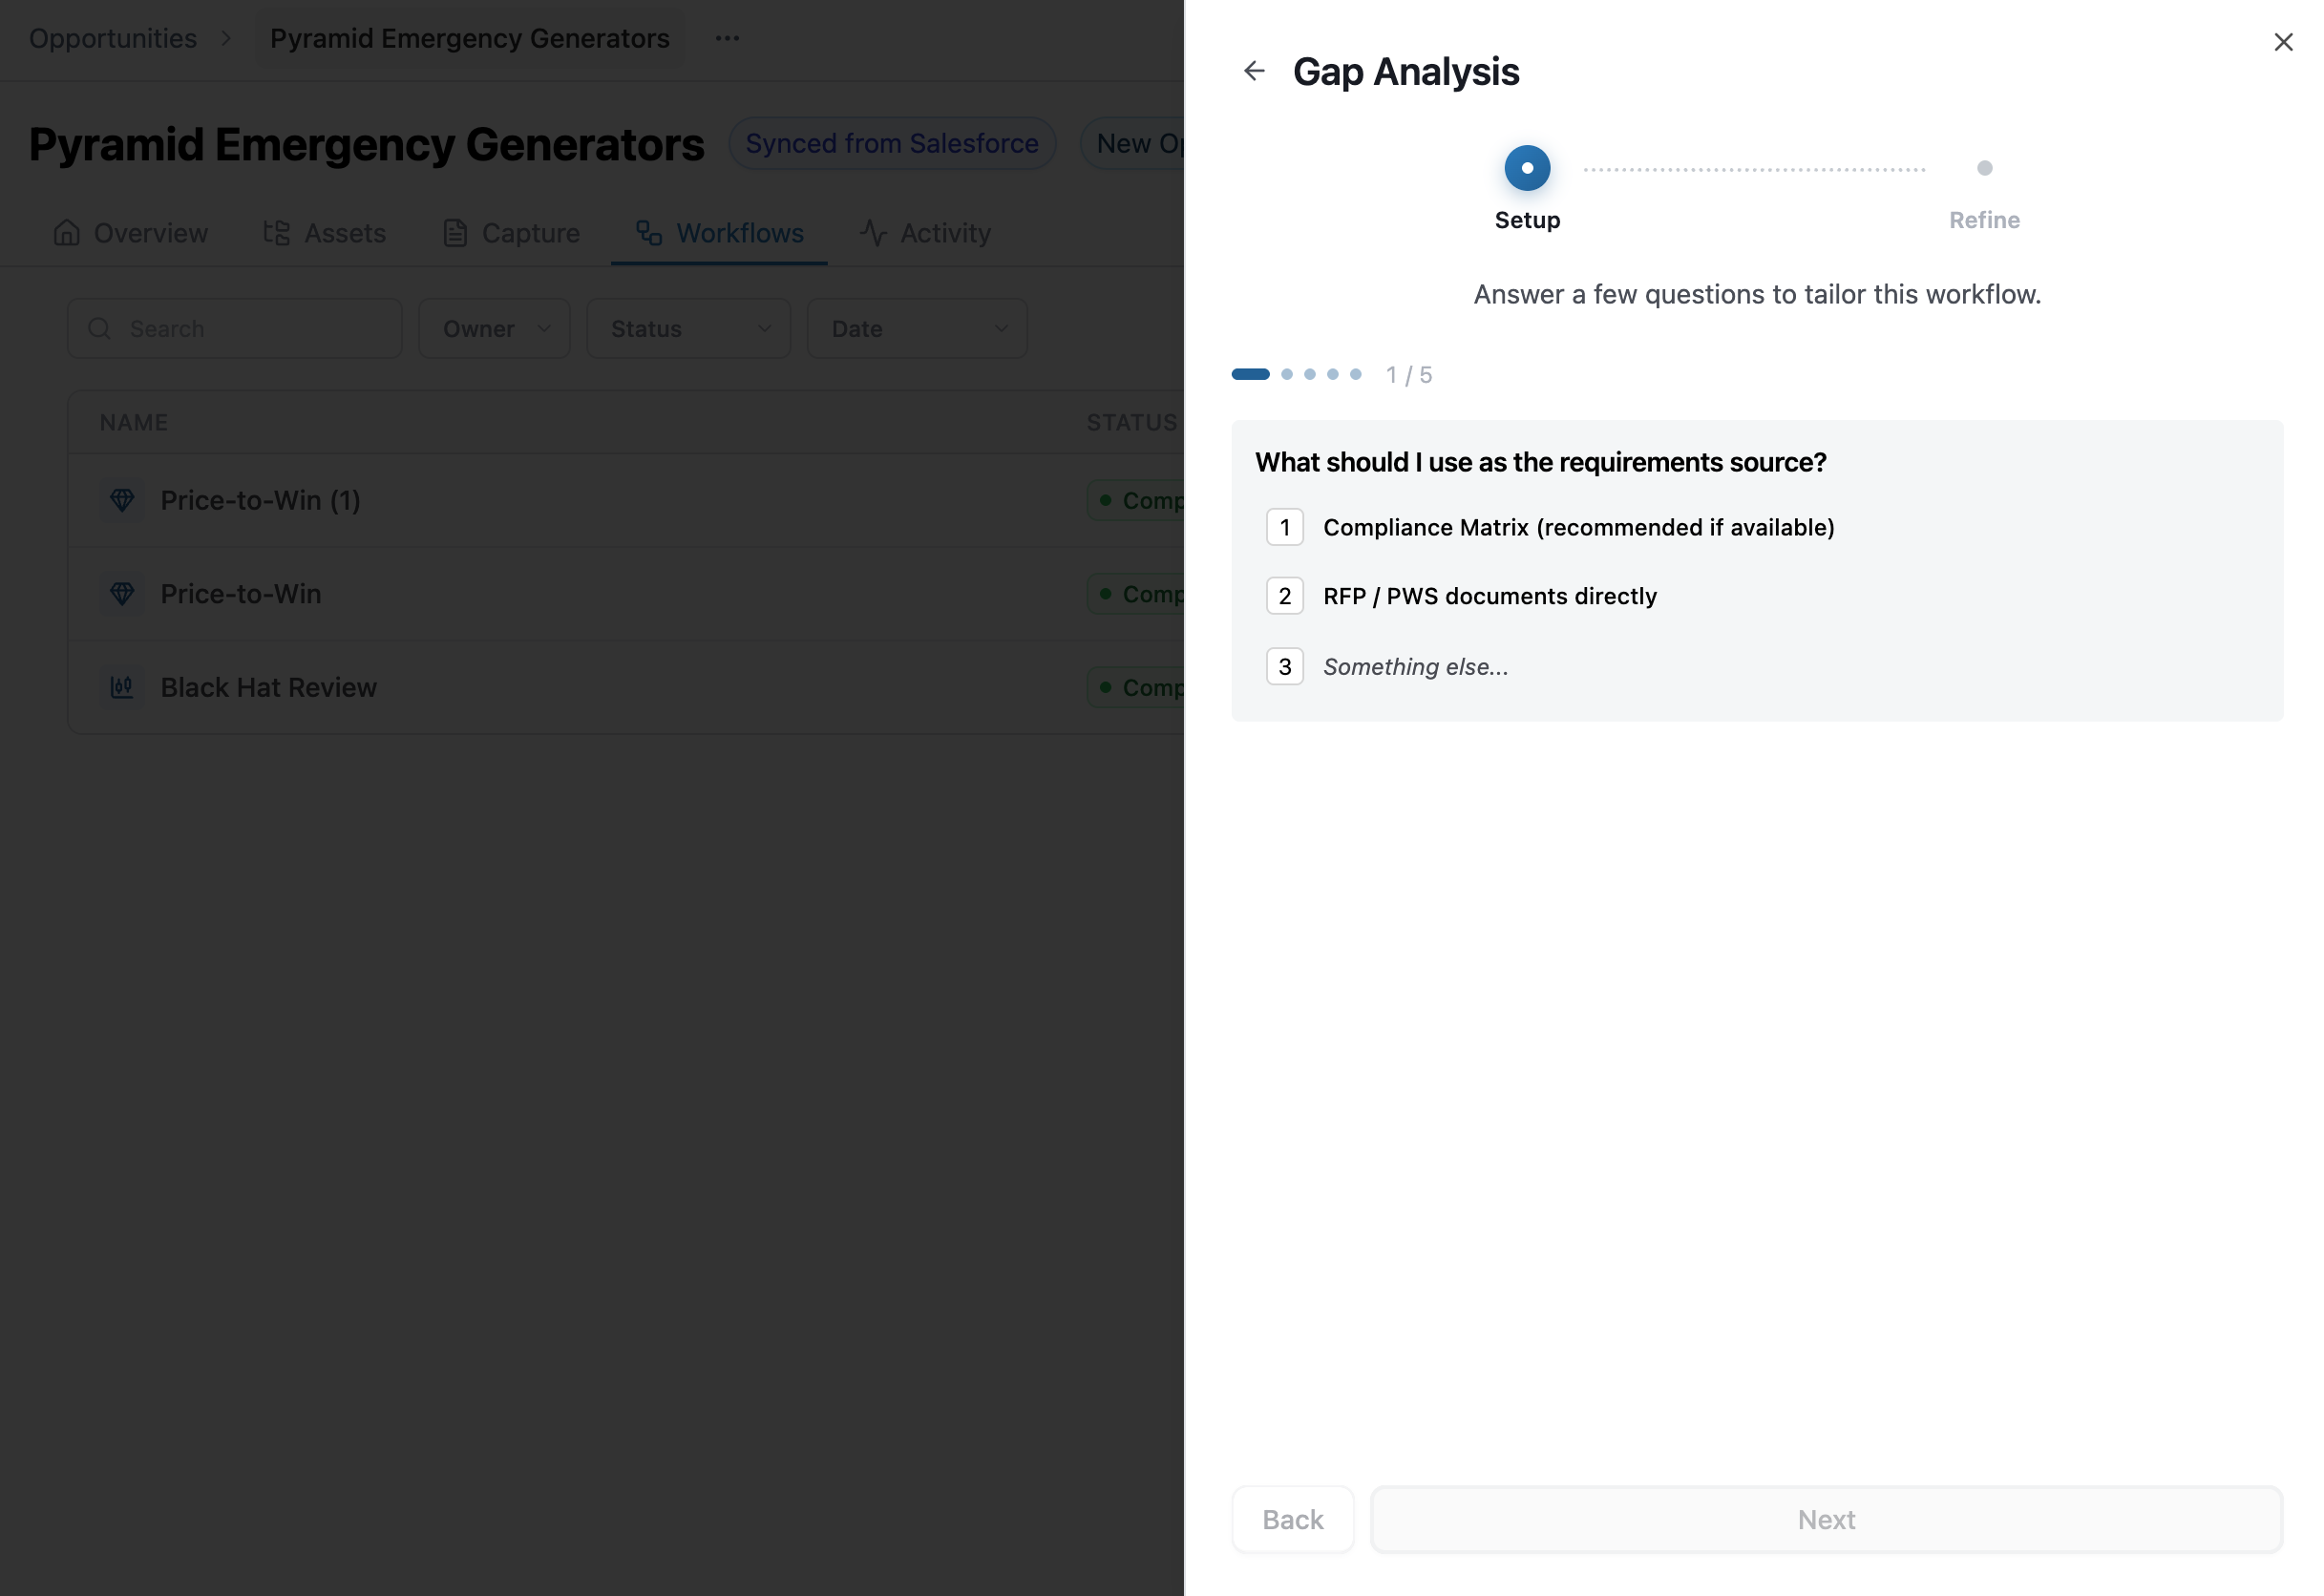
Workflows run in the background, so you can keep working anywhere in GovEagle while they generate. A notification appears in the app when the run finishes. If you'd rather get an email, click Email me on the confirmation that appears when the run starts, or use the bell icon on the report. Most runs finish within a few minutes; thorough analyses over large document sets can take up to 30 minutes.
Tracking your runs
Every run for the opportunity appears in the Workflows tab, so the whole team can see what has been run, by whom, and what's still in flight. Each run shows one of four statuses:
Planning: The run is being set up and hasn't started yet.
In progress: The AI is working through the analysis.
Complete: The report is ready to open.
Failed: The run hit a problem. Delete it and start a new one.
Runs that produce a file instead of a report show a Word, PowerPoint, or Excel chip next to the workflow name. Use the search box and the Owner, Status, and Date filters to find a specific run. To rename or delete a run, or to download its result without opening it, open the ⋯ menu at the end of its row.
.png)
Note: Deleting a run permanently removes the run and its report for everyone on the opportunity.
Working with the report
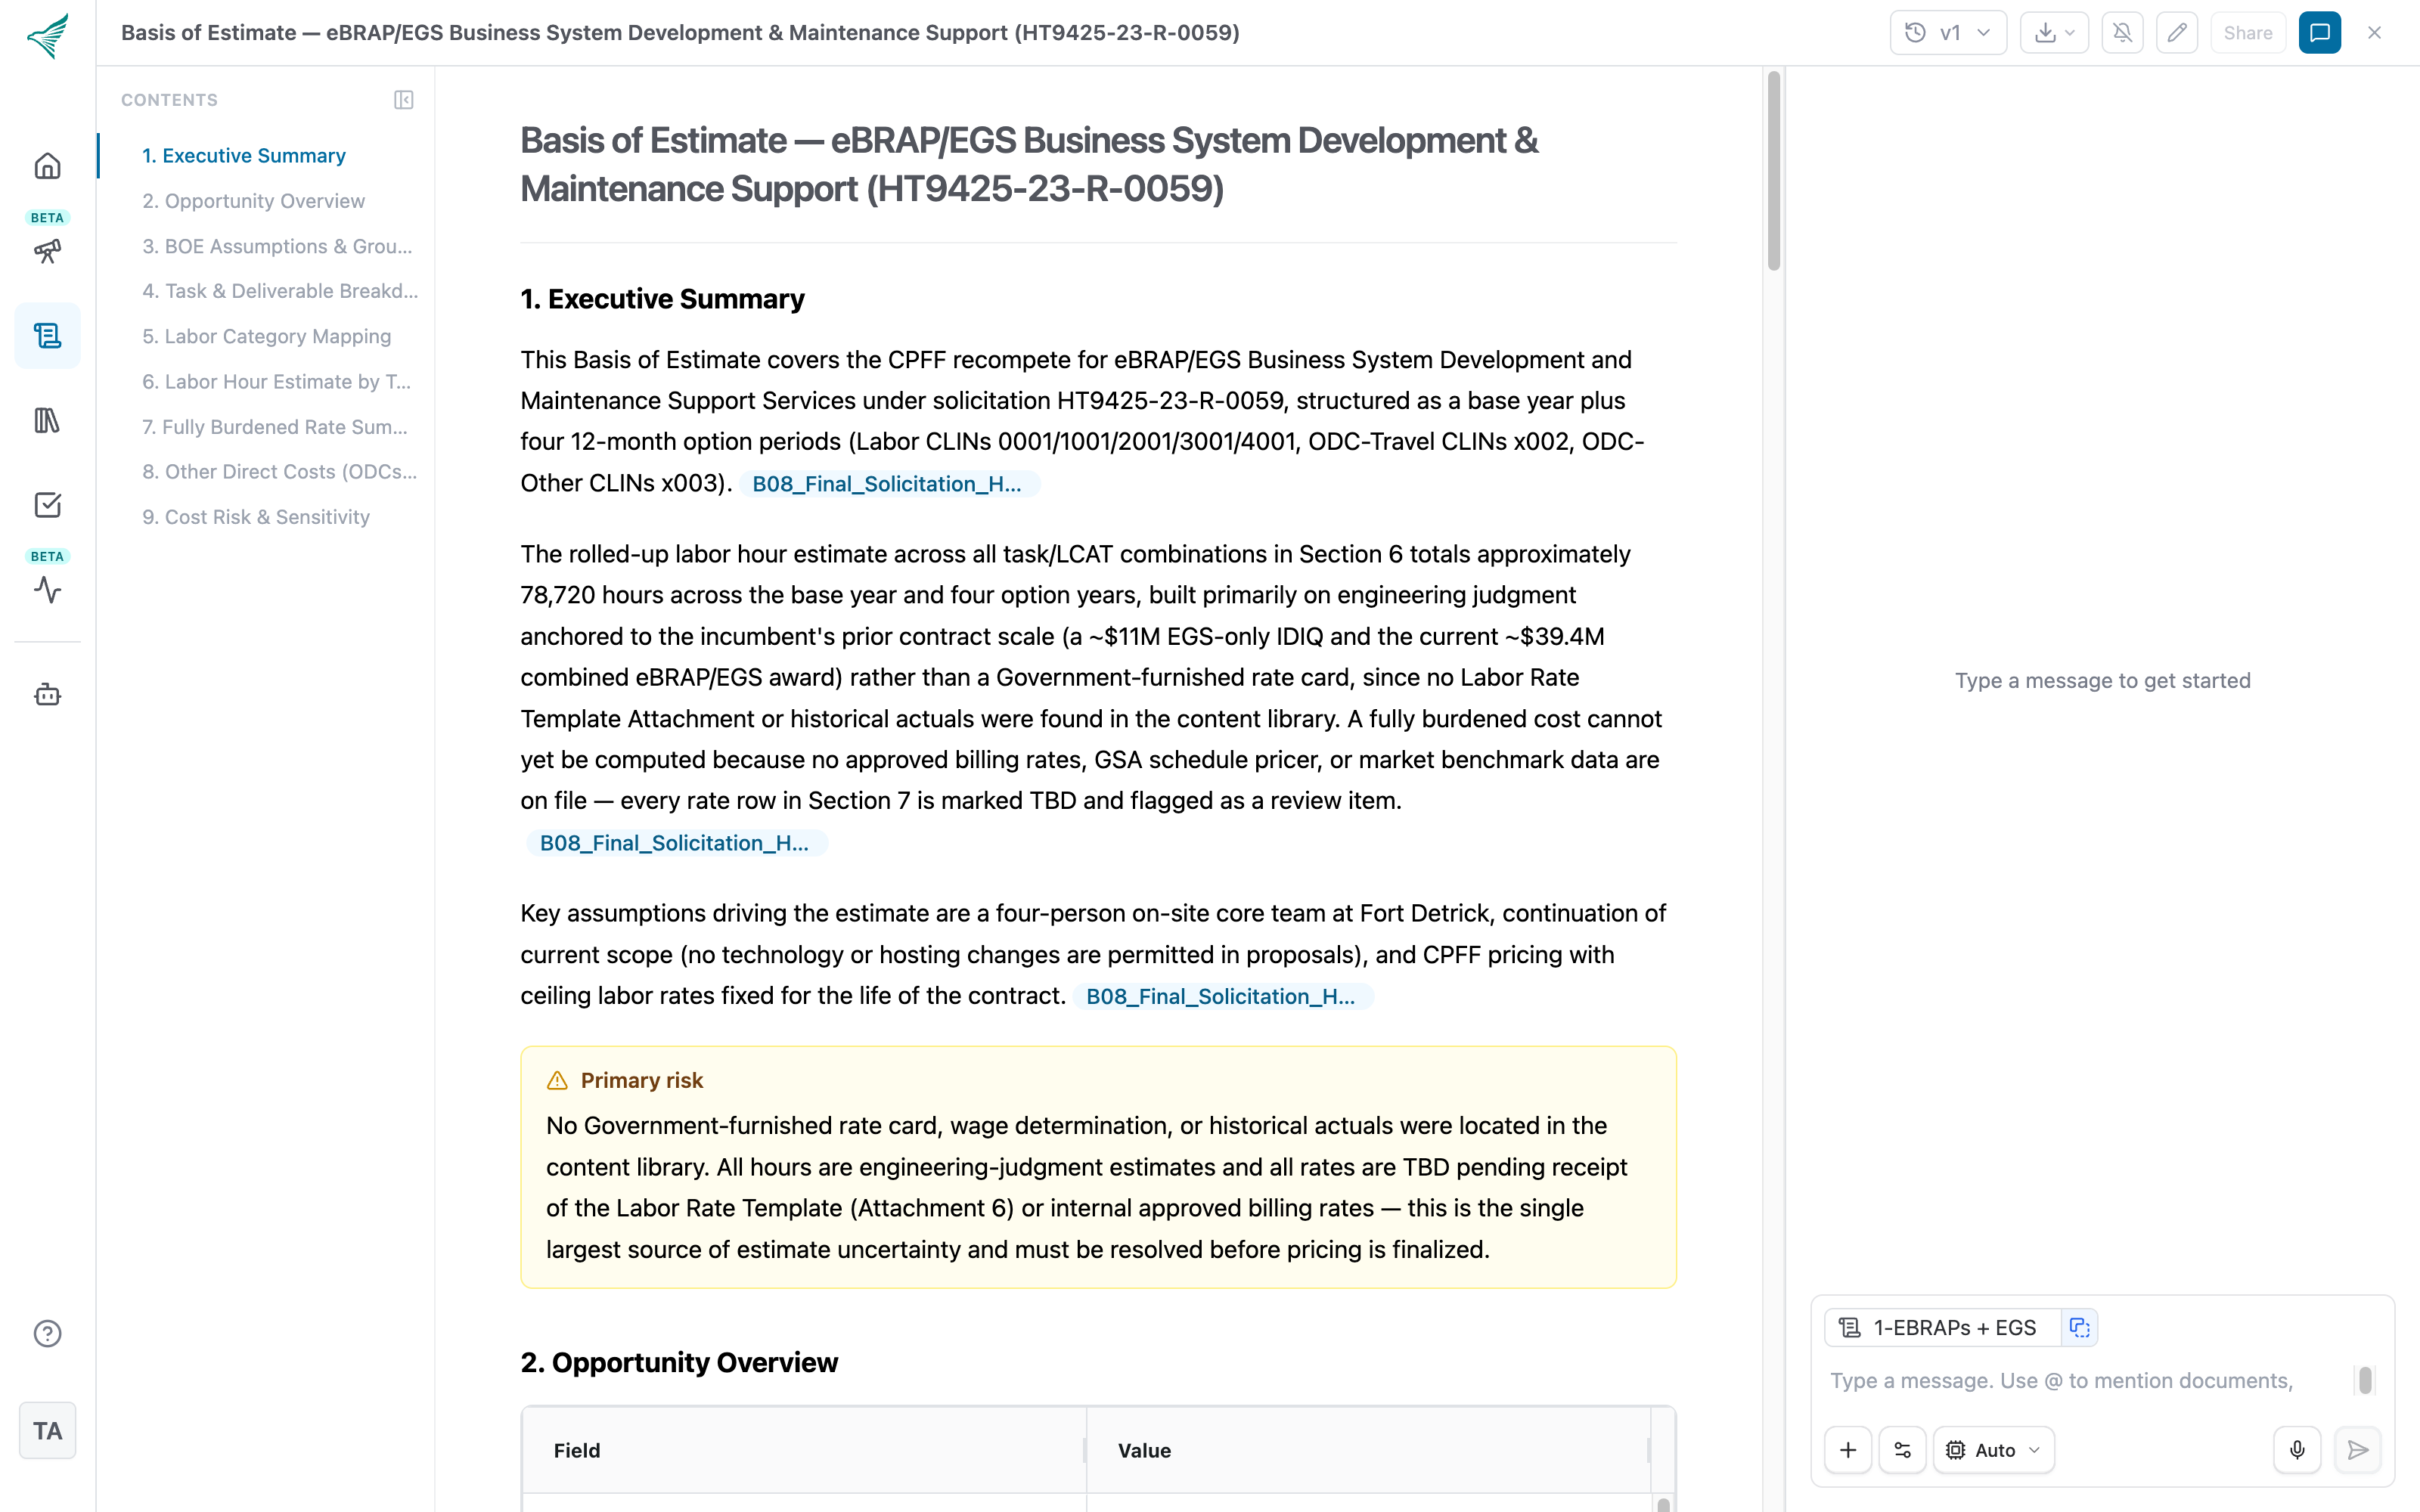
Click any completed run to open its report. Reports are rich, structured documents rather than a wall of text: they use headings, tables, stat cards, callouts, and diagrams, and cite the documents they draw from. Click any citation to open the source document at the cited page.
The report opens full width with three areas:
Contents outline on the left, for jumping between sections.
The report in the middle.
The chat on the right, where you ask the AI for changes.
Navigating with the Contents outline
The Contents outline lists the report's sections. Click an entry to jump to it; the section is highlighted briefly so you can see where you landed. As you scroll, the outline tracks the section you are reading. Click Hide outline to collapse it and give the report more room, and the outline icon to bring it back.
For slide-deck reports, the outline lists one entry per slide.
Asking for changes
Use the chat next to the report to tell the AI what to adjust, for example "re-score section 3," "add a column for risk," or "dig deeper on requirement C.4.2." Each revision is saved as a new version, and the report updates as soon as the AI finishes.
Editing the report yourself
For small fixes you do not need to ask the AI. Click the pencil icon in the report toolbar, or just click into the text, to edit the report directly.
You can:
Edit any text, including headings, and apply bold, italic, underline, highlight, and links.
Turn a paragraph into a heading, list, or quote, and back again.
Edit table cells, add or delete rows and columns, and drag rows to reorder them.
Add new content with the + button: text, tables, stat cards, callouts, quotes, diagrams, dividers, page breaks, and images.
Drag blocks to reorder them, or duplicate and delete them.
A toolbar at the bottom of the report shows Save and Discard while you have changes. Saving creates a new version labeled Manual edit, so your changes are never lost and the AI sees them the next time you ask for a revision. Downloading is paused until you save or discard.
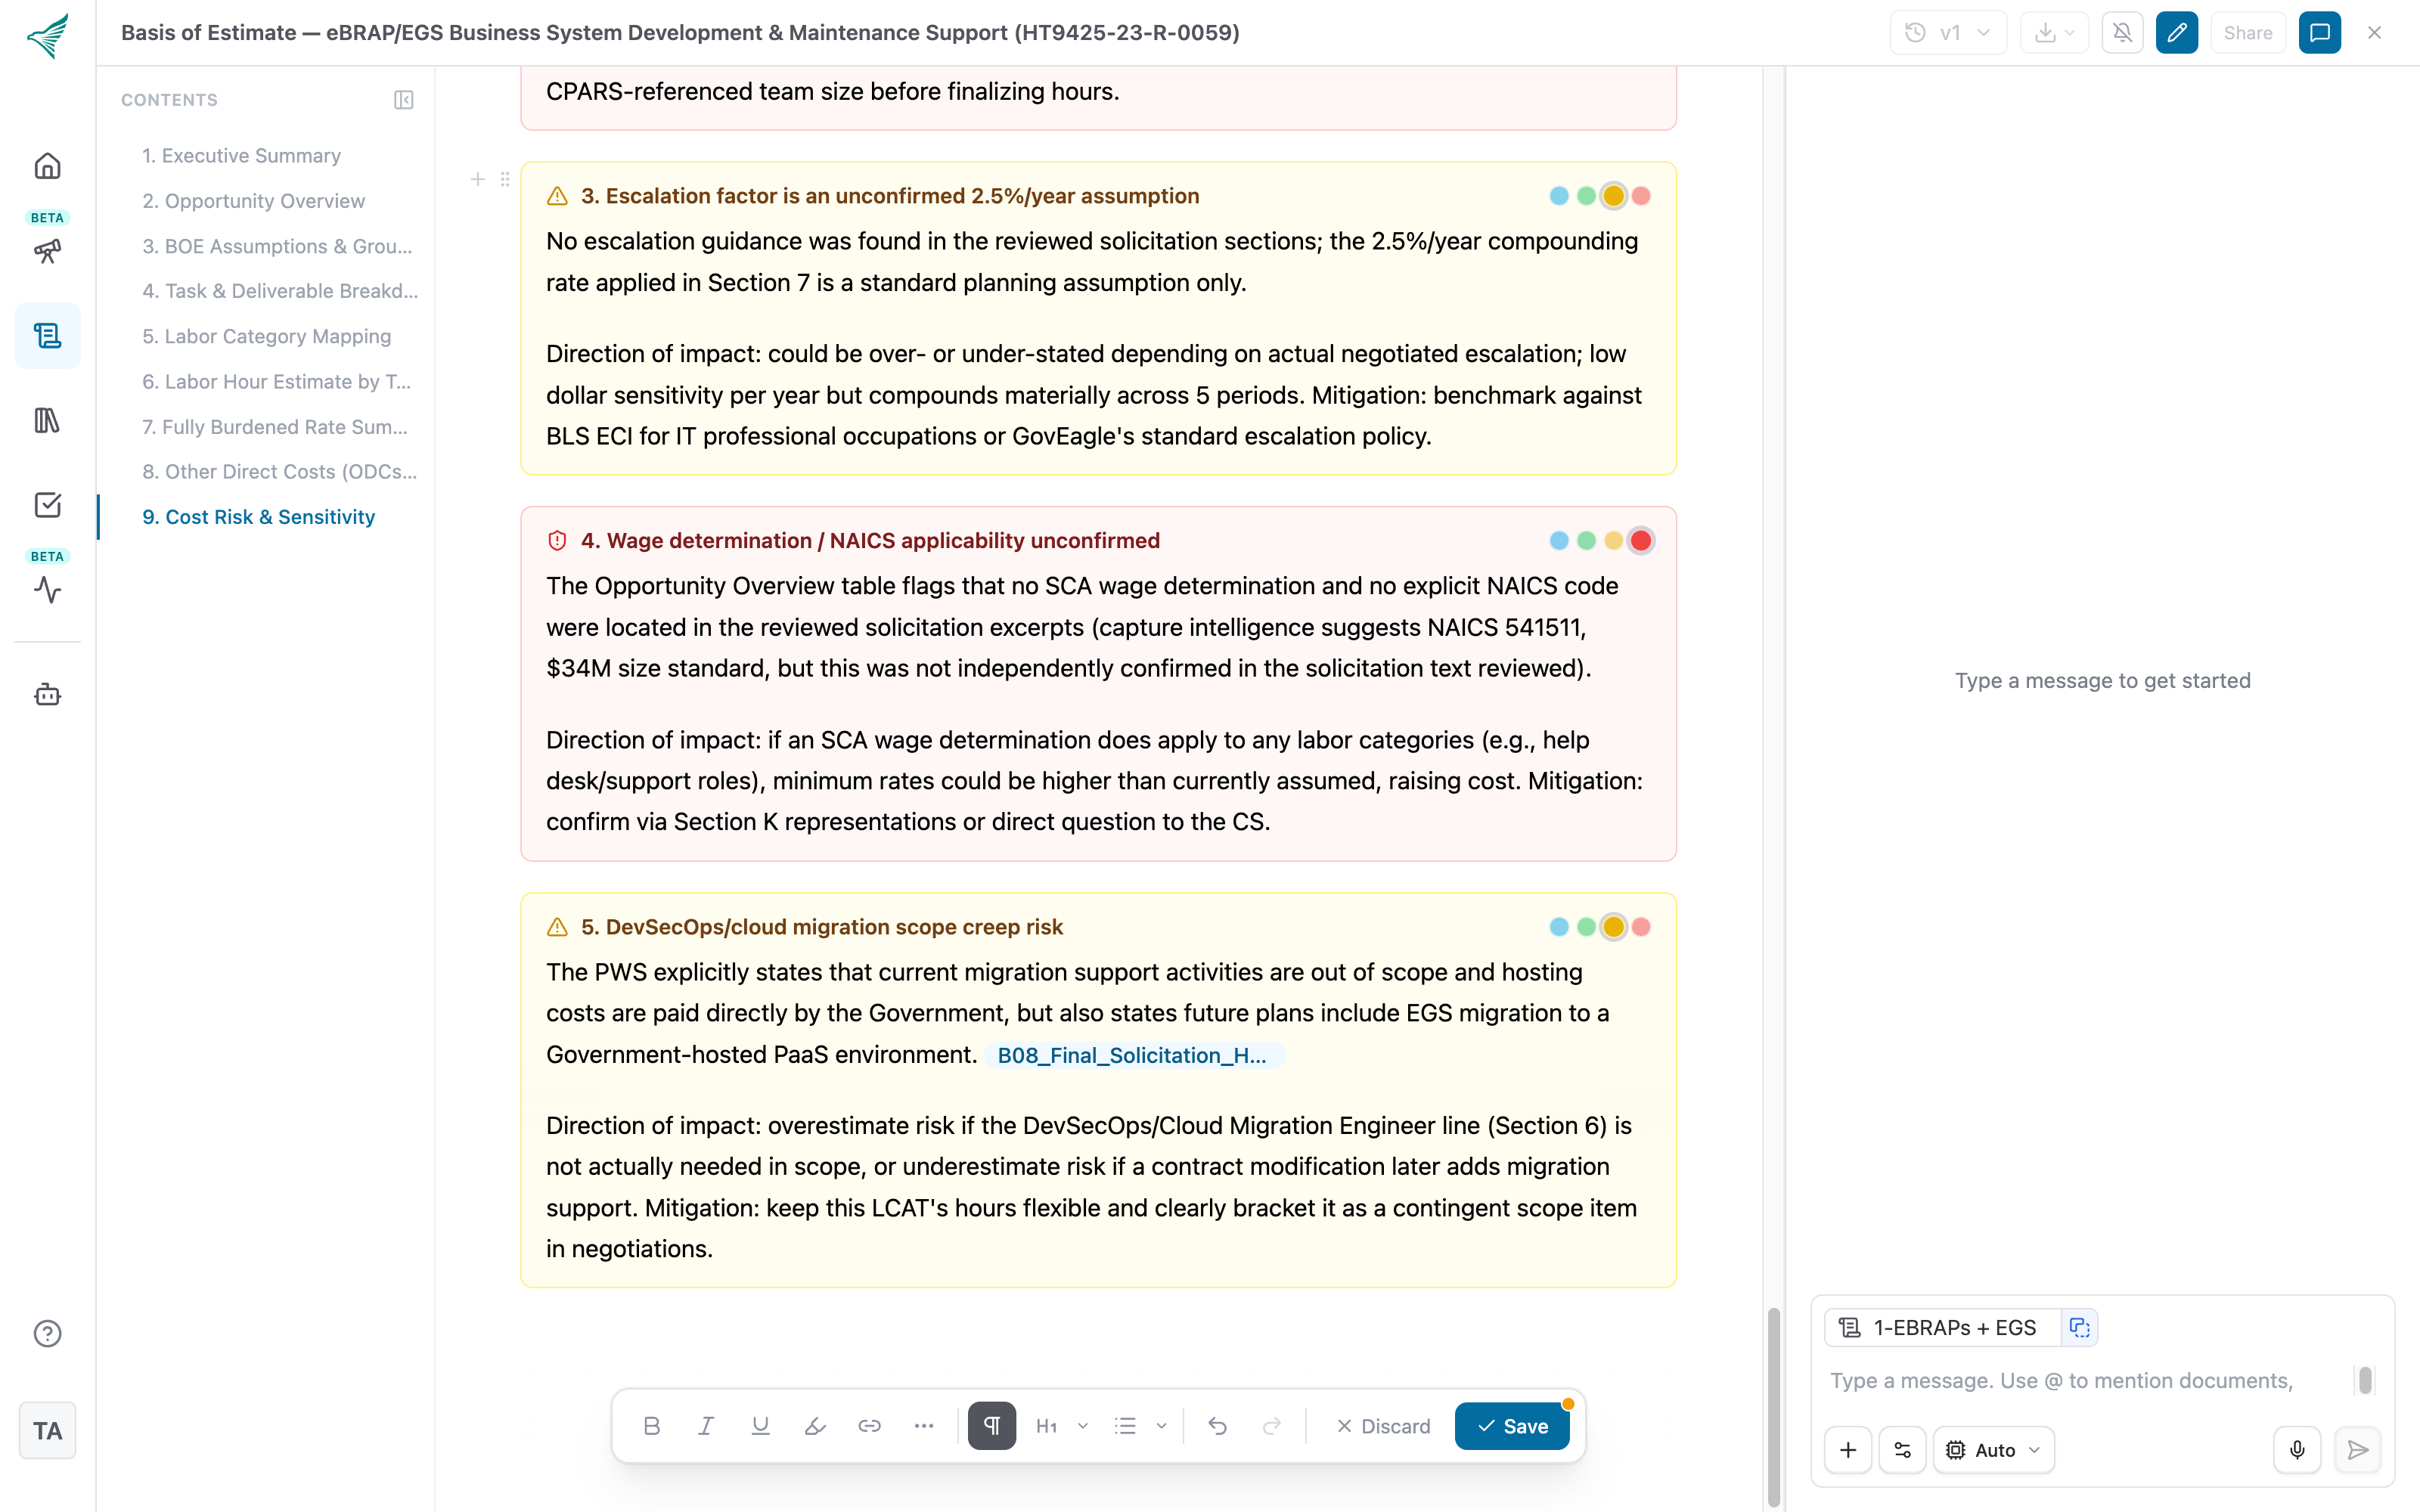
Note: You can only edit the latest version. If you have an older version open, switch back to the latest one to make changes.
Switching between versions
Click the version button (v1, v2, …) to see every version of the report. Versions are labeled by how they were created: Assistant edit, Manual edit, Restored version, and so on. Several manual saves in one sitting are grouped under one entry. Open any older version to compare, give it a name so it is easy to find again, or click Restore this version to make it the latest. Nothing is ever overwritten.
Downloading, printing, and exporting tables
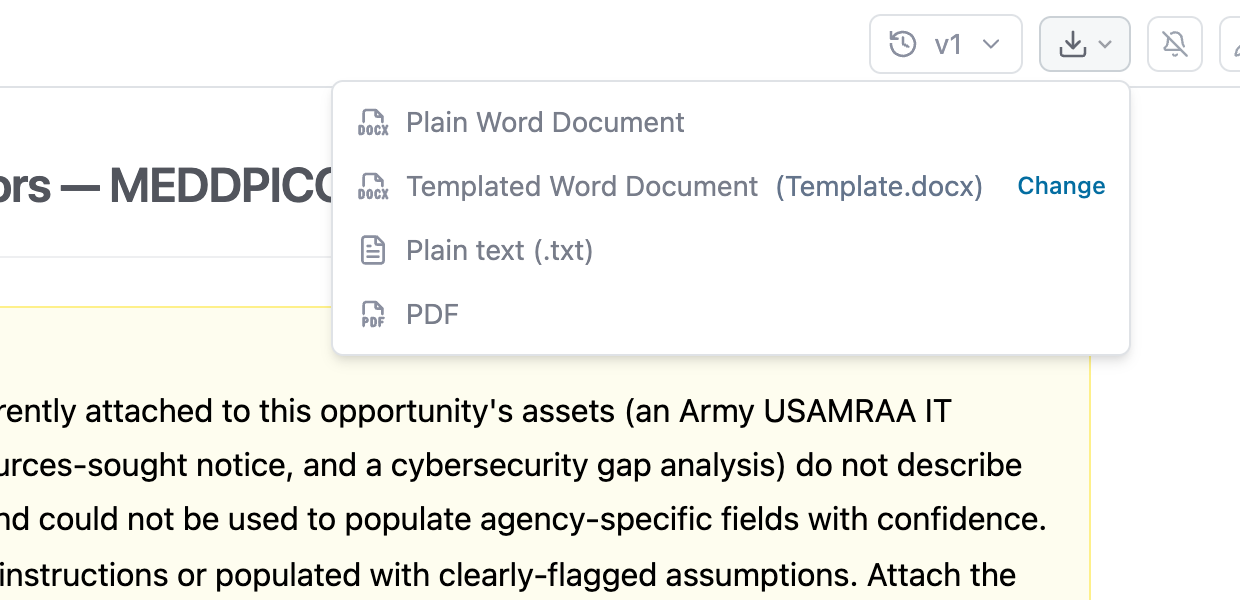
Click Download to save the report as a Plain Word Document, a Templated Word Document in your company's formatting (see below), or Plain text (.txt), or choose PDF to print it. Slide-deck reports offer Plain PowerPoint and Templated PowerPoint instead. Any table in the report can be exported to Excel with one click, or expanded to full screen for easier reading.
Downloading in your company's template
A templated download rebuilds the report inside a Word or PowerPoint template you provide, so the file already has your fonts, heading styles, headers and footers, page setup, and slide layouts. The report in GovEagle stays as it is.
Open the report and click Download.
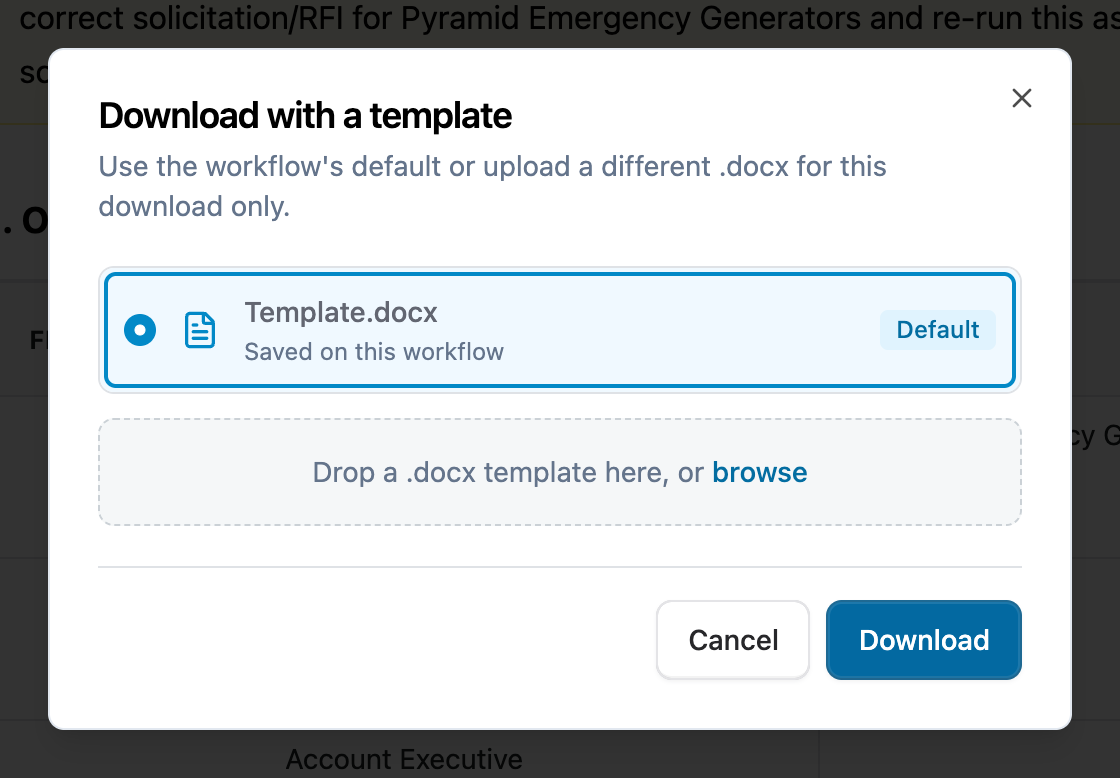
Choose Templated Word Document (or Templated PowerPoint for a slide deck). If the workflow has a default template, its file name is shown next to the option and the download starts right away; click Change to use a different template for this download only. If there is no default, the option reads (choose a template…) and opens the template picker.
In Download with a template, select the workflow's default or drop in a
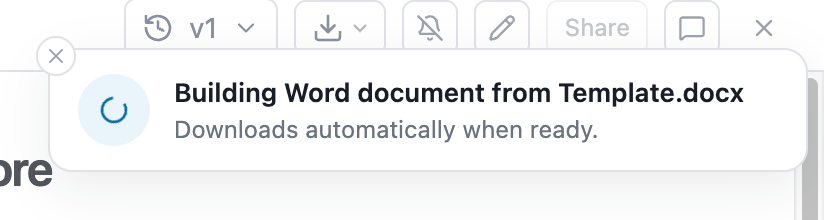
.docx(.pptxfor slide decks) from your computer. If you manage the workflow, click Set as default to save the selected template for everyone who downloads from it. Then click Download.A notification shows Building Word document from your template's name while the AI formats the report. You can keep working; the file downloads automatically when it is ready, and the notification offers Save again if you need another copy. Long reports can take a few minutes. If the build fails, click Retry or Download plain Word document instead.
Note: GovEagle keeps the templated file for each report version. Downloading the same version with the same template again is instant. After you or the AI change the report, the next templated download is built fresh from the new version.
Note: The template must match the report type: .docx for documents and tables, and .pptx for slide decks. Older .doc and .ppt files, PDFs, and Google Docs exports will not work. The creator of a personal workflow, and admins for organization workflows, can set the default template; built-in GovEagle workflows have no default, so pick a template for each download.
Sharing with your team
Everyone with access to the opportunity can open and read any run's report. To change a report a teammate created, click the pencil or chat icon and GovEagle will ask you to duplicate it first. You get your own copy with its own chat, and the original stays untouched.
Note: You need edit access to the opportunity to start, rename, or delete workflow runs. Users with view-only access can still open and read the results.
Creating a custom workflow
If the built-in workflows do not cover an analysis your team runs regularly, you can teach GovEagle a new one.
In the Start workflow list, choose Create custom workflow, or go to Settings → Workflows and click New under Your workflows.
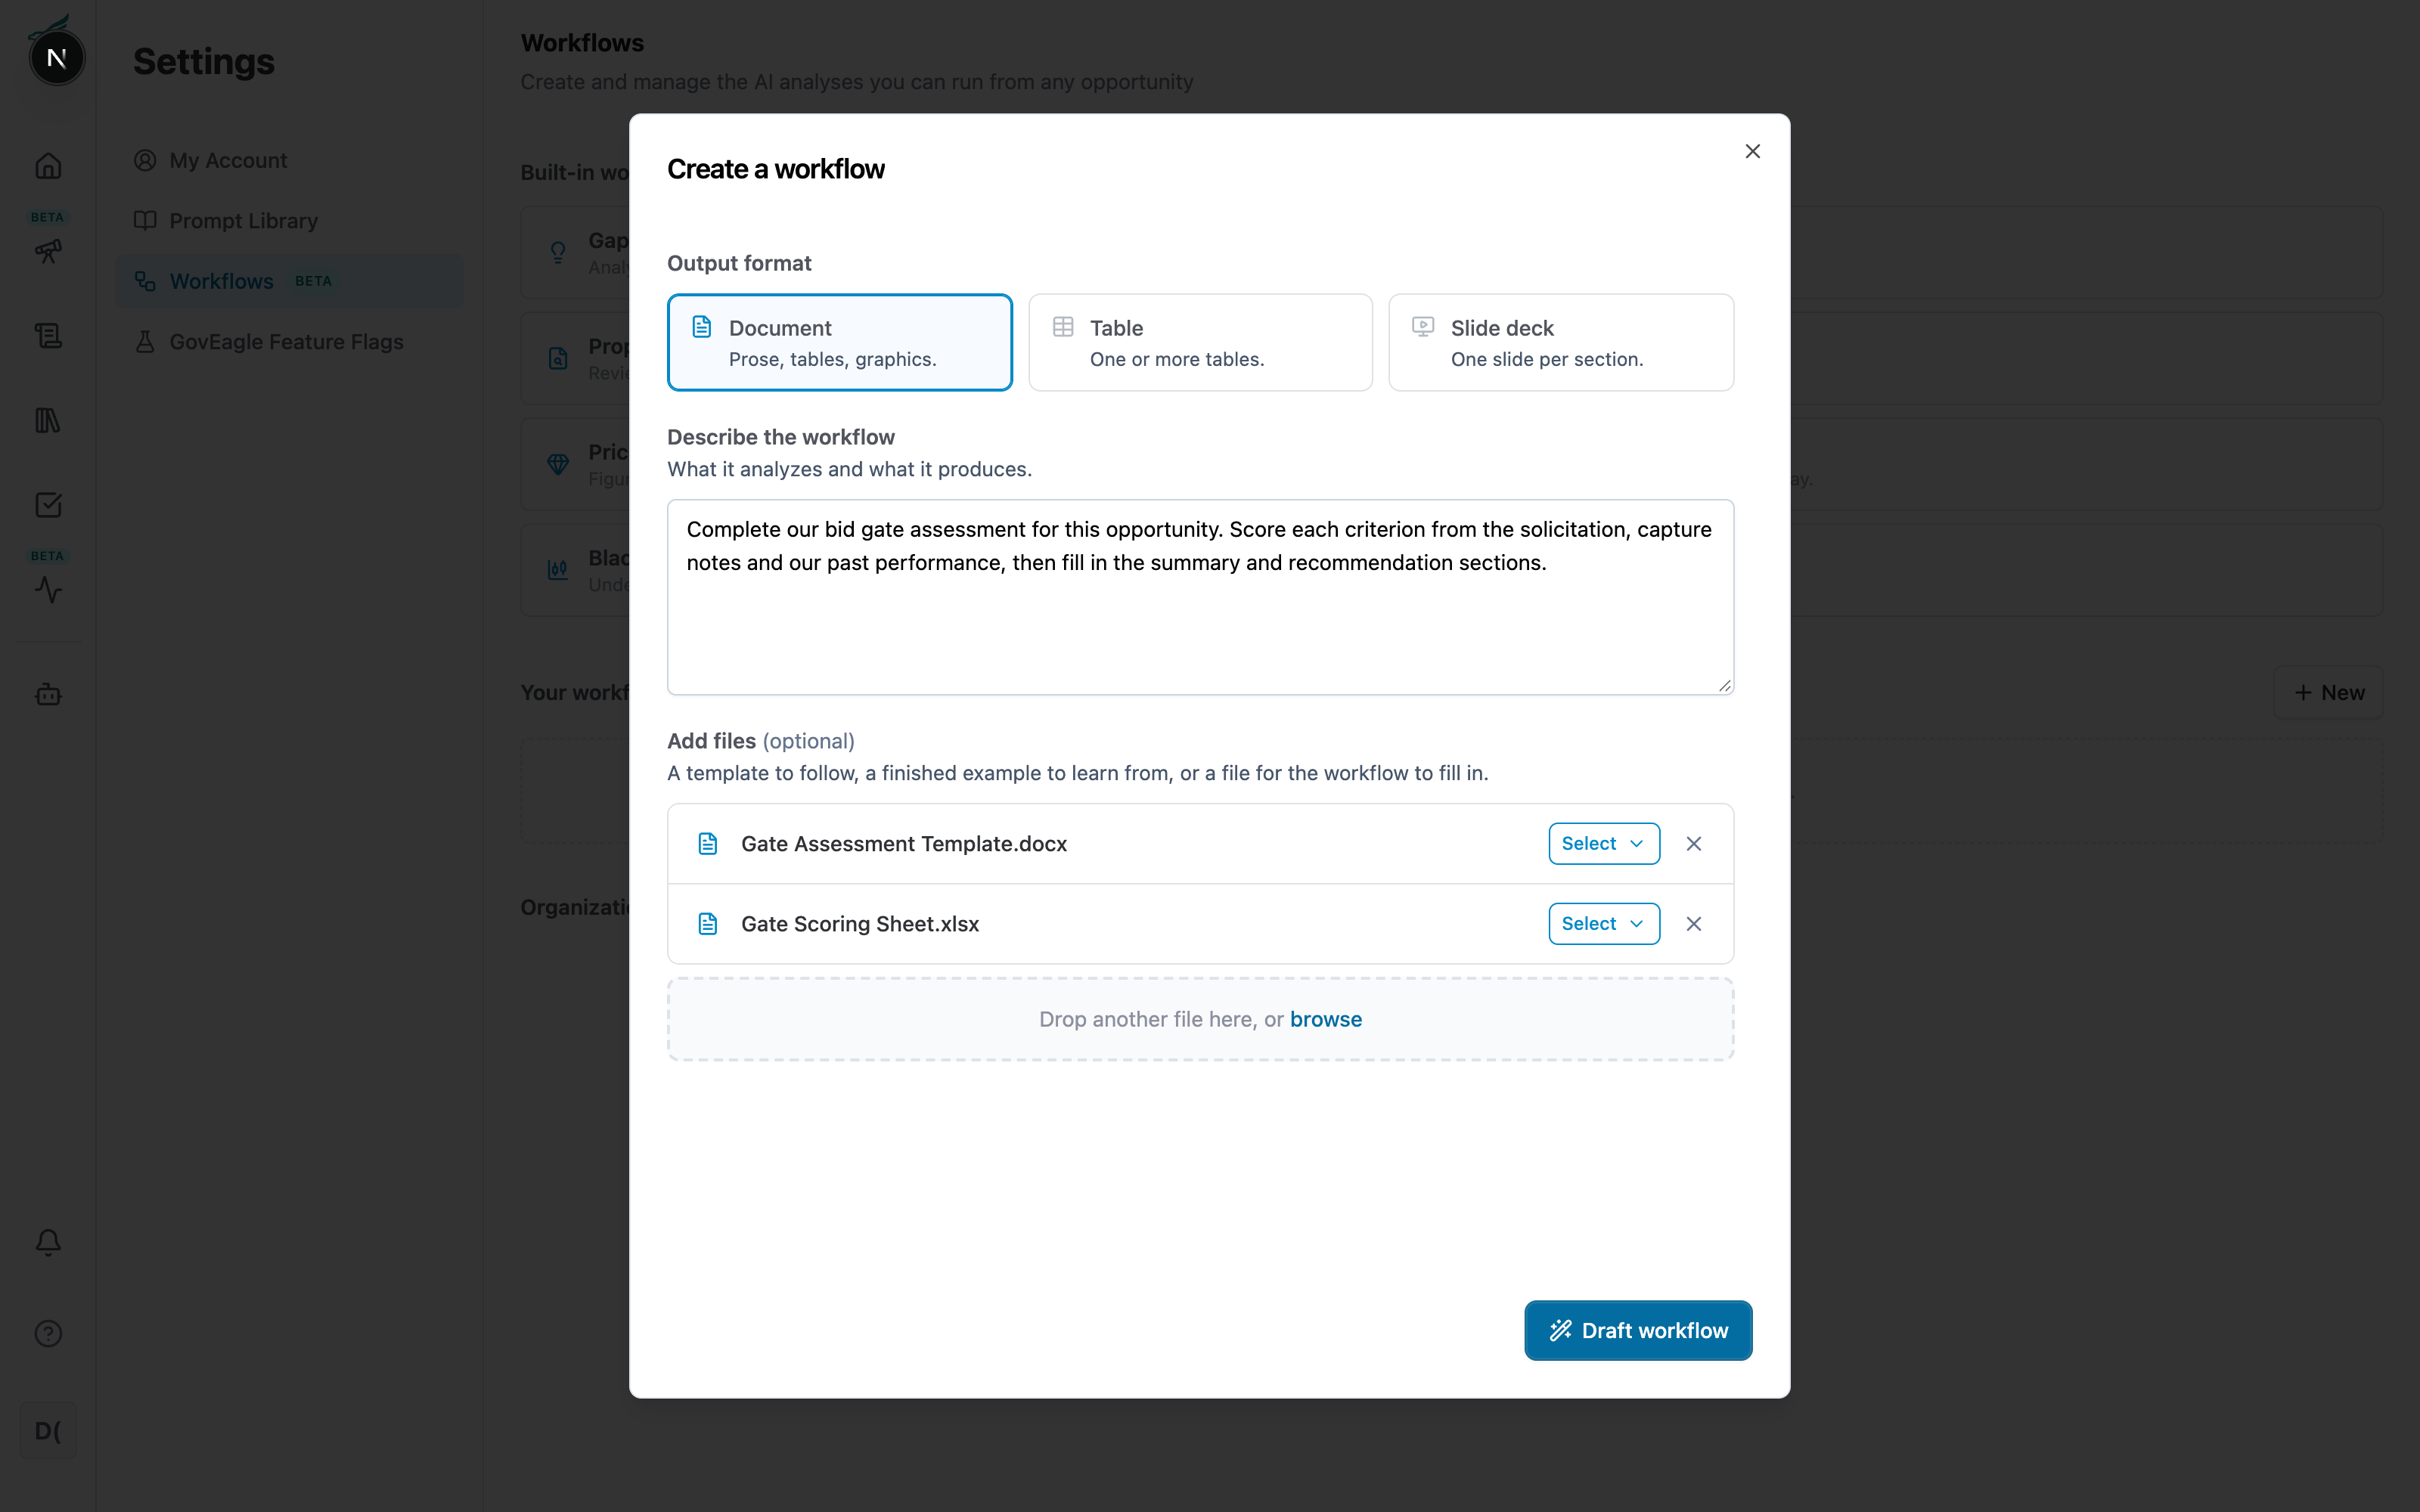
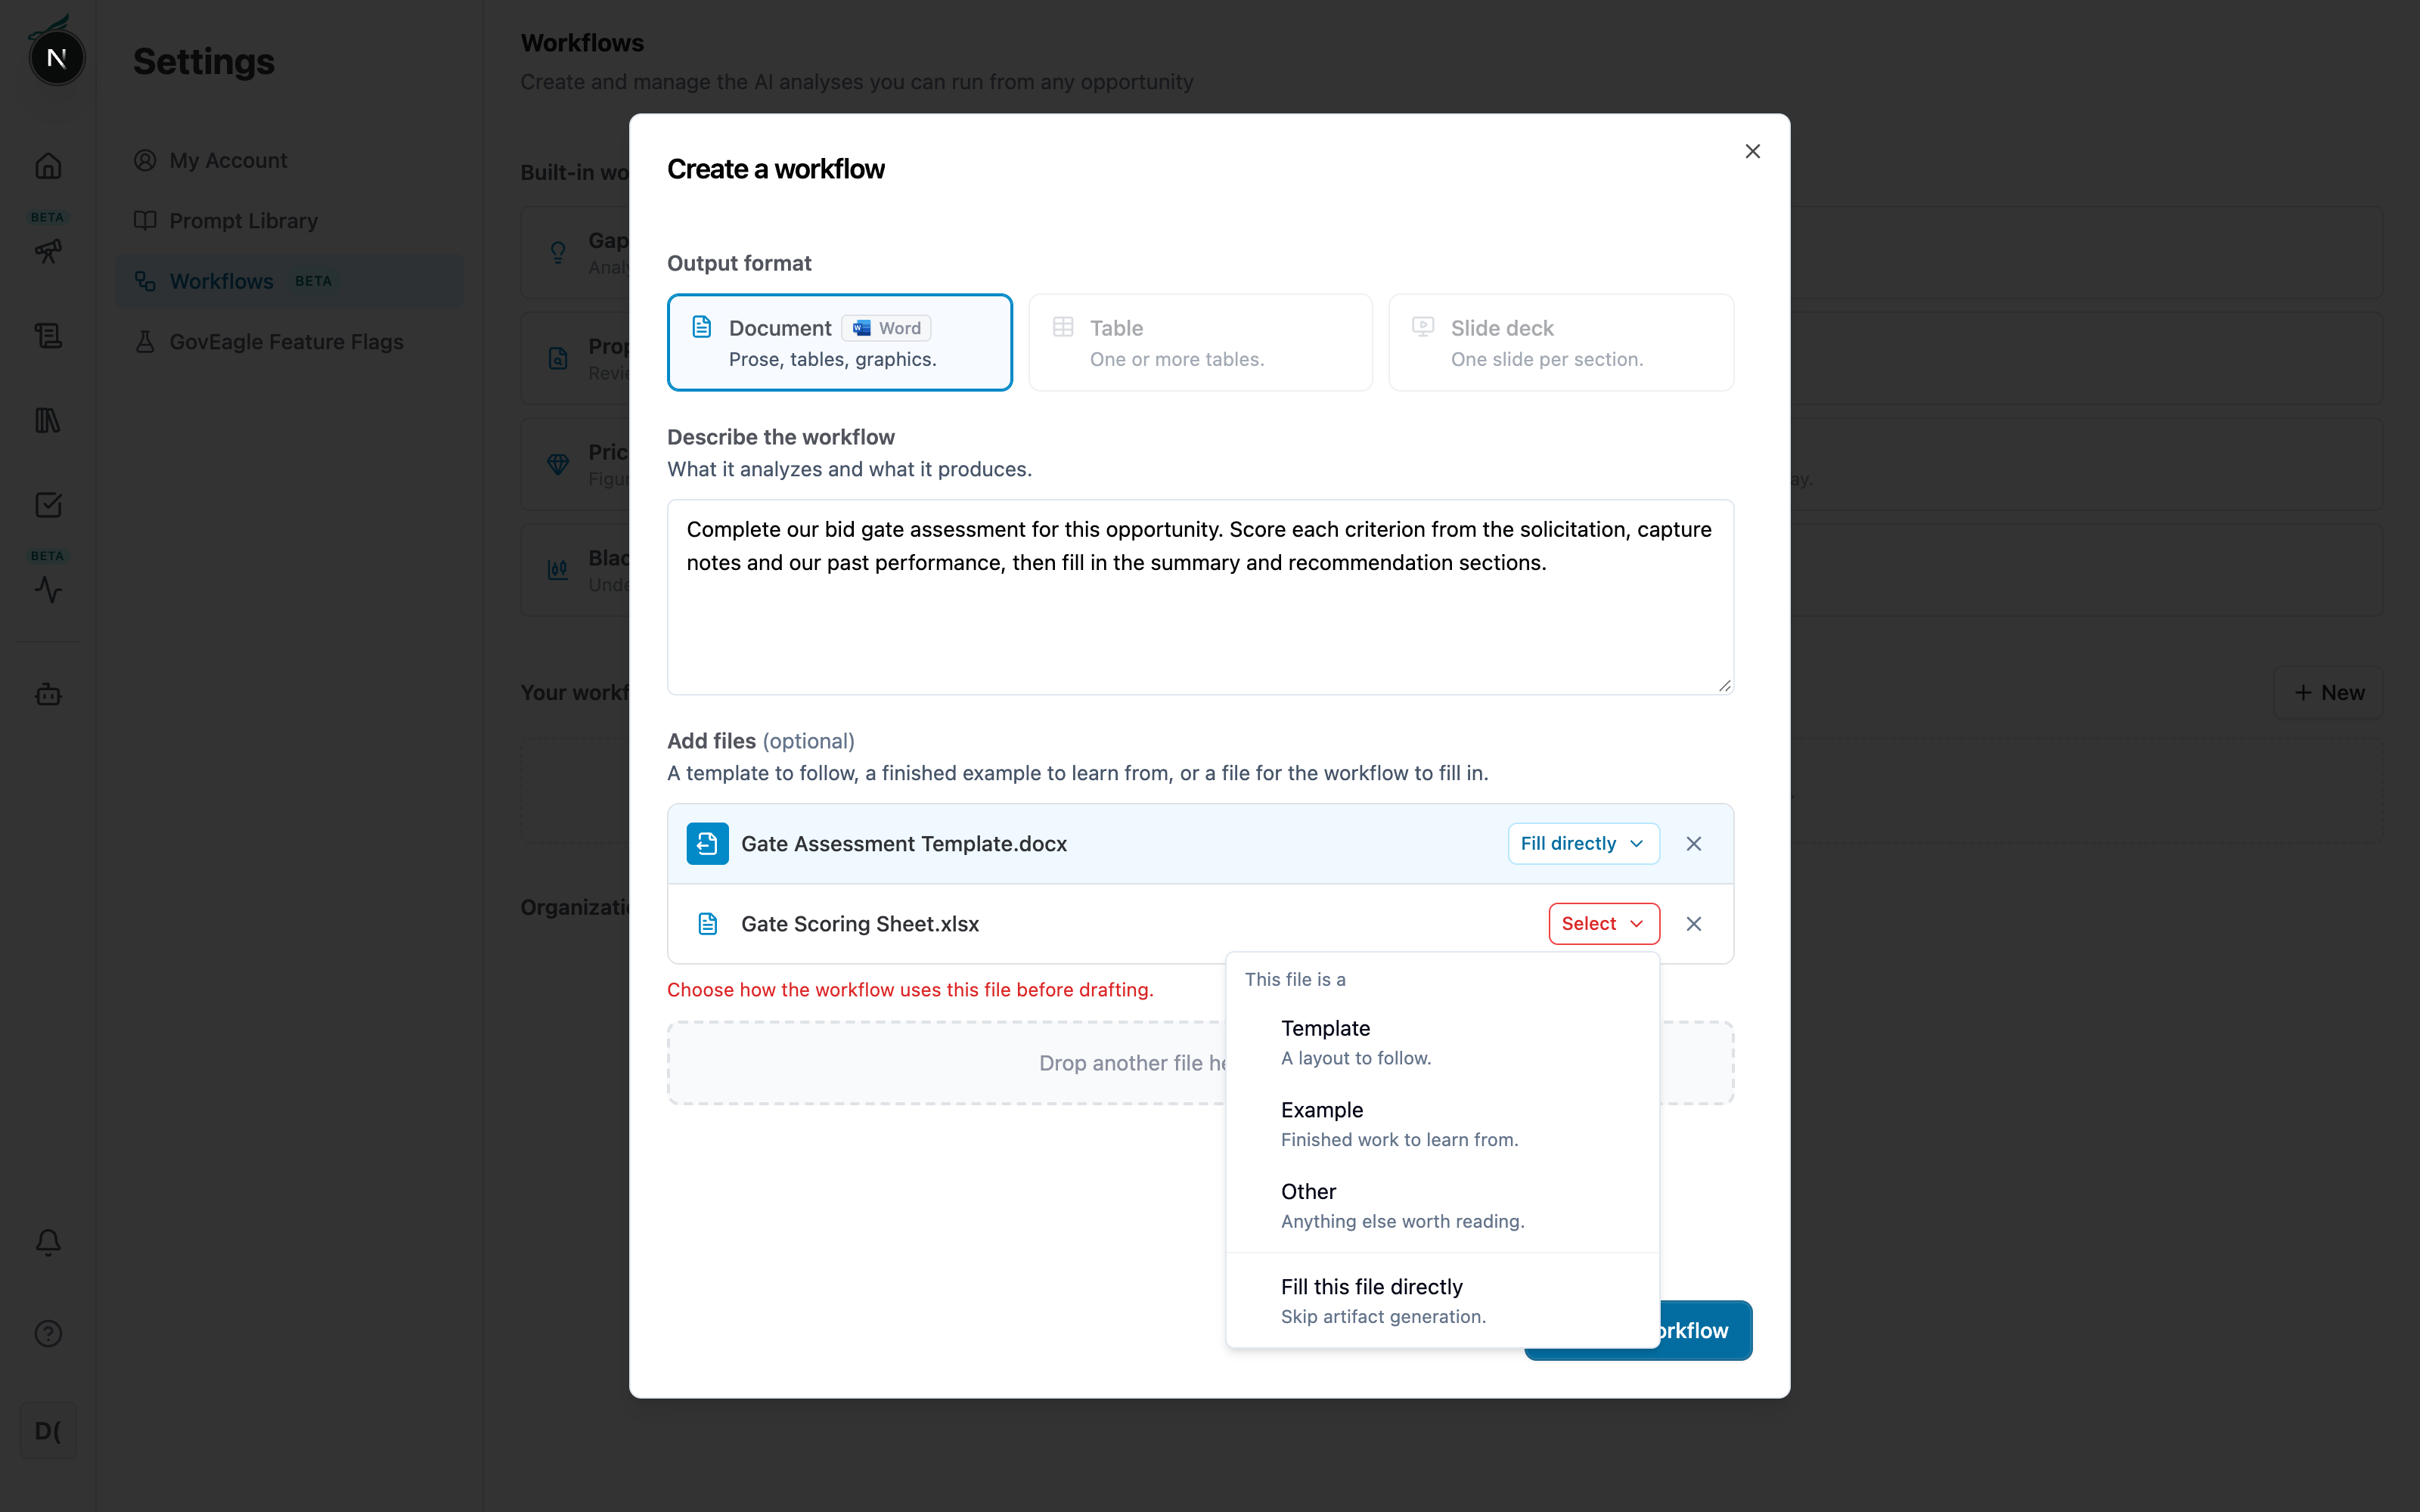
Choose the output format: Document for prose with tables and graphics, Table for a report made of one or more tables, or Slide deck. Then describe what the workflow should analyze and produce. Optionally attach up to five files, such as a blank template, a filled-in example, or a scoring rubric. Each file starts out marked Select; click it and choose how GovEagle should use the file: Template (a layout to follow), Example (finished work to learn from), Other (anything else worth reading), or Fill this file directly (the workflow fills that file itself; see Workflows that fill a document below).
Click Draft workflow. GovEagle reads your description and drafts a plan. If a file is still marked Select, drafting waits: the file is flagged and its menu opens so you can pick how it is used.
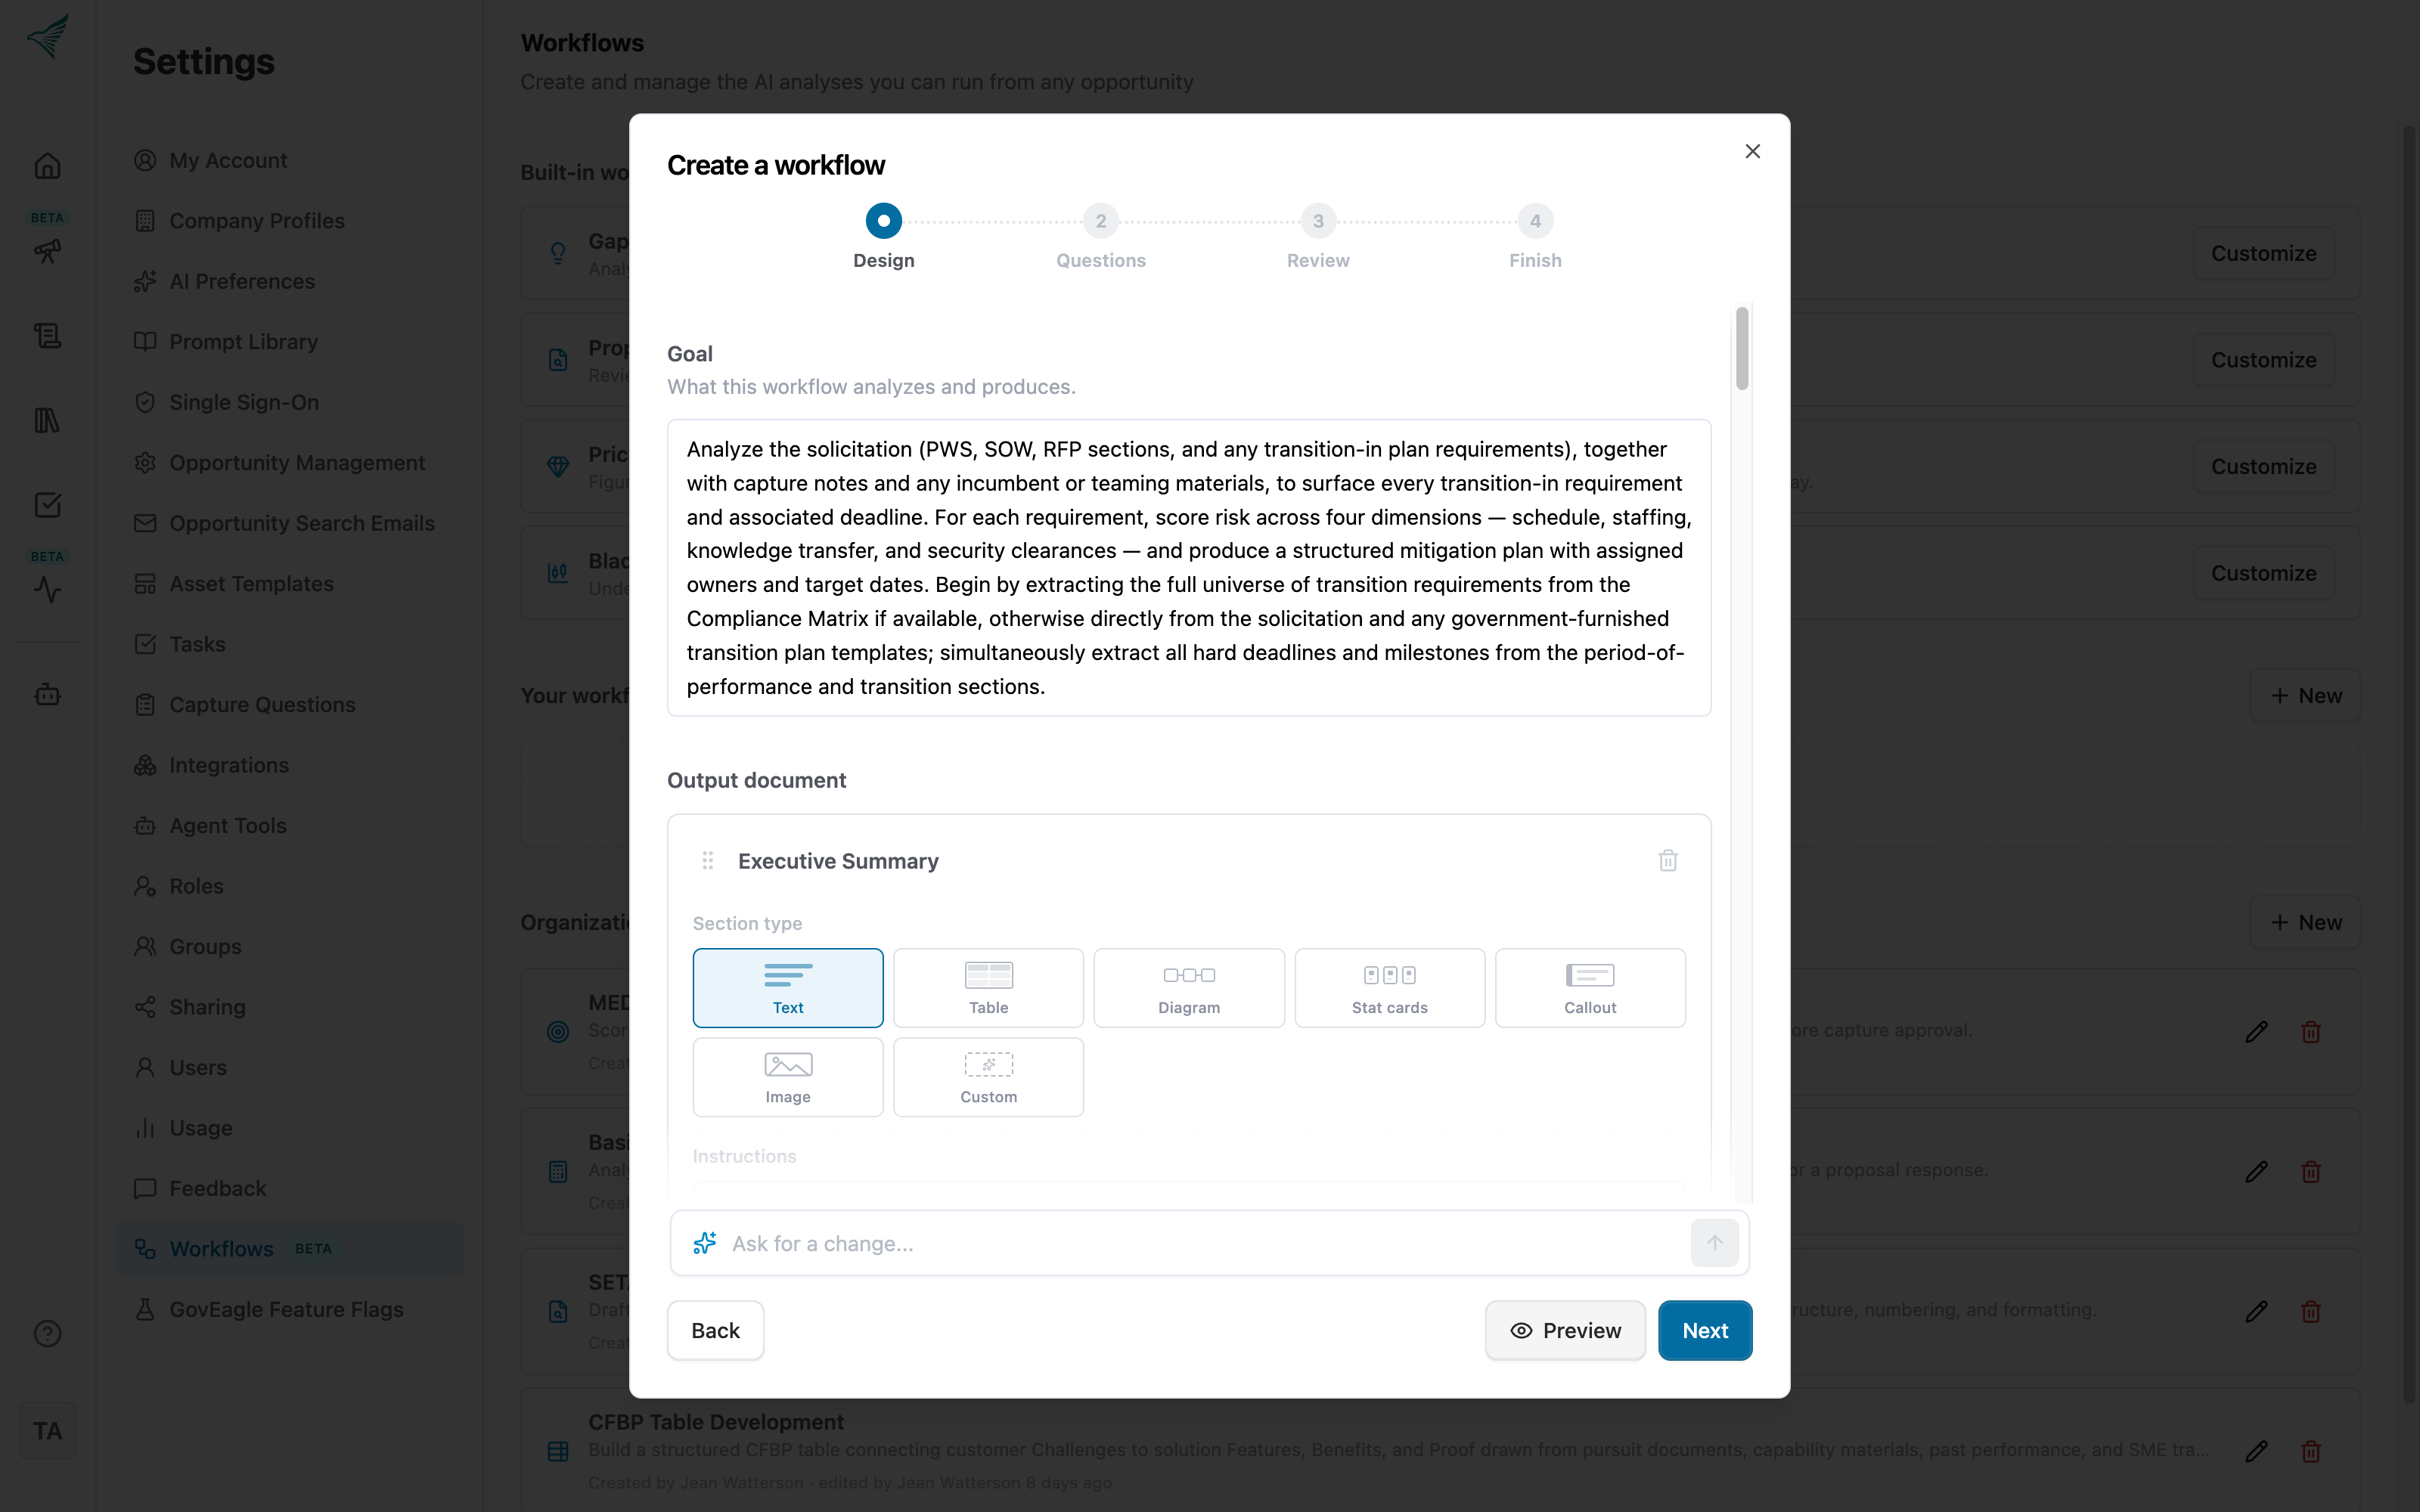
Refine the draft across the Design, Questions, and Review steps. Design shows the goal and the report's section outline; Questions lets you add setup questions the workflow will ask whoever runs it; Review lists the judgment calls GovEagle made while drafting so you can confirm or change them. At any step, type a request such as "add a section on transition risks" in the Ask for a change box.
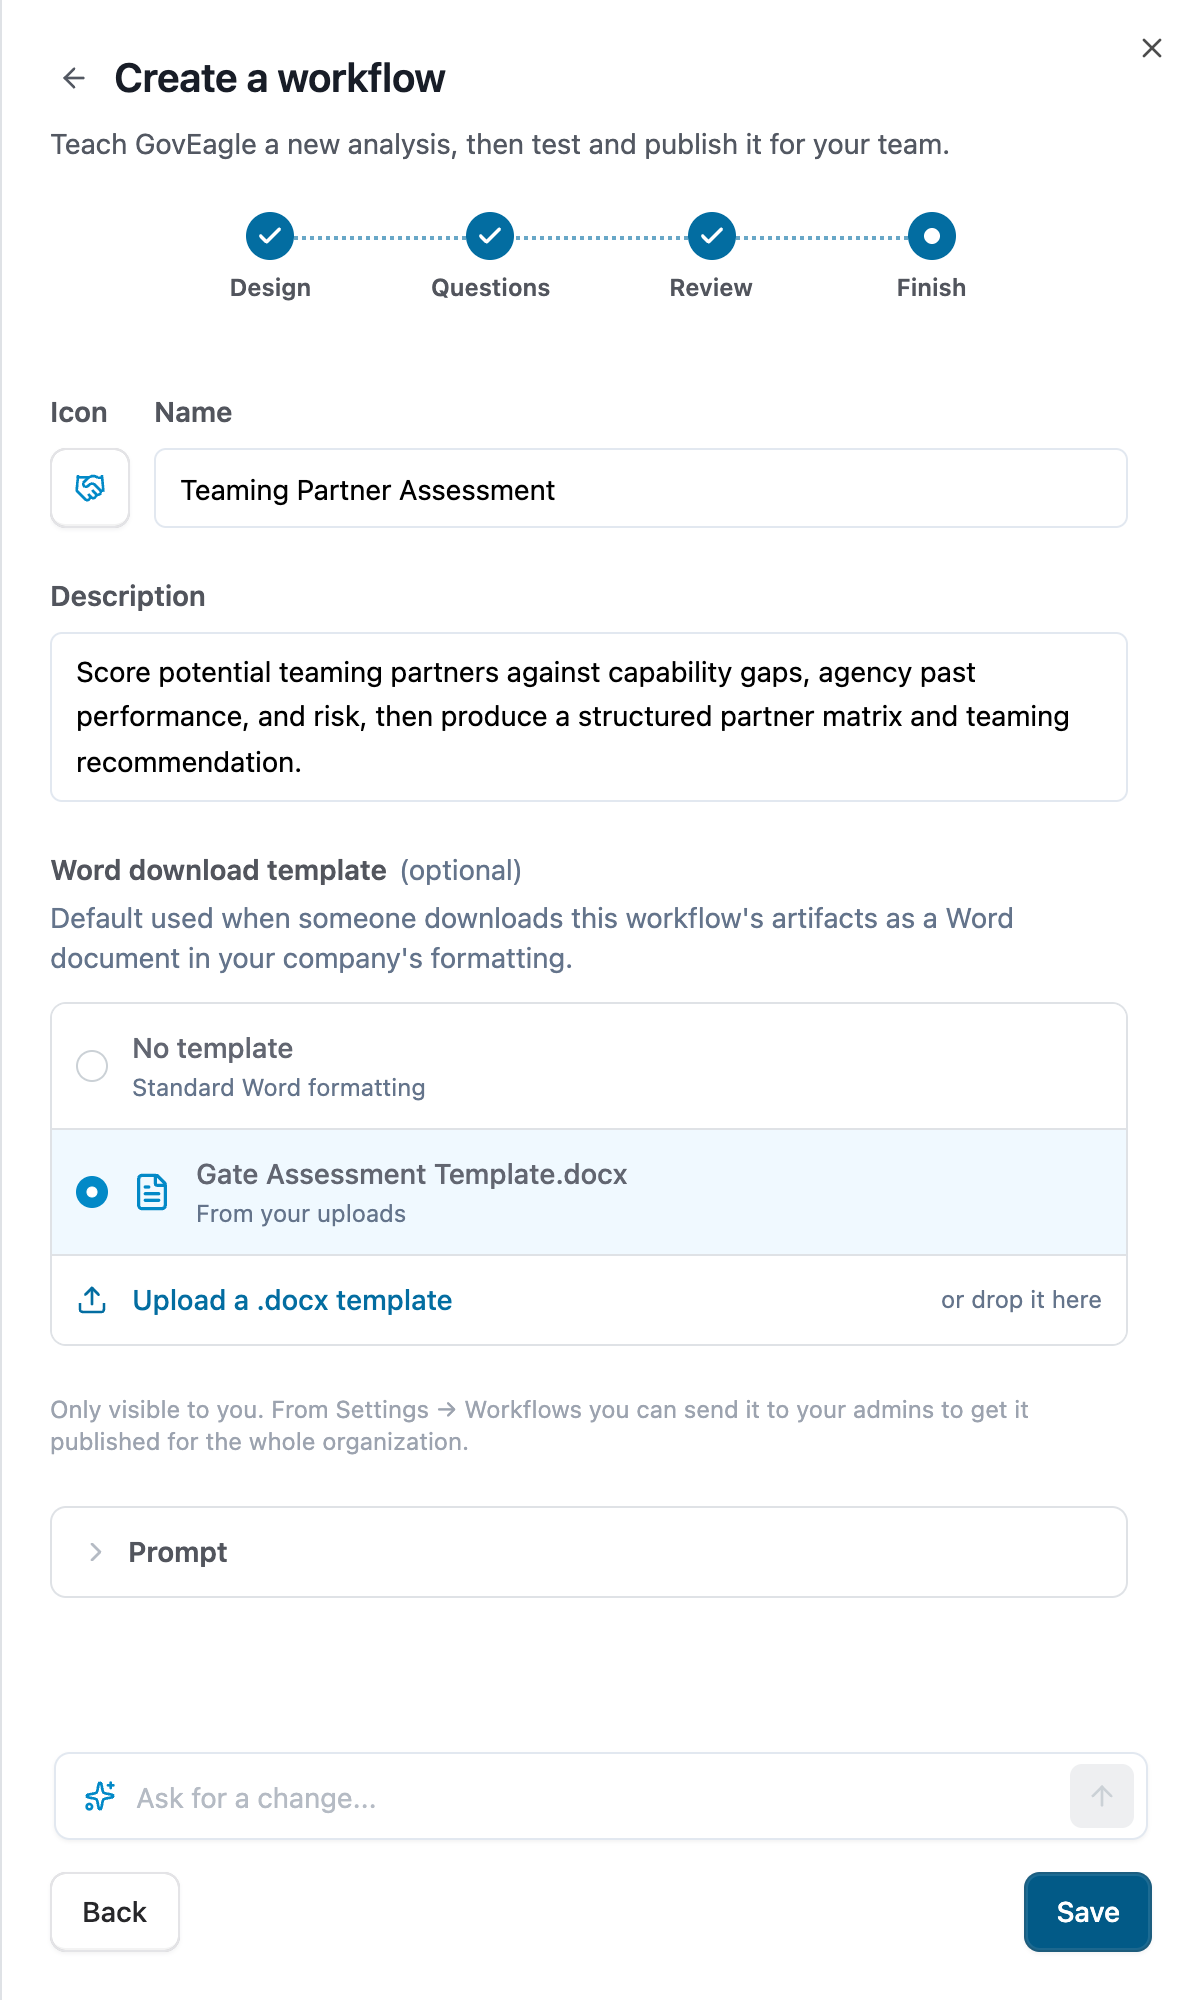
On Finish, give the workflow an icon, name, and description. Under Word download template (or PowerPoint download template for slide decks) you can pick one of your uploaded files or upload a new one; it becomes the default for templated downloads from this workflow. Then click Save.
Your new workflow appears under Your workflows in Settings and in the Start workflow list on every opportunity, marked Personal. Only you can see and run it until it is published to your organization.
Note: Admins can also Customize a built-in workflow for their organization, for example to change its sections or setup questions, and Reset it to the GovEagle default at any time.
Workflows that fill a document
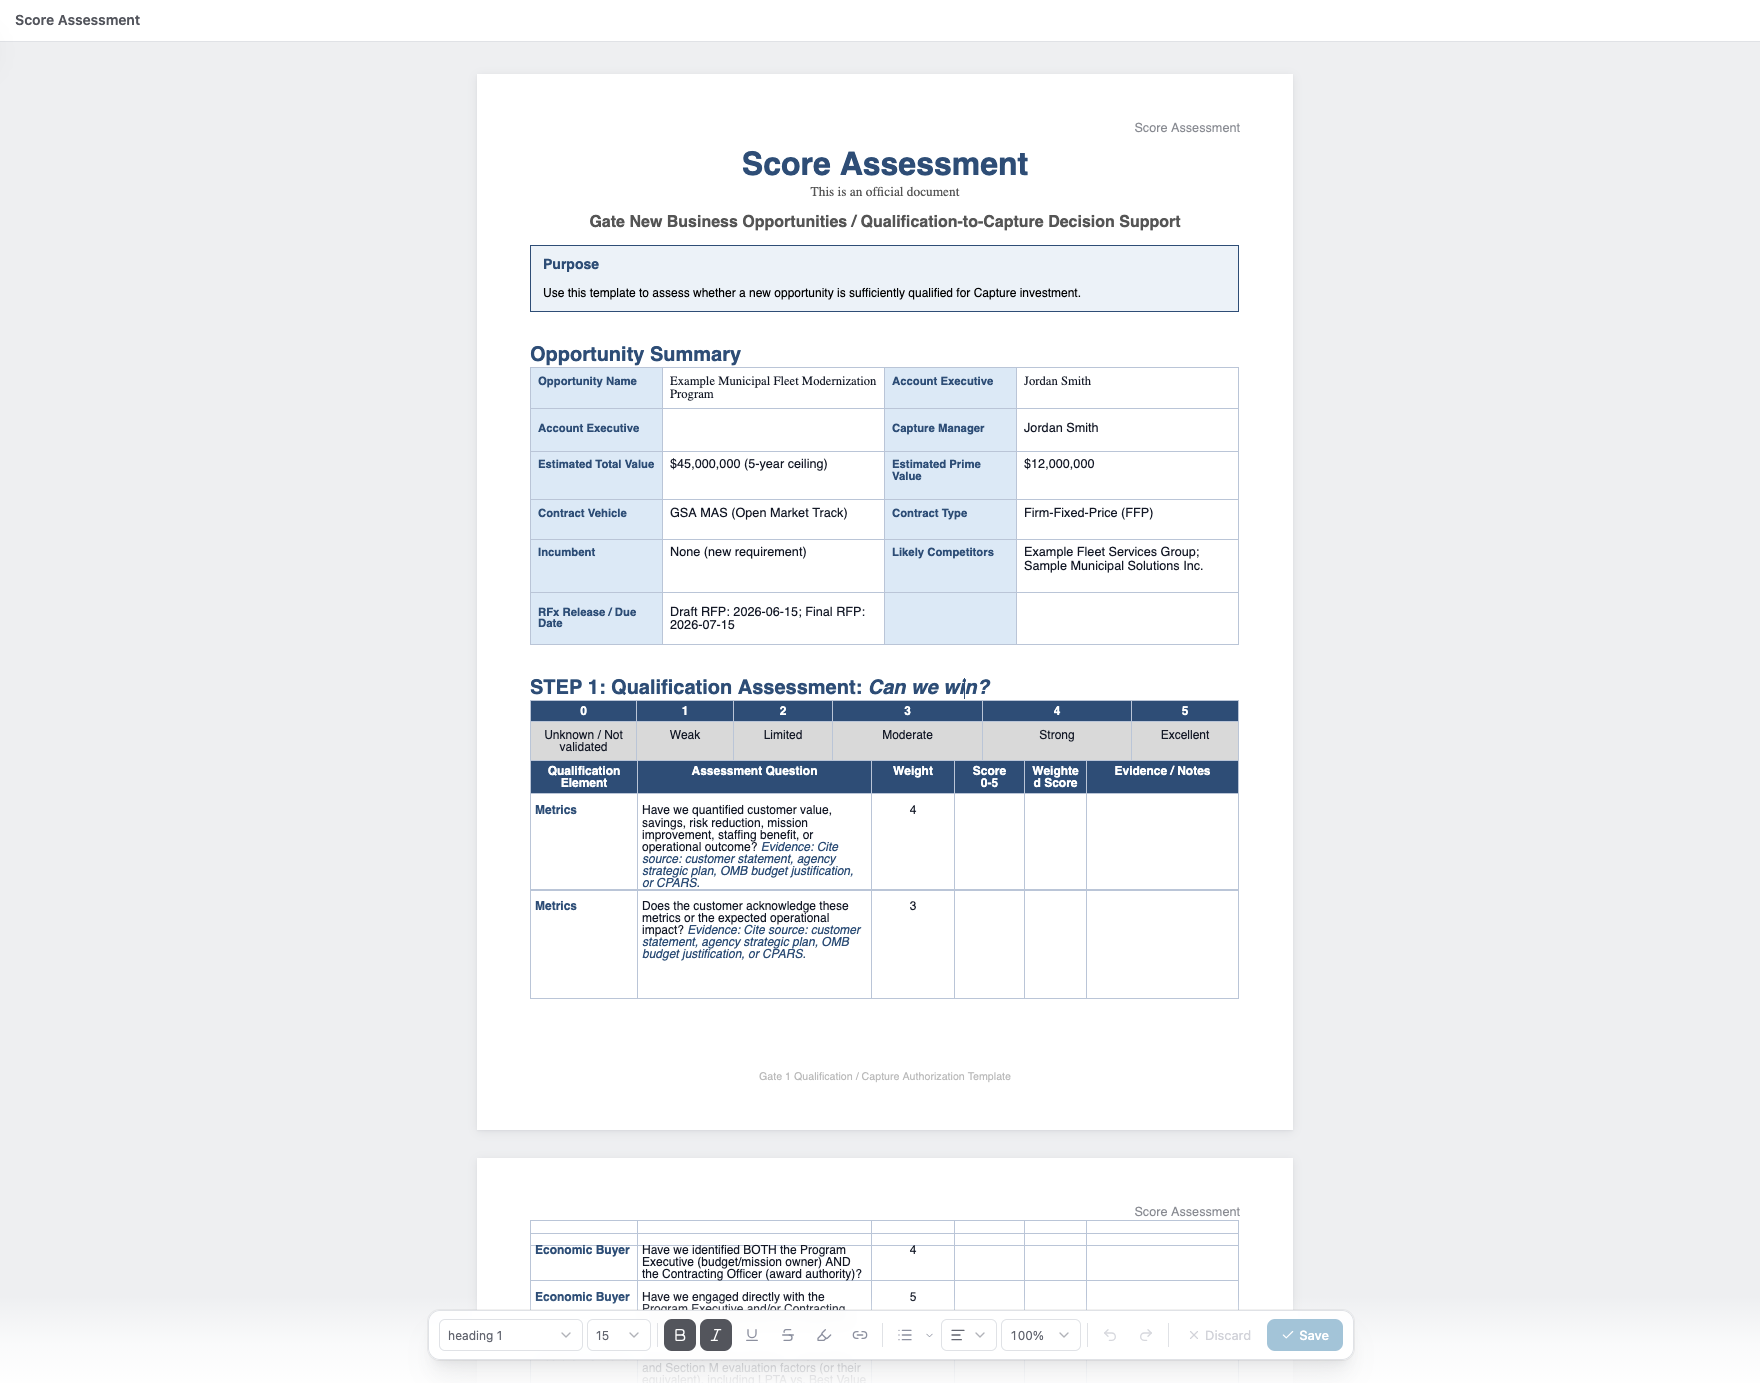
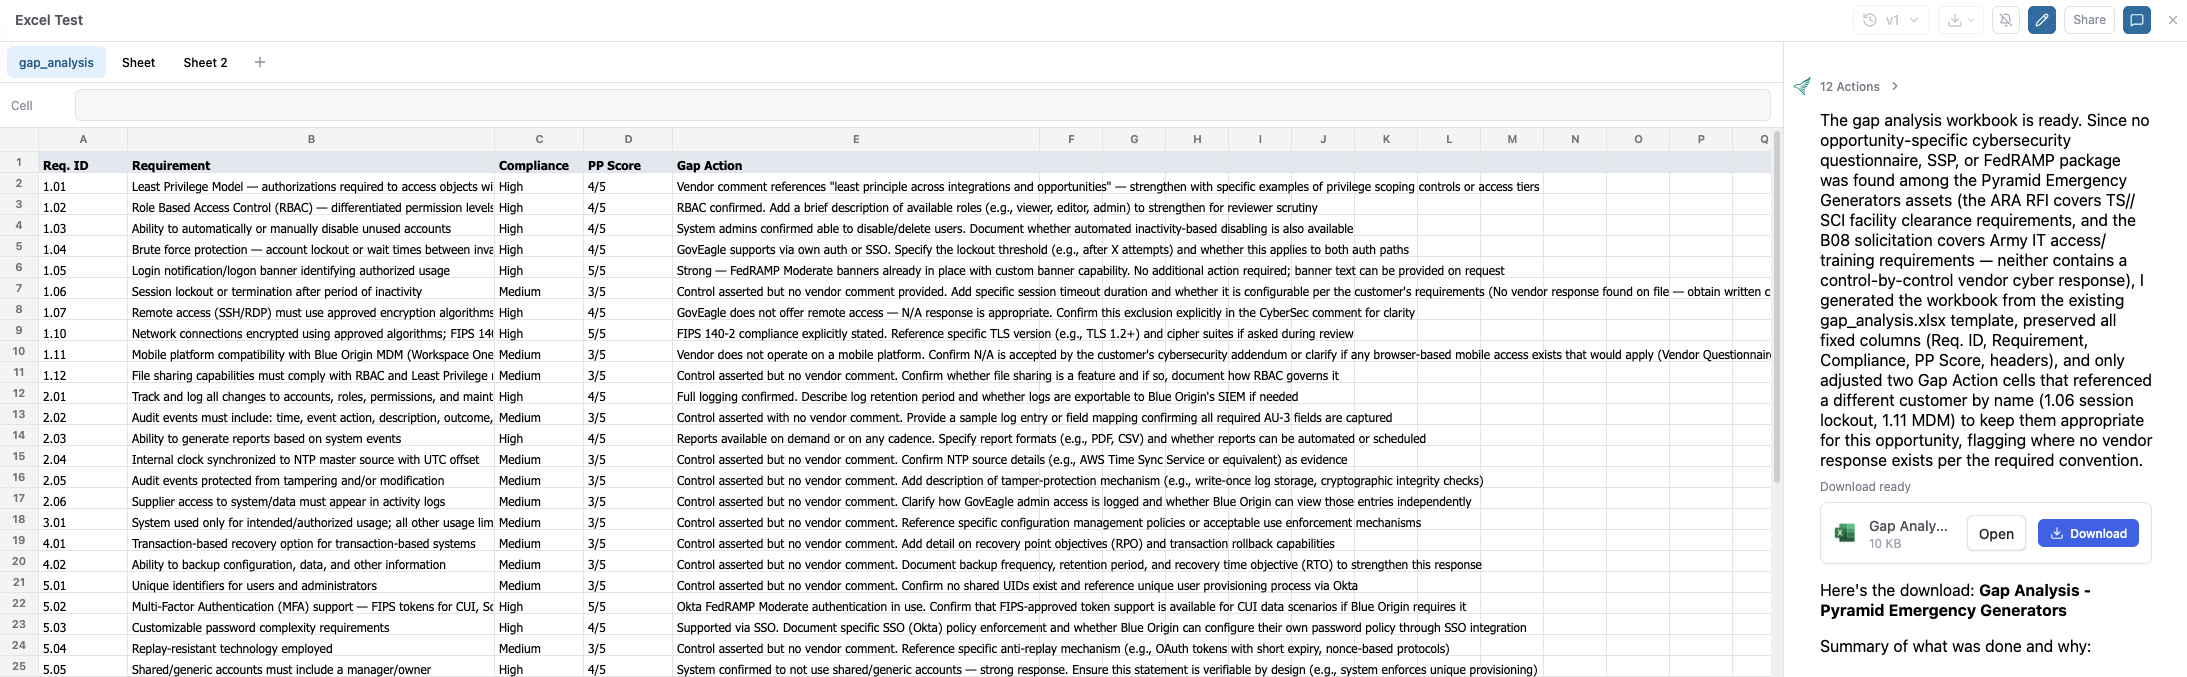
Most workflows produce a report that lives in GovEagle. When the deliverable is a fixed form, such as a gate assessment, a quad chart, a scoring workbook, or a data call, you can instead have the workflow fill one of your own Word (.docx), PowerPoint (.pptx), or Excel (.xlsx) files. Every run copies the file, fills it in from the opportunity's documents and your setup answers, and opens the finished file. Your original is never changed.
Setting one up
In the Start workflow list, choose Create custom workflow, or go to Settings → Workflows and click New.
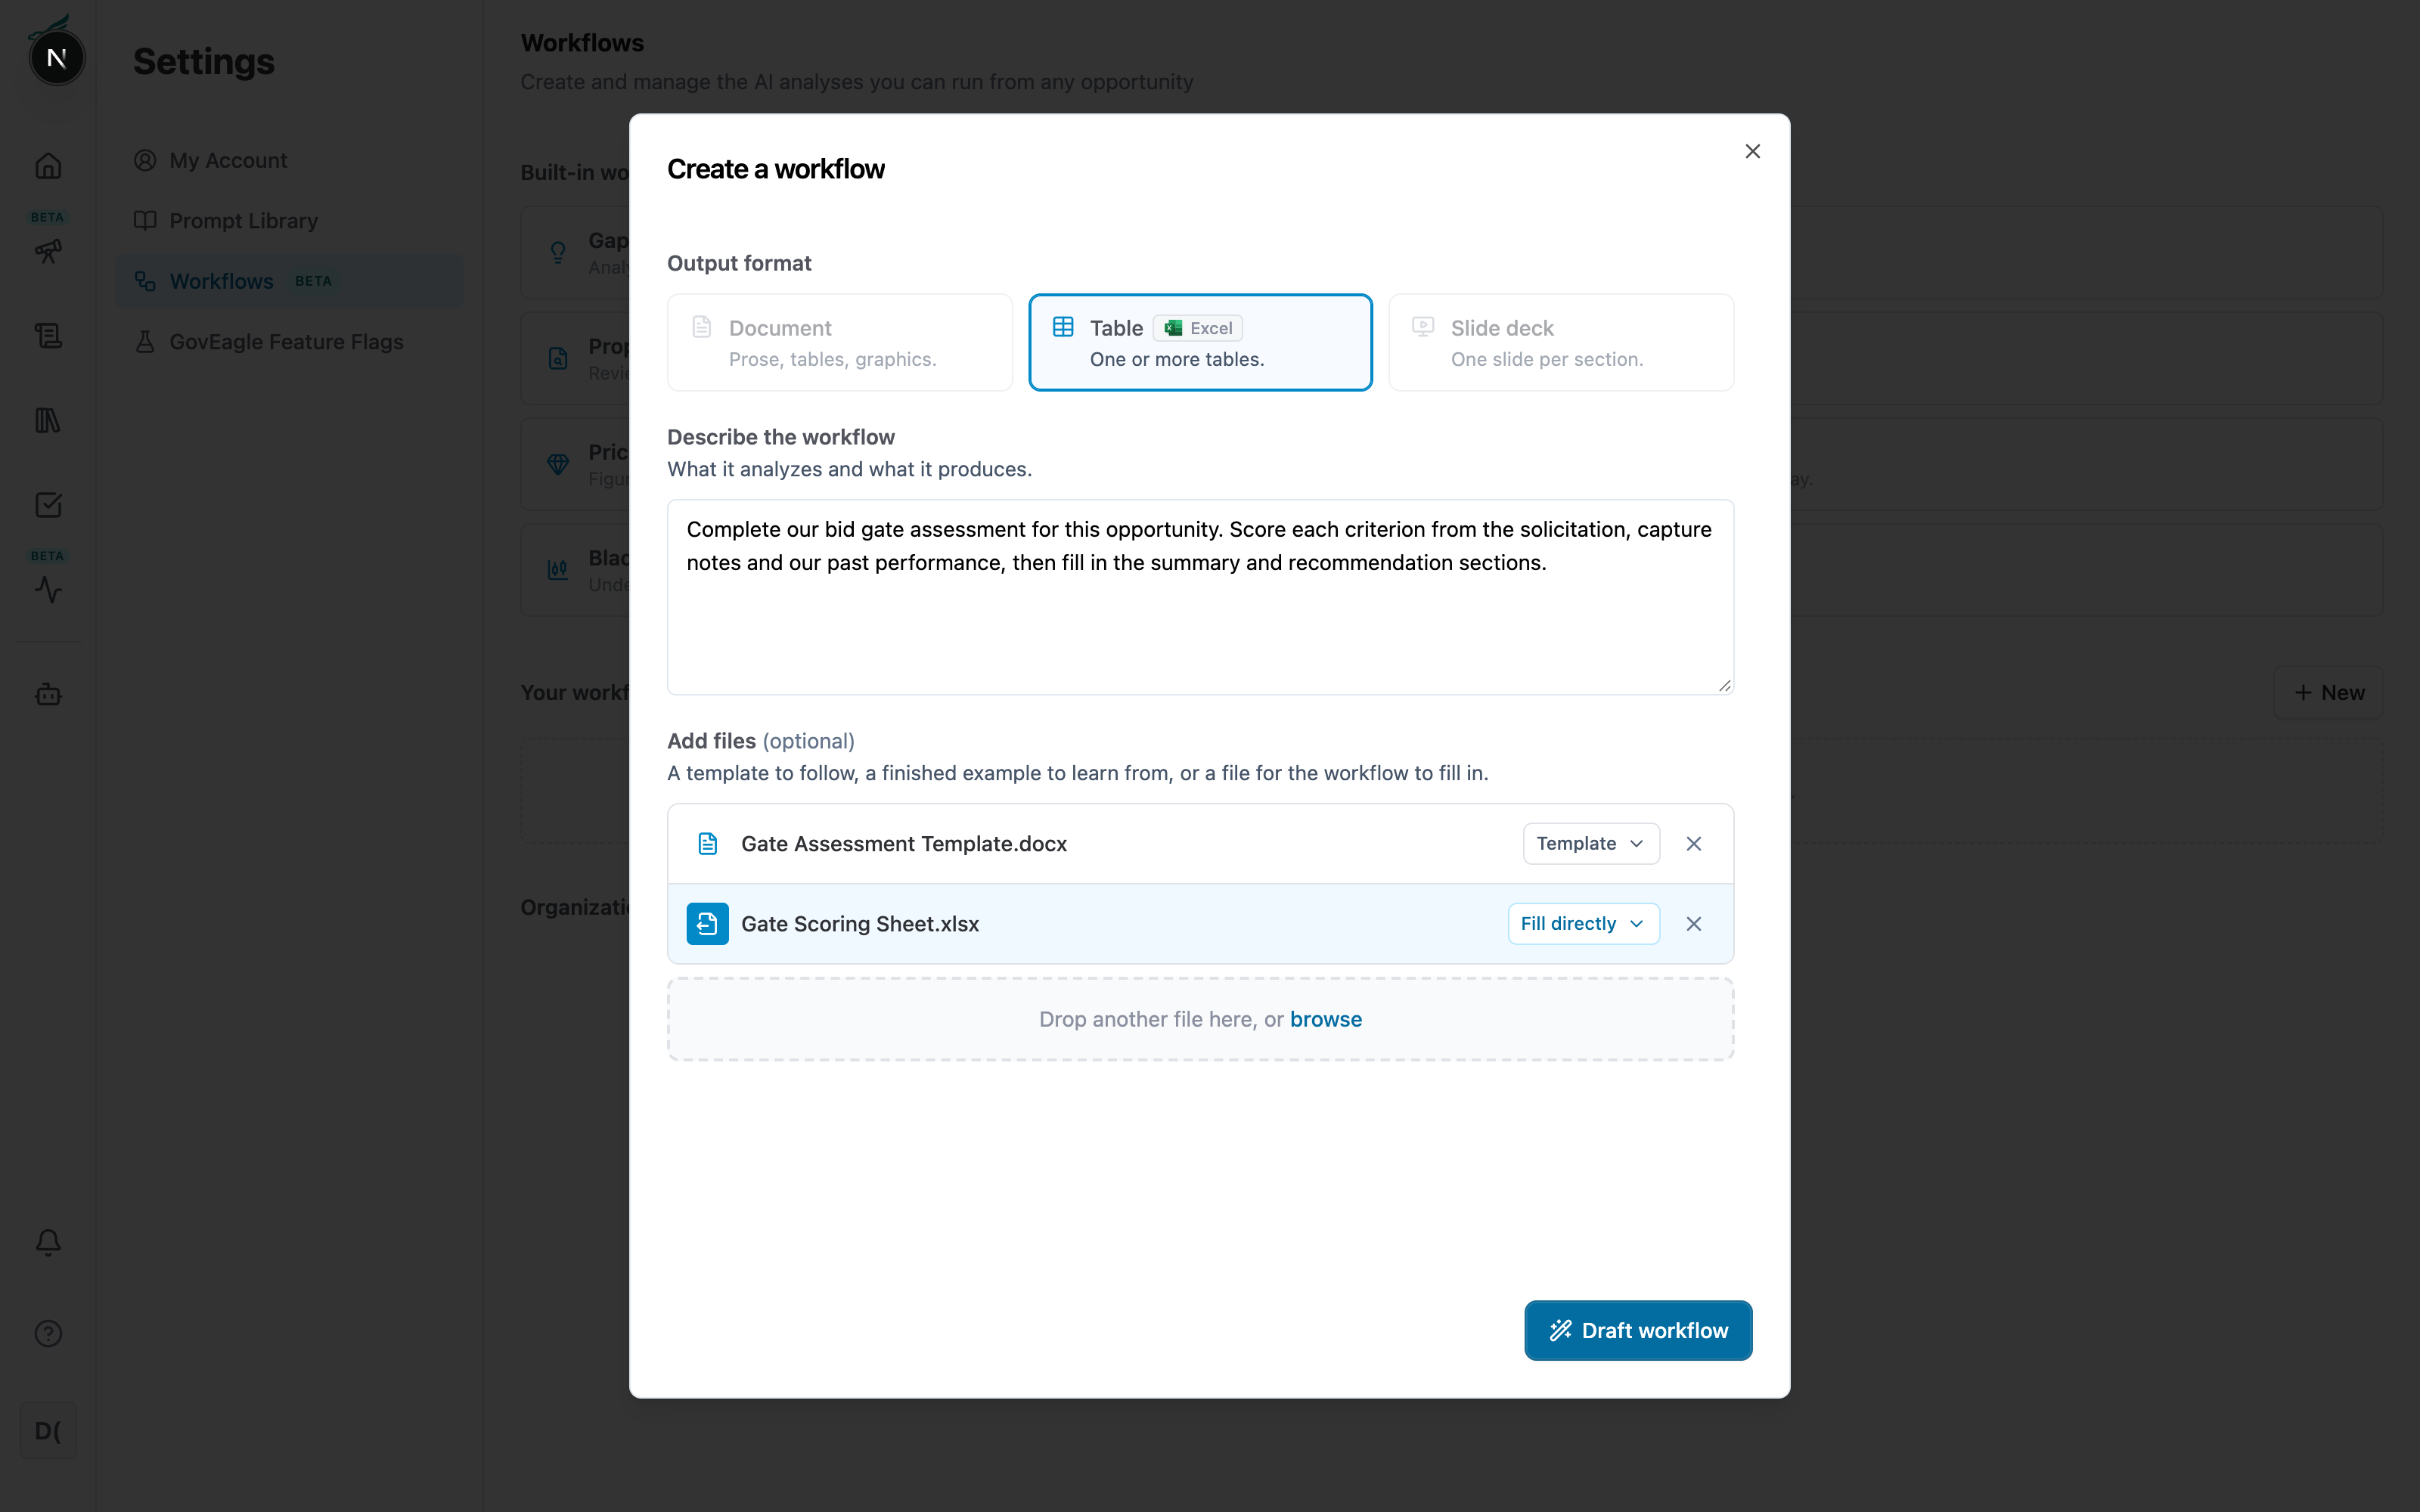
Drop in the file you want filled. Click Select next to its name and choose Fill this file directly. The file is highlighted, and the output format follows the file: a Word file selects Document, a PowerPoint file Slide deck, and an Excel file Table, with a Word, PowerPoint, or Excel chip on the selected format. To pick a different format, set the file back to Template, Example, or Other.
Describe what the workflow should put into the file, for example which sections to complete and where the information should come from, then click Draft workflow and refine the draft as usual.
On Finish, the Document to fill section shows the file each run will fill. Give the workflow a name and click Save.
.png)
.png)
Note: A workflow fills one file. You can still attach other files as templates or examples to guide the content. Placeholder text and empty table cells show GovEagle where the content goes; the rest of the file is kept as it is.
Running one and working with the result
File workflows show a Word, PowerPoint, or Excel chip in the Start workflow list and run like any other workflow: pick one, answer the setup questions, and let it work in the background. When the run completes, click it to open the finished file.
Word and Excel files open in an editor. Click on the document to make changes yourself; saving creates a new version labeled Manual edit.
PowerPoint files open as a preview. Download the file to edit it in PowerPoint.
Use the chat next to the document to ask the AI for changes, for example "fill the risk table from the SOW." Each change is saved as a new version labeled Assistant edit.
Click the version button to switch between versions, name one, or restore an earlier one.
Click Download to save the file, or choose PDF to print it. From the Workflows tab, the ⋯ menu on the run also offers Download.
Note: Only the person who started the run can edit the file or ask the AI for changes. Teammates with access to the opportunity can open, read, and download it.
Publishing a custom workflow to your organization
Personal workflows are visible only to their creator. To make one available to everyone, an admin needs to publish it.
Sending a workflow for review
Go to Settings → Workflows.
Under Your workflows, find the workflow and click Publish to org.
Confirm with Send for review.
The workflow shows an Awaiting review badge, and your organization's admins receive an email. You can click Withdraw at any time to cancel the request. You will be emailed when an admin decides. If the workflow is not published, it stays in your personal workflows with a Declined badge and you can refine it and send it again.
Reviewing and publishing (admins)
Admins who manage workflows receive an email titled "Workflow awaiting your review" and see an Awaiting review section in Settings → Workflows whenever a request is pending. For each request you can:
Review: open the workflow in the builder to inspect or adjust it before publishing.
Publish: make it available to the whole organization.
Decline: leave it as the author's personal workflow. The author is notified by email.
Published workflows appear under Organization workflows in Settings and in the Start workflow list for every user. Anyone can run them; only admins can edit or delete them.
Note: Admins creating their own custom workflow can publish it directly by turning on Share with organization on the Finish step, without going through review.